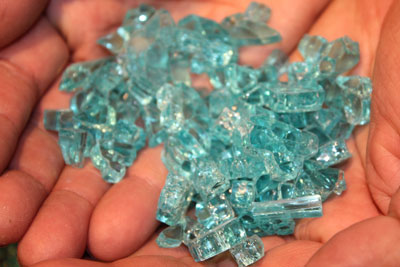
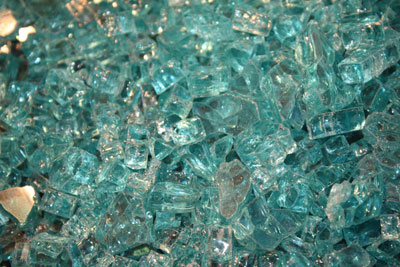
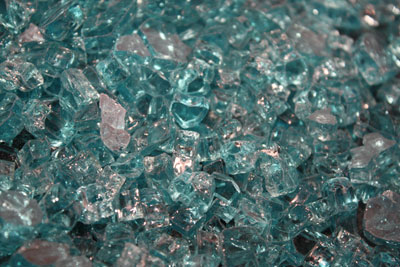
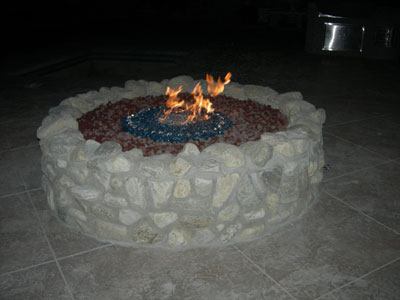
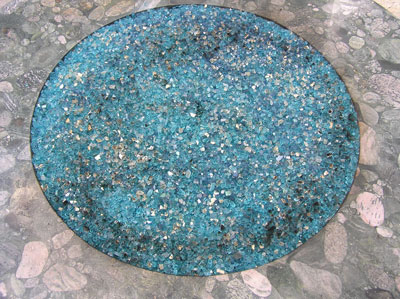
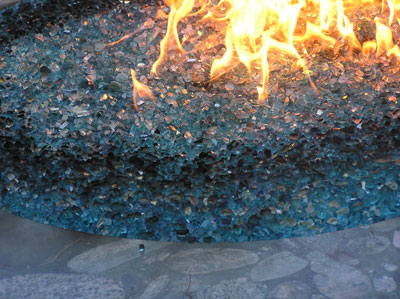
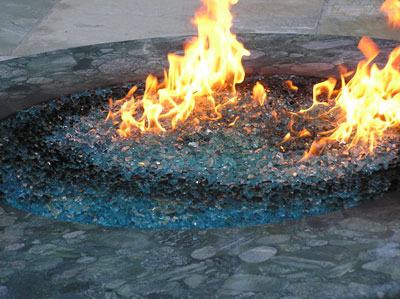
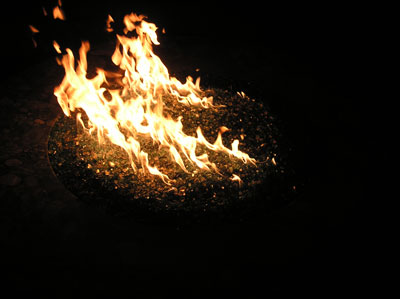
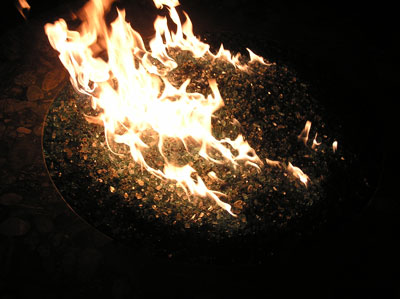
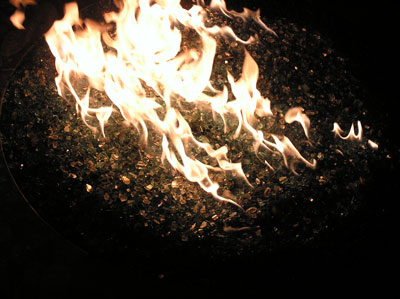
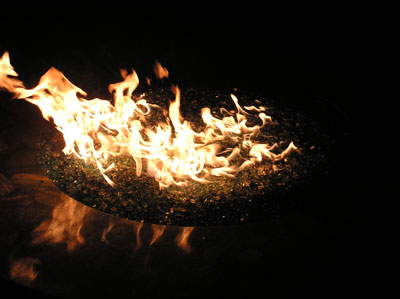
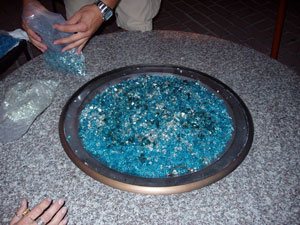
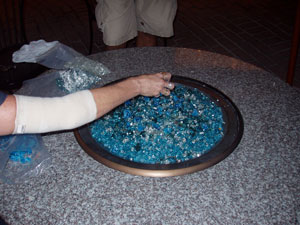
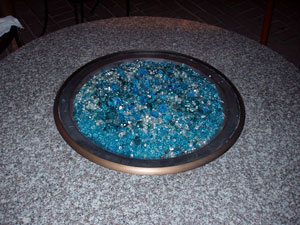
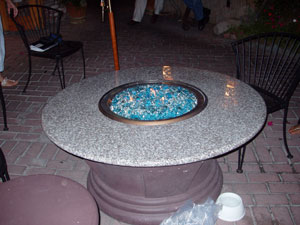
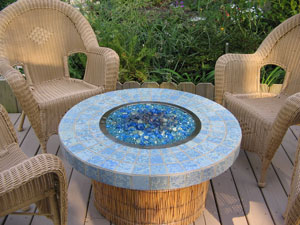
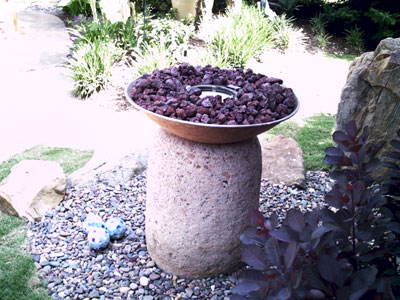
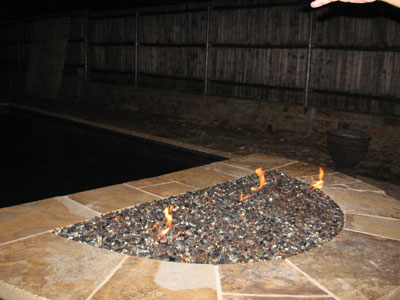
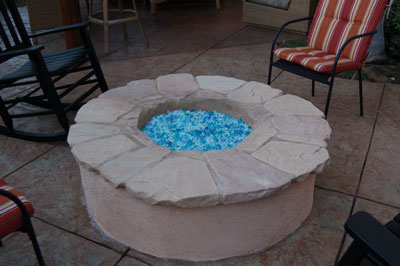
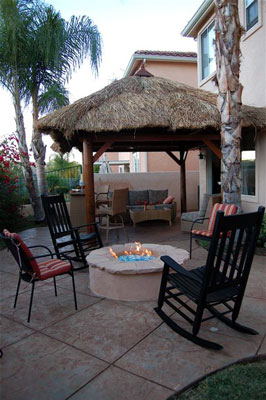
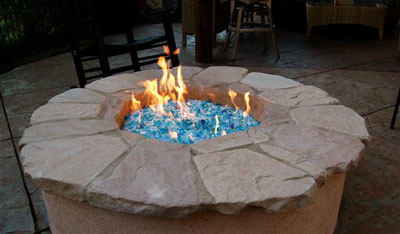
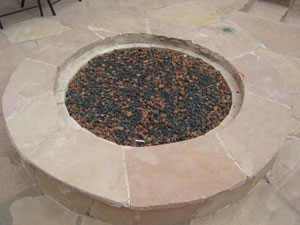
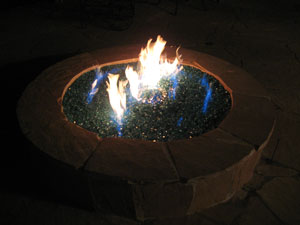
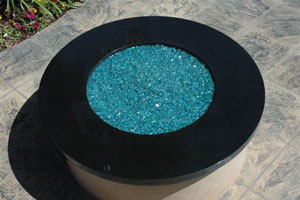
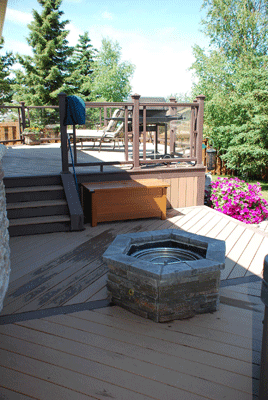
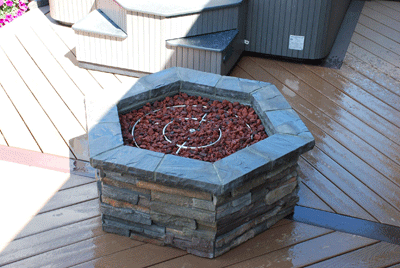
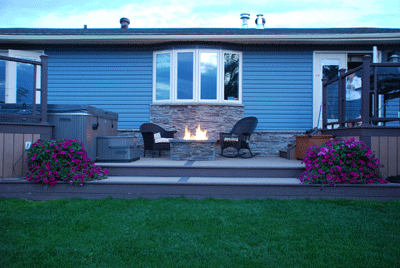
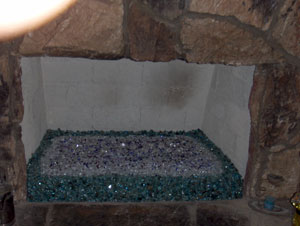
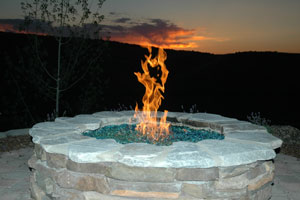
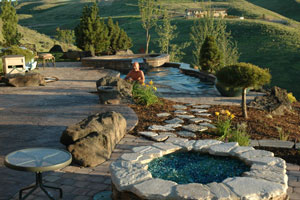
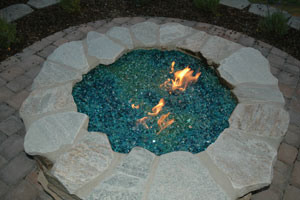
The fire pit below has Azurlite, 1/2" Azurlite, Ice Ice Ice, Starfire and Platinum in the center. Lava rock was used to minimize on the use of glass to keep it in the budget.
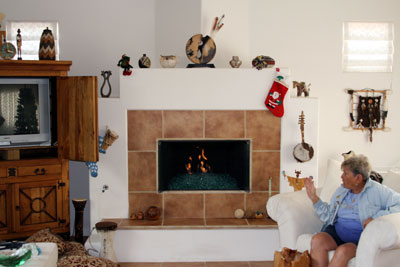
Hi Ed,
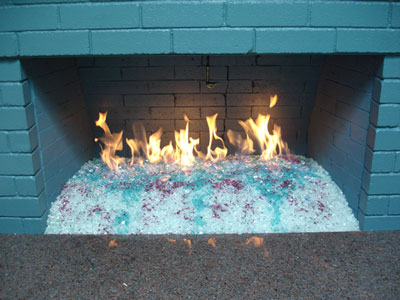
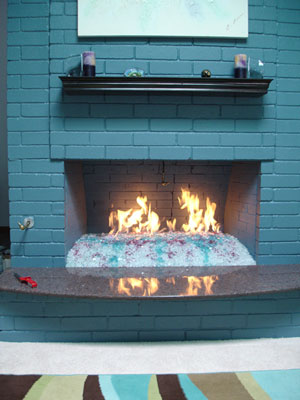
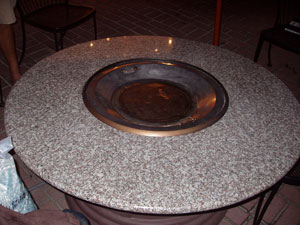
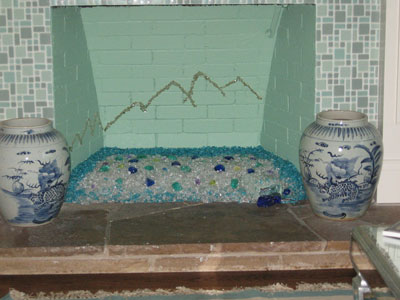
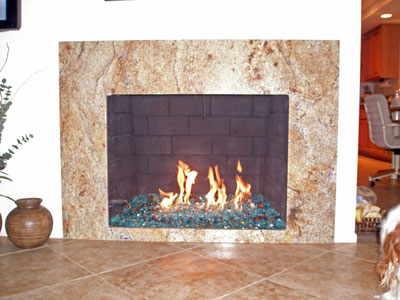
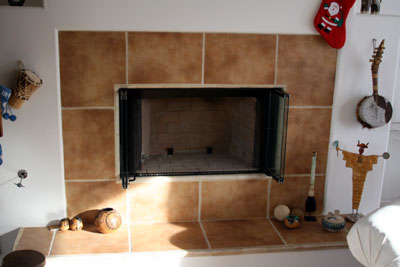
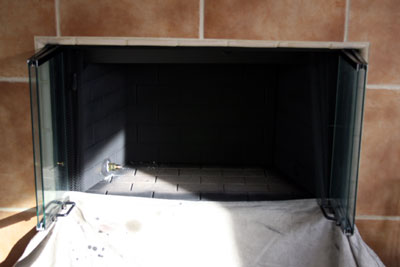
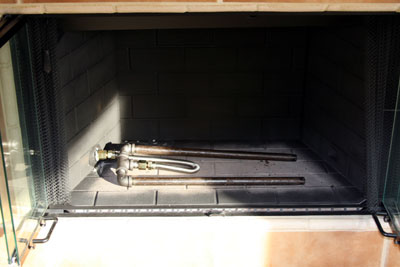
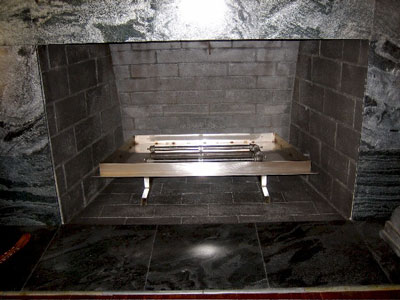
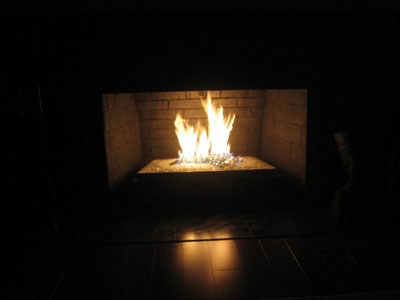
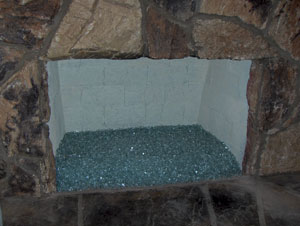
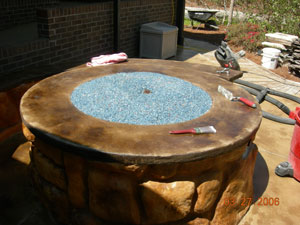
I finally managed to finish the fireplace. We have decided to place a 2" piece of metal in front (which hasn't been done yet), though, to keep the glass off the ledge. We thought it would be deep enough, but that didn't quite work.
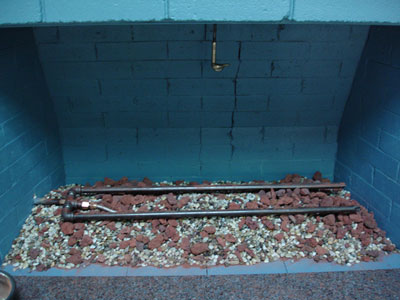
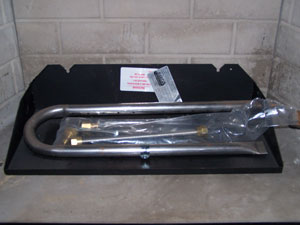
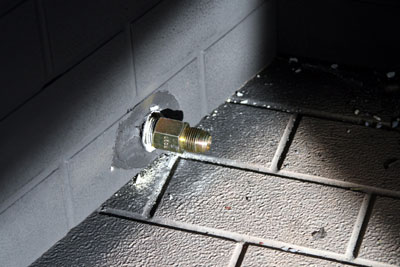
To enable me to keep the center area smooth, we had to place the burner on top of the wall pipe, which created a rather high burner placement. This ended up creating a bit of a problem because I had a steep slope to the hearth. This is why I need to add the metal strip in front--so the glass doesn't roll down and come out of the fireplace. We had decided to not have a glass door on it, although if we find something we really like, that could change.
The pics might come in 2-3 e-mails, but I'll describe them here. The first few pics are duplicates of ones I already sent you.
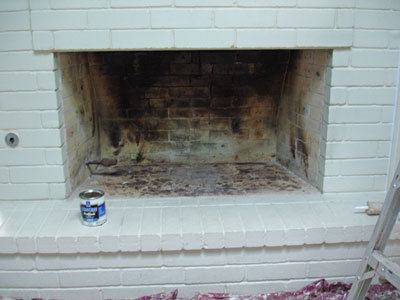
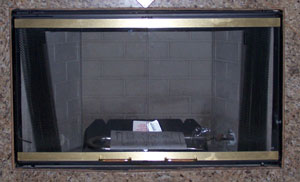
1. Original fireplace, emptied out.
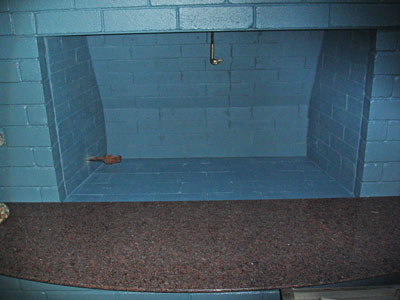
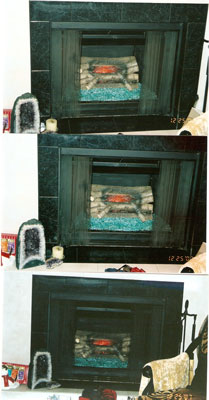
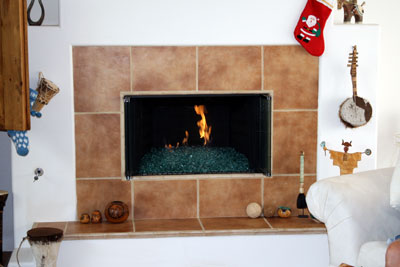
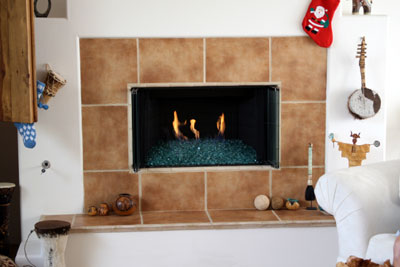
2-3. After painting with the dark blue from the chart you guys gave us. The wall was painted to match, although, I'm not sure I really like it. I'm trying to reserve judgement until I see it for awhile.
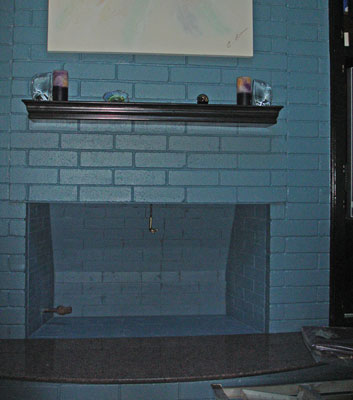
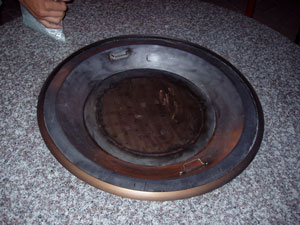
The damper handle is a brass duck head which wasn't even noticeable when it was all black.
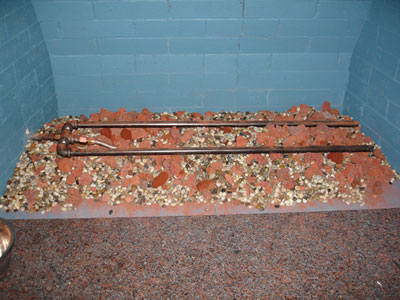
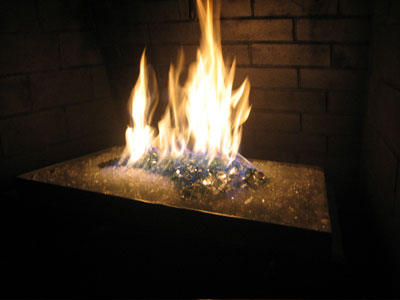
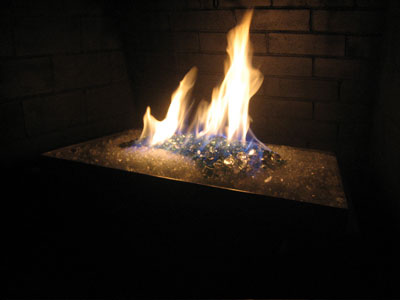
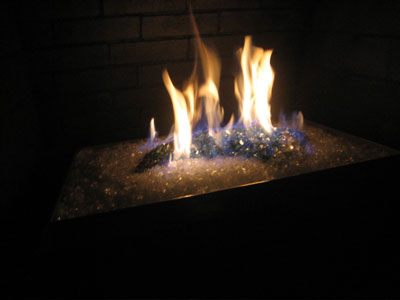
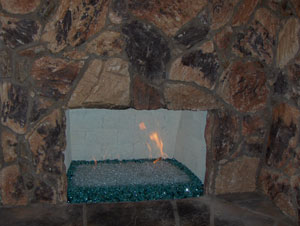
4-5.New burner in place. This created more problems than expected due to the wall pipe being higher than most. We ended up using regular lava rock, since we couldn't find the smaller rocks. Then we added small pea gravel to fill in gaps around the lava rock. After the burner was finally level, we added the sand.
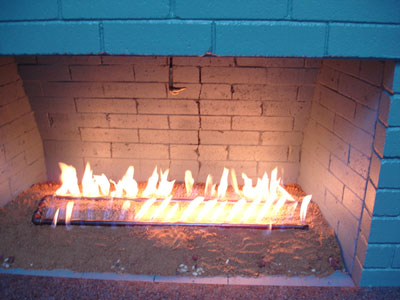
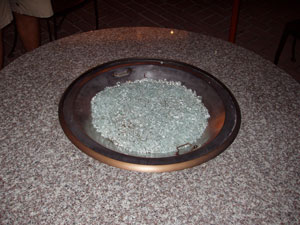
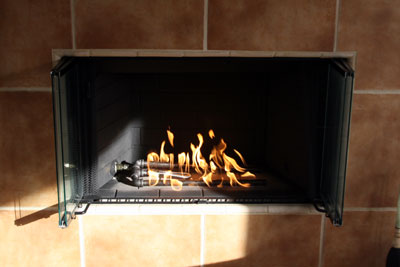
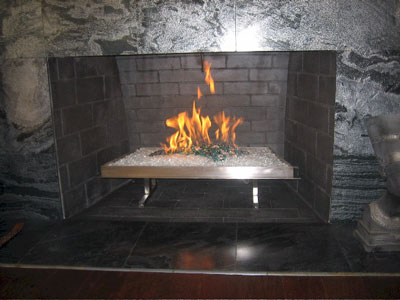
6. Testing the burner with sand added.
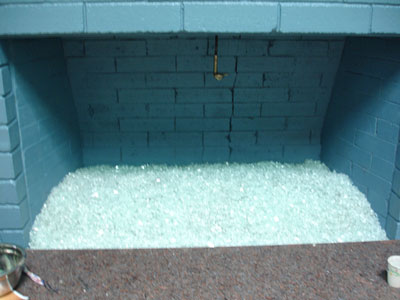
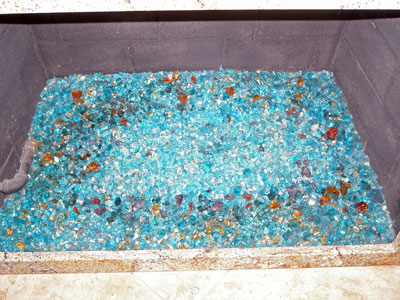
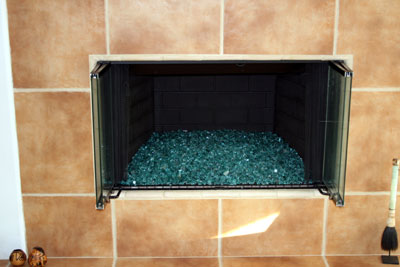
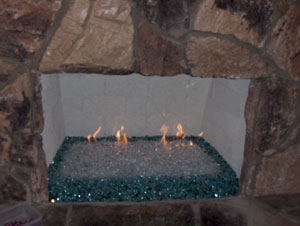
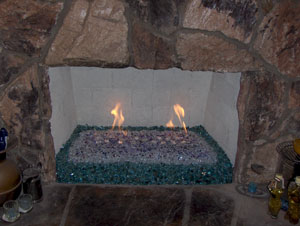
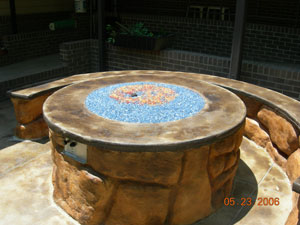
7. Clear glass base added.
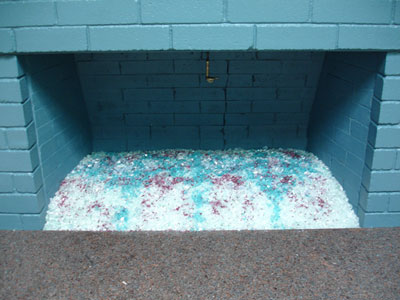
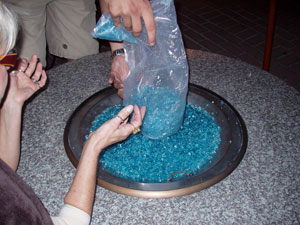
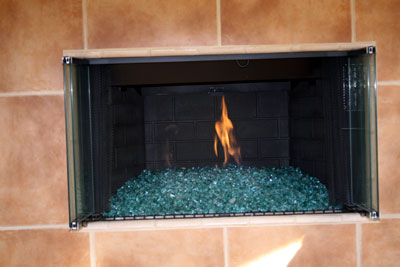
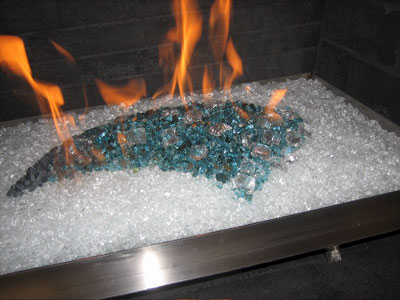
8. Rest of colors were added--Starfire, Azurlite, Cranberry-Pink, with a little Steel Blue Topper and a few Ice Cubes.
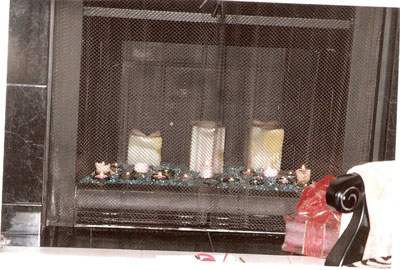
9-10. All finished and burning.
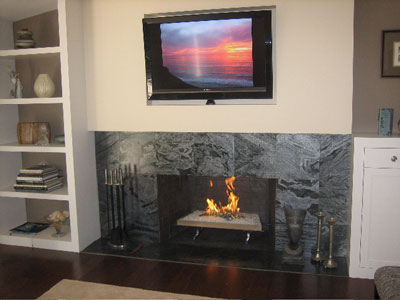
We're still working on the right side of this wall which has cabinets holding the TV and storage. Once the entire wall is finished, I'll send you one final pic of the entire wall. Not sure how soon that will happen, so don't wait for it, if you want to post these pics on your website.
I want to thank you for all your help. Your store was great to visit, so we could pick our glass out in person. Your staff was very helpful and we had a great time making our final color choices. I'll will definitely recommend you to others.
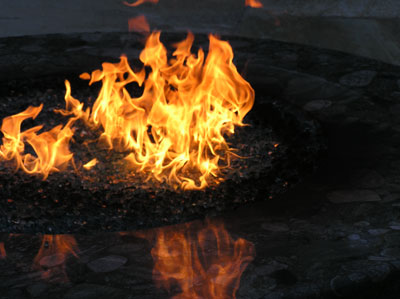
The fire pit below is a failed attempt of a propane conversion without our help in the beginning. You can't just burn propane! If you try this, this is what it will look like. You need to calibrate the amount of air to propane or it will back fire, burn black or explode! We recommend a thermo coupler, air mixer/ venturi along with several other important factors. We won't tell you who tried this but we will tell you we did fix the issue and now the customer is very happy. We did use Azurlite with Azurlite Reflective.
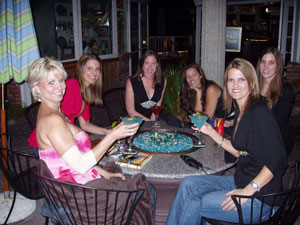
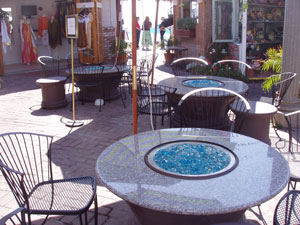
The fire pits below are located in Laguna Beach California at the Cliff Restaurant
5775 South Coast Highway Laguna Beach 92651
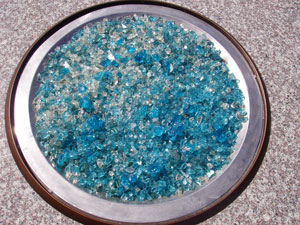
We used a Clear base with Azurlite on top with Azurlite Reflective. Then we added Emerald Green Topper and Copper Blue Topper which turns green when it gets hot. Then it turns back. Because the chrome is seen when its cold and the copper changes the color to green when it get 500 degrees.
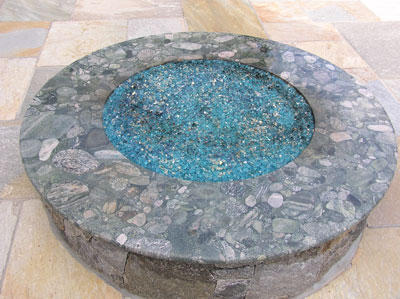
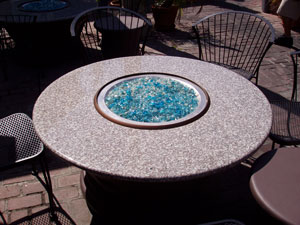
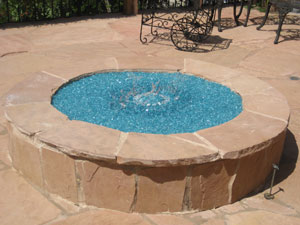
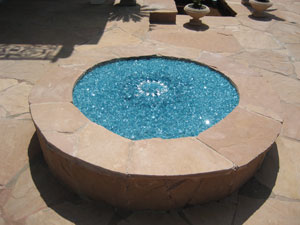
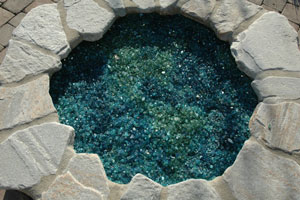
The fire pit below has an Azurlite base with Azurlite Reflective on top. Then topped with Pale Lime Green Topper and Aqua Marine Topper.
The fireplace below has Evergreen and Evergreen Reflective, Emerald Green Topper, Pink Rosa, Azurlite, Cobalt Blue Topper, Olive Green Topper, Green Diamonds and Blue Tubes Toppers. They had use their existing pan burner which was a double burner and worked out just fine.
The fire pit below has a Azurlite base glass with Aquamarine Blue Topper, Hyacinth Topper, Citrine Topper and Copper Ruby Red Topper. This is a propane fire pit in Texas. Our dealer installed this glass and explained to the customer to eliminate the soot from the propane we had to lean the mixture with air. The customer asked the burner manufacture to come out and inspect the fire pit. The manufacture told the customer the glass was defective and this was causing the soot. The manufacture didn't even know how to get a clean burn on their own product! Needless to say the fire pit is still producing clouds of soot and the customer now knows the manufacture didn't even have a clue. The smell in propane is an added oil to the liquid propane so it can be identified. The oil will still burn off as the fuel is used but we lean the fuel by introducing 6 parts of air to the fuel to virtually eliminate the soot from the fire. Below are before and after pictures of the propane fire pit.
As you can see below the fire pit was creating soot long before we even started. The glass had nothing to do with burner as the burner was in the middle of the glass. The manufactures of most of these propane fire pit and fireplace burners don't even have a clue on what they are doing so please be careful. In this case the manufacture didn't know how to get a clean burn so there fore he said it can't be done! You be the judge, what looks better?
The fire pit below is in Palm Springs and the customer poured about 350 lbs of lava and we topped it with 80 lbs of our 1/4" crushed lava to keep the glass from falling through the larger lava rock. We used a 50" stainless steel "H" burner and topped that with 120 lbs of Azurlite.
They left about 3" to 4" of the interior glass tile showing, very nice effect.
The fire pit below is again in Dallas Texas and installed by Nadine. She used a Black base with Gray base glass, Gold base glass, Bronze Rust Copper base glass and a splash of Azurlite.
The fireplace below is an electric fireplace. Actually we have supplied glass to dozens of electric fireplaces but Rita was the only one who sent us pictures of Azurlite under her logs. There is no real fire but it does look nice.
The fireplace below has Azurlite base glass with Dark Red Orange and Yellow Amber on top.
The fire pit below has a Clear base glass,
Cobalt Blue Topper,
Copper Blue Topper and
Azurlite base glass for one very nice fire pit and back yard!
The fireplace below is in Palm Springs, California and is a self install
Clean and paint the walls in the color of your choice, we offer 25 colors!
Screw on the flex line adapter
Attach the flex line and burner with the flex line under the burner.
Test the burner to insure the flames are not hitting the back wall.
Pour on the glass, with or with out filler (sand or crushed lava rock)
and you're done!
The fireplace below was installed by George Foote who also built his own pan, great job! We supplied the burners and glass and George supplied the talent and labor. Great job George! The colors used were:
Starfire base glass,
Azurlite,
Azurlite Reflective,
Gray base glass,
and our Ice Ice Ice and you be the judge!
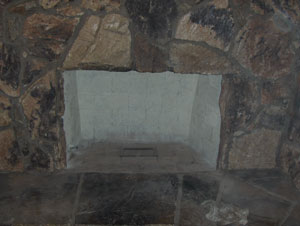
Before the pan and glass.
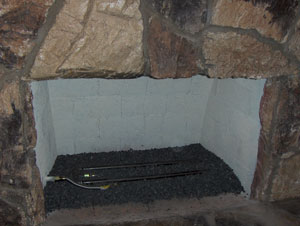
Here is the stainless steel pan that George built.
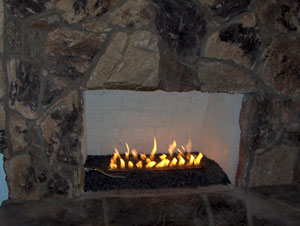
Start with Starfire.
Add some Azurlite.
and the rest of the colors for one nice design from George!
The fire pit below is filled with lava rock and then was topped with a base of Clear base glass. Then they covered the Clear with Azurlite and topped it with a few Ice Ice Ice cubes. A funny story comes with this fire pit. Elliott came out from the San Fernando Valley as he was sent by his mother, which was tooooo busy to come out herself. She told Elliott to pick out the colors he liked which he did (he was told to pick amber colors). He went home with Amber and gold and set up the fire pit which actually looked very nice. Well to his demise his mother did not like Amber at all! She made Elliott pick out all of the Amber and replace it with what you see here. Yes we did exchange the glass for him to prevent his mother from further punishing Elliott. We will post the Amber pictures when we come across them in our files.
Elliott: It turned out very nice! I hope your Mother is happy now.
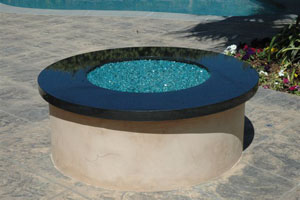
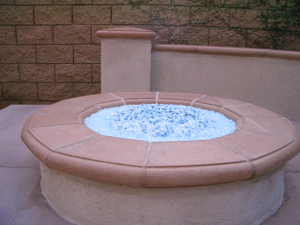
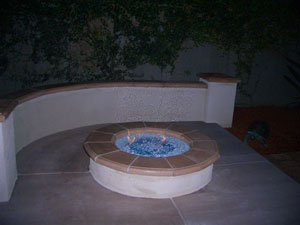
The fire pit below has a Azurlite base glass and a black granite ring for one very nice fire pit!
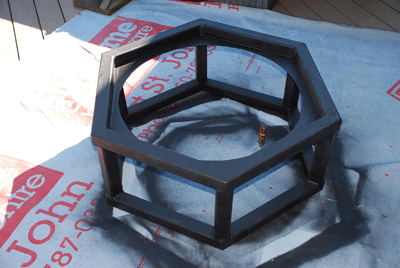
On this page (as if you needed another page) We are going to show you how to build a basic fire pit for your deck/ back yard.
This was built by Glenn Harvey of British Columbia.
This first picture is the frame he had started with.
You can make one from metal studs, aluminum studs, etc. Anything non flammable.
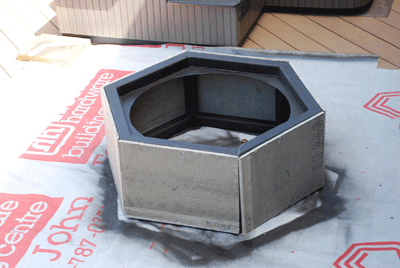
Wrap it with wonder board or durock/ cement board.
Below you can also wrap it with wire for better adhesion to the backer board.
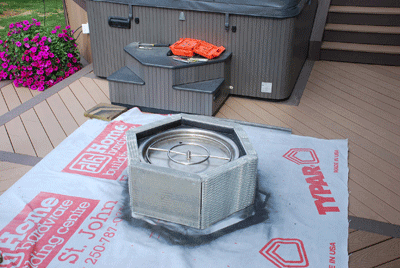
This fire pit was natural gas. We also manufacture the burners for propane. Well, we are the only ones who actually manufacture propane burners for your projects.
Below you can see the gas connection coming up from the deck. Glenn used a pan but he also could of used an aluminum/ stainless steel base plate as well.
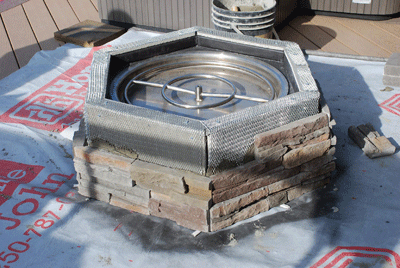
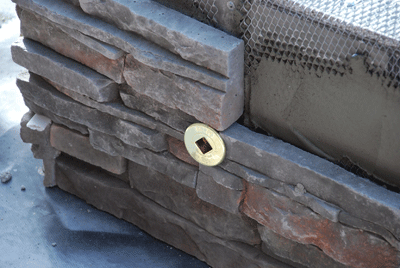
The stacker stone is now being applied.
As you can see below the trimming valve is installed on the side. You would be surprised on how many plumbers don't think of this little detail, a valve to turn it on or off. I have seen the valves installed inside of the pit or not even at all. You also need to be careful as to not have a gas line installed that is too small for the application.
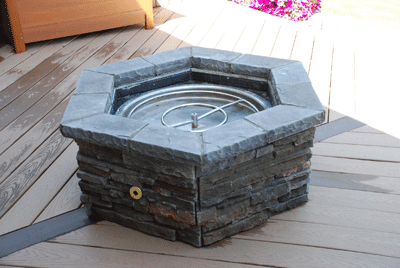
Now the stone and cap are done, great and simple job!
Below you an see the larger filler lava rock was installed. If a flat plate were to have been used you wouldn't need the larger filler lava rock base.
Below our crushed lava was used to cover the larger lava rock to insure the glass does not fall through. This makes an even base. What ever shape you make the lava is the shape the glass will take.
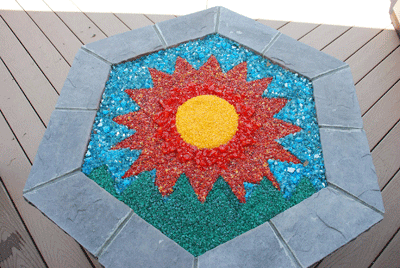
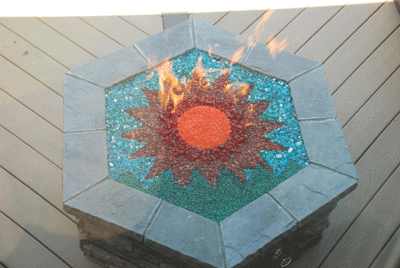
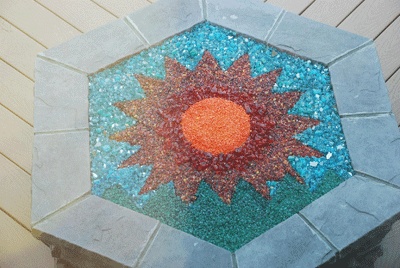
If you notice below the center of the sun, it changes when it get hot! This one of our chameleons that change when the glass gets hot. If you look real close at the Orange Topper (next to the suns center) as well, it turns a bright cinnamon red when it get hot also! All of our chameleons will be posted when we get a chance. This is just another one of our product lines that we have not had time to further promote.
Above is the fire burning and
below the fire was just turned off.
Glenn spent a few hours placing all of the glass to make this very cool scene. So don't just think you can just throw it on and it knows were to go. Very creative!
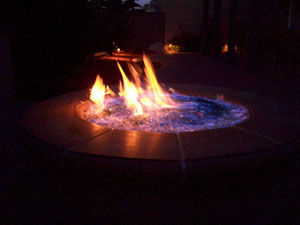
The fire pit below belongs to Chad Haupert. He used an Azurlite base with Azurlite Reflective on top. Then he created a star in the center using Bronze Rust Copper with and outline of Ice Ice Ice. We didn't get pictures of the complete pit nor of it burning. But it looks great!
The fire pit below is in Palm Springs California. We use Azurlite Fireplace Glass and a crushed lava filler underneath. There were a few issues which we resolved.
First issue: Don't use polished Mexican Pebbles as they will chase you across the yard.
Above, second issue, the ring could of been bigger as we installed a triple 30" stainless steel ring.
Below, third issue the plumber installed a 3/8" reducer, why? :-~ The gas comes is with 1/2", the ring is 1/2" so the plumber installed a 3/8" reducer in between the gas supply and the ring. Why in the heck would he do this? Anyway we just installed a 1/2" flex line and the pressure was back and fine.
Cover the wrong material with at least 1 1/2" to 2" of crushed lava.
And pour the Azurlite Fire Pit Glass
We never were sent pictures of the fire pit burning, but we did test it during our installation.
The fireplace below is in Palm Springs and was installed by John, our customer.
He used a sand base with 1/2" Azurlite base glass on top.
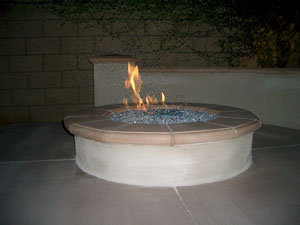
The fire pit below is a mix of V Blue base glass and Azurlite base glass.
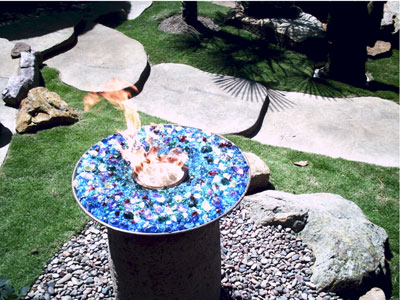
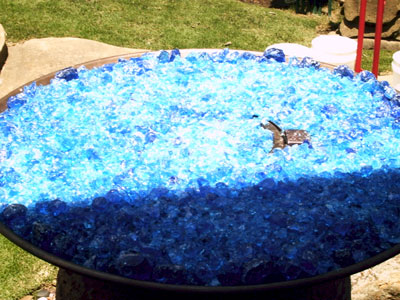
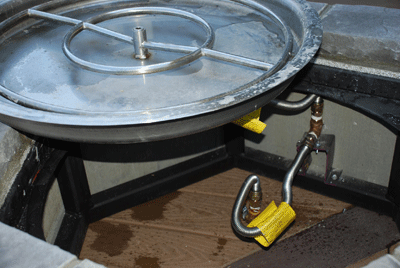
The fire pit below was purchased locally and then we converted it to burn propane without soot! The colors used were:
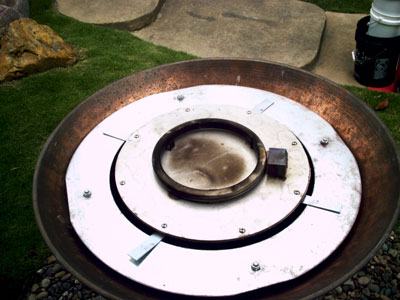
Here is what is looked like when he started. These manufactures have no imagination!
This only cost about $100.00, complete!
The fireplace below has Azurlite base glass, Ice Ice Ice and Sky Blue Diamonds for accents.
The fire pit below was installed in Sydney, Australia by Ian Sutherland. He did a great job on his new patio and fire pit. We inspired him to build this really nice back yard project and we were glad to help. The glass that was used was Azurlite and Starfire base glass.
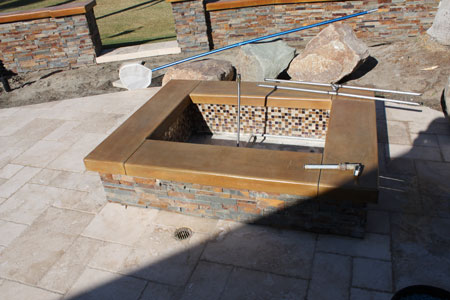
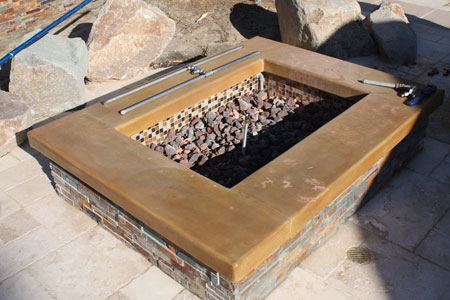
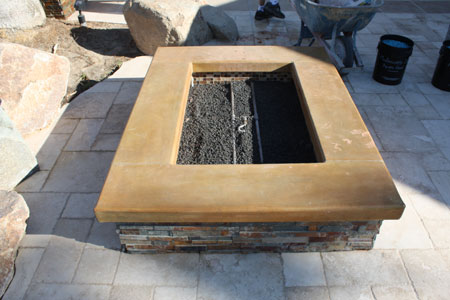
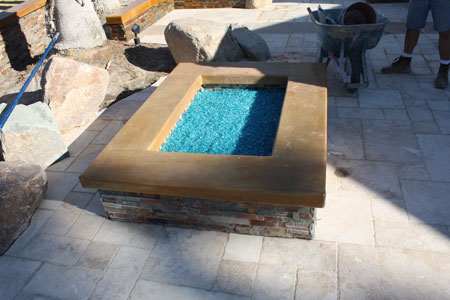
The fire pit below has Azurlite FireGlass/ Fire Glass installed. This fire pit was to have an electronic ignition but the pool builder forgot to wire it, oops! We then installed a battery operated IPI system and we will explain as we move on. The first issue was we were told the pit was 8" deep, it was only 6" deep! That will explain why the glass is mounded so high. they put a board on top of the fire pit and measured it to the top not the bottom.
We had to mount the gas on top of the ring because of the measuring mistake.
On the bottom front left of the pictures you can see the blue battery compartment.
This will be just slightly covered with glass but easy to find come the time to replace the batteries.
First layer of glass going on.
Below you can see that the ignition is just above the surface and the battery box is now gone!
We had to add more glass, again because of the 6"/ 8" bad measuring.
Below here it is finished.
Yes it is on the golf course in Palm Desert
Below we did a Paparazzi photo shoot! This home took 2 years to build! The gates below had Sea Glass laminated to the glass panels.
If you take notice to the outside walls, the entire house was covered in marble! Crown moldings included!
We only do this once in a while, but the home was outstanding. You should of seen the interior!