http://www.aquaticglassel.com https://www.aquaticglassel.com
Moderustic Aquatic Glassel Fireplace Glass Rocks Propane Fireplaces

Ed@Moderustic.com 909 989 6129

Starfire Base Glass-

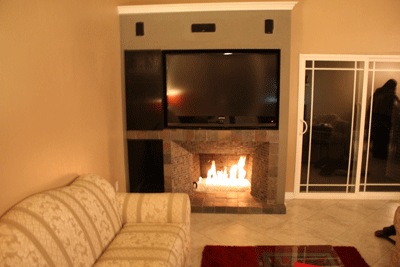
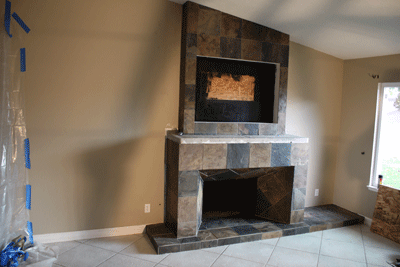
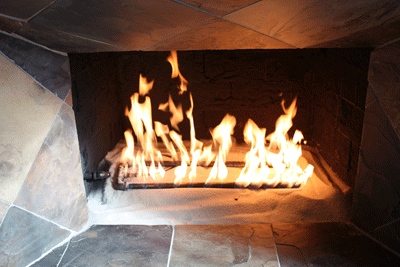
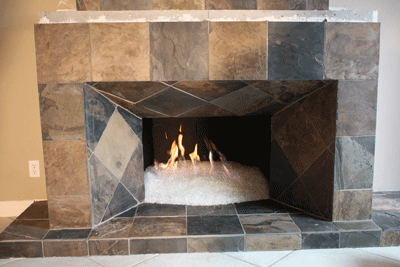
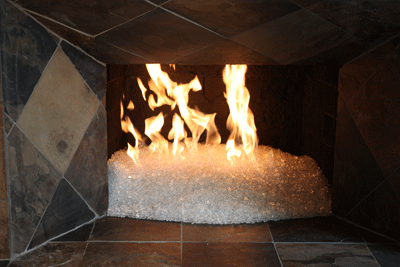
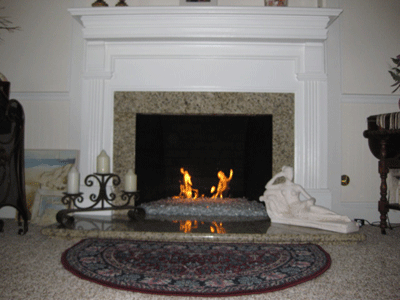
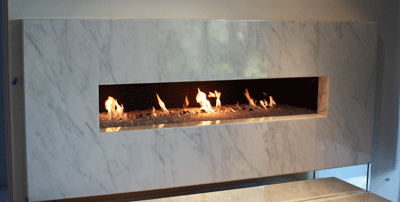
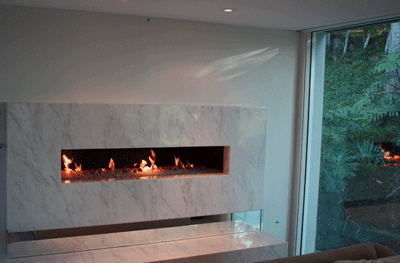
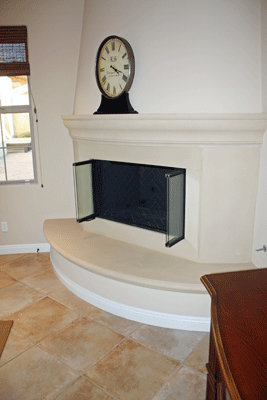
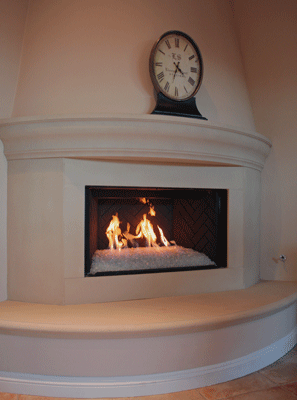
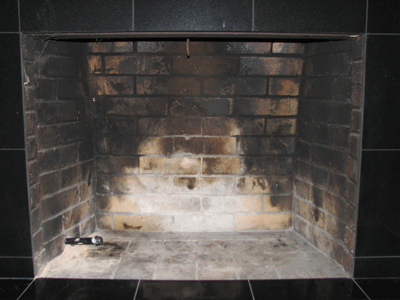
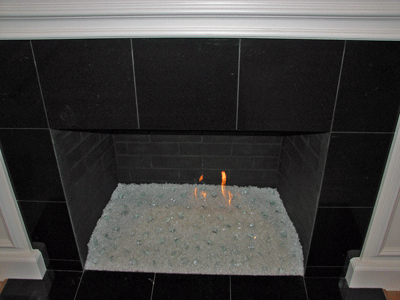
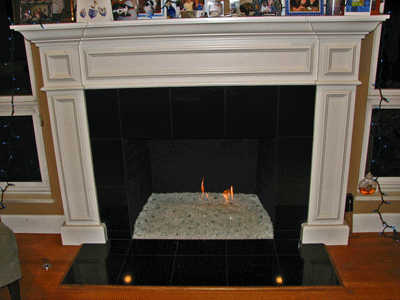
The fireplace below is in Pasadena California. this is a before and after with a 2" base of crushed lava as a filler with Starfire on top with a double 24" burner installed. We are next installing one of our surrounds.
heidi 2
Looks nice? Huh? NOT! Again, has anyone ever told you nice logs? I don't think so.
I would really not like being a log manufacture as they really produce some ugly products, in my opinion. But you decide for yourself.
heidi 3
heidi 4
Below we have installed the burner on top of the lava rock filler.
heidi 6
Now test the burner to insure the flames don't hit the back wall as this will scorch the walls.
heidi 7
heidi 14
Now this is nice! Now we will install a surround. Most everyone tells us "Nice Glass"!
heidi 15


______________________________________________________________________

Click HERE or on the picture to see how it was transformed to this!

Steve Clendenen

From THIS! (BELOW) again YUK!

Steve Clendenen

______________________________________________________________________


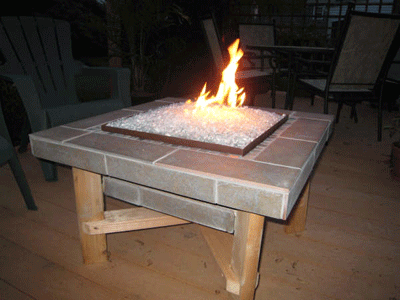
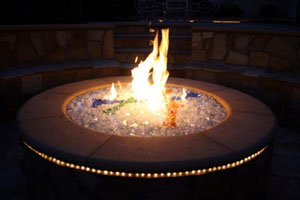
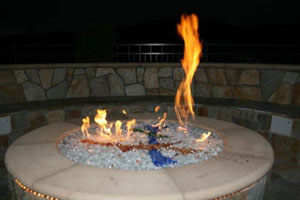
Below is a fire pit with a Clear Base Glass with Azurlite Base Glass and Starfire Base Glass on top

cary

cary

cary


The fireplace below was installed in Palm Springs, California. The base glass is Starfire Base Glass and then we topped it with 1 lb of Pirates Topper.
ps pirates 1
This is a typical fireplace but this one has lava rock stacked up inside, yuck!
ps pirates 2
Below you can see the flame hitting the back wall creating a soot mark, not very nice looking. The customer didn't want the fireplace painted, why?
ps pirates 3
There's that soot mark! If you do paint make sure the work is not spotty! That looks nasty as well.
ps pirates 4
Above you see the typical hard piped burner installed which is fine for logs or lava. But this does not really work well for glass.
Below you see the double burner installed with an 18" flex line.
ps pirates 5
ps pirates 6
ps pirates 7
Test the burner and pour the glass, now it looks nice except for the soot mark!
ps pirates 8
ps pirates 9
ps pirates 9
ps pirates 10
Now we added 1 lb of our Topper, Pirates!
ps pirates 11


The fireplace below has Starfire and Ice Ice Ice installed with a really cool ceramic tile on the face. Nice job!
tr 9tr 8
tr 7tr 6
tr 5tr 4
tr 3tr 2
tr 1
cape cod 3cape cod 2
cape cod 1
The fireplace below has Starfire, Bronze, Bronze Reflective, Gold, Amber and Dark Red Orange Topper.
pj 1pj 2


The fireplace below has a 3" layer of crushed lava, 1/4" Clear Base Glass, 1/2" Starfire Base Glass, 3/4" Starfire Base Glass for the chunky look and a flush surround to finish it off. A very impressive and modern house and fireplace. From beginning to end, here we go.

n 1n 2

We also floated the walls to level the fireplace and get it ready for the surround.

A little bit of granite on the floor

n 3n 4

If you notice to the right there is no valve to turn it on? The plumber from a few years ago has it to the right about 5 feet, DUMMY! Lets fill the fireplace with gas before we get there and see what happens! Don't hire that plumber.

n 1n 2

We are now going to do an extended 3/4" glass radius counter in the kitchen in front of the stove for a glass counter top.

n 3n 4

n 5n 6

We also bent all of the kitchen handles to contour the cabinets.

n 7n 8

n 9n 10

n 11n 12

n 13n 14

n 15n 16

n 17n 18

n 19n 20

Now you can see the fireplace valve to the right.

n 21n 22

We flush fit a surround to the wall for a final finish. This was a satin black aluminum frame with 2" of glass installed

n 23n 24

We are capable of any size project from design to a full installation (depending on our current work load). There is nothing we can't do as we are the the first and foremost authority in our field. We never say NO! We do only what the other companies can only dream about!

Ed


The fireplace below has Bronze Base Glass with Bronze Reflective Base Glass and Starfire Base Glass on top.
house 001
house 002
This is the back side of the peninsula fireplace.
house 012
house 013


The fireplace below is a propane burner, self installation with the 2" method, Starfire and Gold on top

jr 1jr 3

Above we have the old burner with a smaller flame pattern which we will change to a double burner in our tray propane pan burner

jr 5jr 4

A little bit of cleaning with a wire brush and 1200 degree paint

jr 6jr 7

We filled the bottom with pea gravel and the covered it with sand

jr 8jr 9

Then we installed the propane burner and filler it with pea gravel to the top of the burners

jr 10jr 11

You can see the pilot light and thermo-coupler exposed

jr 12jr 13

So there it is. A clean burning propane burner, 2" method, no soot, no smells, no carbon monoxide and it puts out a tremendous amount of heat. We sell the 2" method because it works and if anyone tries to tell you different, they need your money more than you do. We are the only company building propane burners for glass that don't soot or smell!


starfire-no-fire

starfire-amber-no-fire

Starfire Base Glass with Amber Topping on top

starfire-amber-orange-red-t

Starfire Base Glass with Red Topping, Orange Topping and Amber Topping

starfire-amber-red-topping


The fire pit below has a Clear base, and 3 lbs of each of the following, Starfire, Azurlite Reflective, 1/2" Bronze, 1/4 Bronze, Evergreen Reflective, Gold, Black Reflective.
mm 1mm 2
mm 3mm 4
mm 5mm 6
mm 7mm 8
The fire pit/ table is at the Roxbury Hotel and we will show you the progress here from beginning to end. This was a propane installation with our FPPK burner. The colors used were:
1/4" Starfire, 1/2" Starfire, Gold, Lime Green Topper, Pale Olive Green Topper, Olive Green Topper,a little bit of wood and tile and here you go!
roxbury 4roxbury 5
Above shows the framing and the gas line coming in.
Below shows the pipe coming out of the floor and the thermo-coupler on the glass next to the igniter
roxbury 6roxbury 8
roxbury 7
roxbury 7a
roxbury 2roxbury 1
roxbury 3
Roxbury Motel 1
Roxbury Motel 2
Roxbury Motel 3
Roxbury Motel 4
Roxbury Hotel, a cool fire pit! www.TheRoxburyMotel.com
The fireplace below is a direct vent self install by Norm. The colors used were: Starfire base, Cobalt Blue Topper, Pale Cobalt Blue Topper, Ice Ice Ice, Pale Gray Topper, Gray Topper and Copper Blue Topper.
norm 1norm 2
norm 3norm 4
norm 5norm 6
norm 7
We use a piece of stainless steel in the front to contain the glass to cover the burners and keep the glass level.


The first project we are working on is the Maryland Hotel (Ivy Hotel now) Roof Top Fire Pit in downtown San Diego, California on the 7th floor roof top!
It measures 60" across, 30" tall and 144" long!
The fire table/ fire pit will and a 5' x 12' surface top in smooth concrete with a 16" x 120" stainless steel fire tray of to one side. We will post pictures as the project grows on.
Te fire pit is constructed with a new flexible track and about 3,000 screws, 240' of galvanized channel, 450 welds, 600 lbs of GFRC/ Wonder Board and coated in smooth texture concrete.
sd 1sd 2
sd 3sd 4
sd 5sd 6
sd 7
This was just before delivery, dry fit.
sd 17
sd 18sd 19
sd 20sd 21
Once on the roof top the two halves were attached and the pan was installed
sd 8sd 9
There were two burners and two controls installed
sd 10sd 11
sd 12sd 13
sd 14sd 15
The glass is going in after the position of the fire table was adjusted. Pictures will be here soon!
If you look at the walls of the roof top you can see most of San Diego.
sd 16
The table now has had a different coat of colored concrete applied and a granite top. The glass that is installed is Starfire. The Hotel plumber was not very careful as he mixed the lava with the glass and now it looks like salt and pepper. We will be taking a trip to San Diego to fix this mixing issue because we would like to post finished pictures of the fire table burning at night time.
ivy 1ivy 1a
ivy 2ivy 2a
ivy 3ivy 3a


sylvia 1

Starfire Base Glass above and below.

This was actually installed on a yacht in Seattle by Sylvia Bolton Desgins.

http://www.SylviaBolton.com/ you need to visit her site! AMAZING WORK!

sylvia 2


The fireplace below has:

A clear base with Pale Lime Green Topper, Red Toppings, Yellow Amber Toppers and Toppings, Copper Ruby Red Topper, and a hint of Starfire to lighten the color up.

ms 2ms 3

ms 1ms 4

ms 5

This is how easy it is to install. This is all glass and if you need to build it up a little or a lot then use a filler to save money


The fireplace below has a Starfire base with Red and Red Orange Toppings, Scarlett Toppers, Copper Ruby Red Toppers. As you can see the fireplace was 5" deep and 54" wide and yes we did fill it with crushed lava rock.

ds 1ds 3

ds 4

The fireplace below was on the outside wall of the fireplace above. We also had a Starfire base with Red and Red Orange Toppings, Scarlett Toppers, Copper Ruby Red Toppers. This fireplace was filled 4" to save on the cost of the base glass. If anyone ever tries to tell you different, well tell them *#@!+$% their wrong! This fireplace was also 54" across the front as well.

os 4os 3

os 5os 1

os 2


The fire pit below has a Starfire base with Ice on top. This is a concrete molded fire pit at the same home as above in Pasadena, California. Later there was 30 lbs of Red added and maybe we can get more pictures.

fp 10fp 20

fp 30


The fireplace below is s typical simple install. Paint, glass, fire and you're done. This is all Starfire over an 18 18 burner and 1 can of paint, black. This is how simple it really is!

jan 1jan 6

jan 5jan 4

jan 3jan 2


The Chambers Hotel

www.chambersminneapolis.com

A very modern fireplace with Starfire

chambers 1chambers 2


The 2 outdoor fireplaces below are in northern California at the Hyatt. They called us about soot on the glass. When we looked at the pictures our first thoughts were PROPANE! No these are natural gas. The fix was actually very simple. This was caused by a down draft from the chimney which we partially closed the flue which stopped the down draft and as you can see they are just fine now.
hyatt 1ahyatt 1
hyatt 2ahyatt 2

The fireplace below has a Starfire base with Ice on top, Pink Diamonds, Pink Drops, Clear Diamonds and a splash of Gold for added color. What make our company different is what we have to offer you as a customer, selection and variety!

rod 1rod 2

Here is what the customer had to say:

From: ROD WILL rodwill1@msn.com

Sent: Sunday, December 17, 2006 7:38 AM
To: Ed@Moderustic.com
Subject: My new fireplace


Ed we love our new fireplace!!
Wow, it is awesome and couldn't have been easier to set up. Made the
purchase late Friday and it took me approx 2 hrs Saturday (while watching
TV) to set up properly including paint and clean up.
I did run into a small problem with the material continuously falling out of
the fireplace . It seemed that I actually used too much material. I was able
to resolve the problem by utilizing the original glass door frame as a
decorative and very functional stop. It is held in place with clear silicon
and the material was allowed to contact and dry into the silicon. ( see pics
) In my case this worked out well as my accent color is gold and so is the
trim piece of the frame. I imagine this can be done on many fireplaces and
the trim can be painted is needed to match. Feel free to use our pictures or
the idea about the trim ( if it is original ) on your web site or sales
presentations.


Thank you again

Rodney & Therese Williams
Rialto Ca 92377

rod 3rod 4

rod 5rod 6

rod 7rod 8

rod 9


The fireplace below is a before and after with Starfire.

jim 1jim 2

Below is what we started with. We can fix anything!

jim 3jim 4


The fireplace below has a Starfire base with Amber, Pink and Orange Toppings.

faye 1faye 2

faye 3faye 4


The fireplace below is a propane self build and installed by Norm Oppliger in St. Louis. It has a 1/4" Starfire base with 1/2' Starfire on top and topping with:

Light Aquamarine Topper

Turquoise Blue Topper

Cerulean Blue Topping

Copper Blue Topper

Scarlett Topper

Ice Ice Ice

and a few of our Diamonds

one great propane self install Norm!


norm 1norm 2

norm 3norm 4

norm 5norm 7

norm 12norm 8

norm 9norm 10

norm 11


Hi Ed,

I finally managed to finish the fireplace. We have decided to place a 2" piece of metal in front (which hasn't been done yet), though, to keep the glass off the ledge. We thought it would be deep enough, but that didn't quite work.

To enable me to keep the center area smooth, we had to place the burner on top of the wall pipe, which created a rather high burner placement. This ended up creating a bit of a problem because I had a steep slope to the hearth. This is why I need to add the metal strip in front--so the glass doesn't roll down and come out of the fireplace. We had decided to not have a glass door on it, although if we find something we really like, that could change.

 The pics might come in 2-3 e-mails, but I'll describe them here. The first few pics are duplicates of ones I already sent you.

1. Original fireplace, emptied out.

2-3. After painting with the dark blue from the chart you guys gave us. The wall was painted to match, although, I'm not sure I really like it. I'm trying to reserve judgement until I see it for awhile.

The damper handle is a brass duck head which wasn't even noticeable when it was all black.

4-5.New burner in place. This created more problems than expected due to the wall pipe being higher than most. We ended up using regular lava rock, since we couldn't find the smaller rocks. Then we added small pea gravel to fill in gaps around the lava rock. After the burner was finally level, we added the sand.

6. Testing the burner with sand added.

7. Clear glass base added.

8. Rest of colors were added--Starfire, Azurlite, Cranberry-Pink, with a little Steel Blue Topper and a few Ice Cubes.

9-10. All finished and burning.

We're still working on the right side of this wall which has cabinets holding the TV and storage. Once the entire wall is finished, I'll send you one final pic of the entire wall. Not sure how soon that will happen, so don't wait for it, if you want to post these pics on your website.

I want to thank you for all your help. Your store was great to visit, so we could pick our glass out in person. Your staff was very helpful and we had a great time making our final color choices. I'll will definitely recommend you to others.

Judi Weers  

Senior Instructor for Art Clay  

PMC Certified

 crafterjudi@yahoo.com e mail any comments or questions to Judi

judi 1judi 2

judi 3judi 4

judi 5judi 6

judi 7judi 8

judi 9judi 10

The pictures below are of the fire pit on the roof top of the Marriott in downtown San Diego in the Gas Lamp District on the 24th floor, very cool view if you're ever there. The 2 half round 24" x 48" stainless steel rings were made custom for this fire pit. The glass that was used was a 50/50 mix of Starfire and Black. Very nice effect along with the view.

marriott 5marriott 4

marriott 3marriott 2

marriott 1

The half round burners below were installed at the Marriott "Gas Lamp" San Diego, California in a 72" Fire pit. We will post pictures of the finished project when we get the pictures sent to us. These were 24" x 48" stainless steel half round burners.

half 1half 2

half 3half 4

half 5

The fireplace below has a Starfire base with Pale Copper Blue Topper and Blue Tubes Topper.

sparks 2sparks 3

sparks 4sparks 6


The three fireplaces below are of fire stones and Fire Balls in Los Angeles which were featured in Dwell Magazine. These are before and after pics.
living room 1living room 2
bedroom 1bedroom 2
den 1
The fireplace below had Starfire installed for a clean simple look.
family room 1family room 2

The pictures below are from Iggy in New York. He sent me a picture of his fireplace and asked me what we can do to help him. Well sit down and watch. A new pan, hood, surround, tile and Starfire! Nice insert, not! Just like "Nice Logs", not!

iggy 1

iggy 2

iggy 3

iggy 4

iggy 5

iggy 6

iggy 7

iggy 8

below is a template for the stainless steel pan

iggy 9

Below we added a pan

iggy 13

Below we added a vent which was taken out years ago.

iggy 15

iggy 16

iggy 10

iggy 11

iggy 14

Above you can see the the key valve and below you don't see it. Because we made a removable panel!

iggy 12

iggy 18

iggy 17

iggy 19

iggy 20

iggy 21

iggy 22

iggy 23

There you have it in Rochester New York, Iggy it looks great.


The fireplace below is a direct vent self installation with a Starfire base and Hyacinth Topper. There are a few fireplace companies who say this can't be done, really! So I guess this didn't really didn't happen, did it?

tl 1

tl 2

tl 3

tl 4

tl 5

tl 6

tl 7

tl 8

Above you see all the components that make a direct vent work

and below you see the finished product. This was completed by Teresa Leets, an attorney in Los Angeles. So much for those fireplace guys.

tl 9

tl 10
The fireplace below has Starfire installed. Actually this is the fireplace of my Farmers Insurance agent. Nice job Adrian!
adrian 1
adrian 2
adrian 3
adrian 4
adrian 5
You can leave the doors on or remove them. If you remove them you should hang on to them as you may want them back one day.
adrian 6
adrian 7.
adrian 8
The fireplace below has a Starfire base with Black Luster Topper and Scarlet Red Topper for colors
snowman 1
snowman 2
This is where the snowman starts yelling " I'm Melting!"
snowman 3
snowman 4
snowman 5
The fireplace below is in Los Angeles California. It was remodeled in a silver and clear ceramic tile which made it look very modern and contemporary.
This was the old burner, one long ribbon style burner
la 1
la 2
la 3
la 4
Above you see this ribbon burner on a high flame, but it is only one row of flames.
Below we installed a double burner which will give you 4 rows of flames. It's hard to see in the day light but in the evening it is very different.
la 5
la 6
la 7
la 8
We added a Starfire base to the fireplace and here you have it. The customer added a few colors later along with our Ice Ice Ice. We also added two metal shields on each side of the fireplace on the inside left and right to cover the vent holes from view.
la 9
la 10
la 11
la 12

The fireplace below was finished with a standoff surround. We build brackets to support the surround 5 inches away from the fireplace. This was installed by Bruce Rubenstein in a Hollywood night club. If they ever send us pictures we will post them along with these.

rubenstein fireplace

bruce 1

bruce 2

bruce 3

bruce 4

bruce 5

bruce 6

In the bottom of the pictures you can see our brackets which supported the bottom and sides. The surrounds are brushed for a modern contemporary look.

bruce 7


The fire pit below has Azurlite, 1/2" Azurlite, Ice Ice Ice, Starfire and Platinum in the center. Lava rock was used to minimize on the use of glass to keep it in the budget.
fire pit 1
fire pit 2
fire pit 3
The fireplace below is in Glendale Hills California. We installed Starfire as a base with about 1 lb of Ice Ice Ice on top. Then to finish it off we installed a brass surround with bronze frosted glass. The customer loved it! She is the CEO of Fredrick's of Hollywood! Awesome house by the way.
brass surround 1
brass surround 2
brass surround 3
brass surround 4
brass surround 5
brass surround 6
brass surround 7
brass surround 8
brass surround 9
The fireplace below has a Starfire base with Olive Green Topper on the surface. They placed 52 lbs of Topper on the bed of Starfire
faye 3
faye 4
faye 5
faye 6
faye 7

The fireplace below has a Starfire base with Copper Ruby Red Topper, Fluorogreen Topper, Citron Topper, Orange Topper and Light Violet Topping. With the black granite hearth, it looks great. Thanks Steve Fisher.

steve 3

steve 4

steve 1

steve 2
Below is an RV propane fire pit which a customer build a table to drop it in to. We also supplied a quick disconnect for the propane tank. The glass that was used was Starfire.
alan 5
alan 3
alan 2
alan 1
The fireplace below has a Starfire base with Cobalt Blue Topper. Very nice room remodel!
brenda 2
brenda 1

The fireplace below is in Palm Springs California. We installed Starfire as a base glass and then painted the interior ivory white and installed brushed surround with clear glass edging.

ps 4

ps 5

Now it starts to come to life!

ps 6

ps 1

ps 2

ps 3

It just looked sooo good, we had to post all of the pictures!

ps 7

ps 8

Amazing flame work by night and below simple and nice to see by day.

This surround has 4" sides and 3" top and bottom. Every fireplace is a little bit different as we recommend a cardboard template so you can get a preview of what it will look like before hand.

ps 9

ps 10

ps 11

ps 12

ps 13

ps 14

ps 15


The pictures below are for the opening "90210" Malibu party on the night of the series premier. Click on the link to see the full story and write up from BizBash .

http://www.bizbash.com/losangeles/content/editorial/e12364.php

We use Starfire in our propane RV Fire pits on the Malibu Beach Party.

90210 a

The tables were furnished by    www.RriveWorks.com and we furnished the RV Fire Pits.

90210 b

The fire pit below is in Glendale, Arizona at the Renaissance Hotel. We installed an electronic ignition with a 30" stainless steel ring. The glass use was a Clear base with Starfire on top and topped with 42 lbs of Apricot Topper. These pictures were taken with the edges still exposed which were covered by a layer of Starfire.

katz 1

katz 2


The fireplace below is the fireplace of "Bill" and he wasn't sure where the burners went. So he put them on top and as you can see he should of put them under the glass.
bill hall 1
Bill ordered a rectangular pan and it would of looked better if we would of built a trapezoid shape pan to contour the fireplace. Bill did drop his burners under the glass. This was a propane ventless conversion. Looks much better than those log thingies! Hopefully Bill will send us pictures of it finished and burning, maybe. We used Starfire glass in the pan.
bill hall 2


The fireplace below has a stainless steel pan installed with a ribbon burner. The front legs of the pan are 4" round brushed legs with our standard legs in the back. Here you can see the different flame patterns of our ribbon burner. We then installed a brushed aluminum surround.
The first 3 pictures are of the fireplace before we started on it. The wall was built out 8" for the flat screen above the fireplace.
reddish 1
reddish 2
reddish 3
The next 4 pictures are of our ribbon burner after fabrication.
reddish 4
reddish 5
reddish 6
reddish 7
Now we pour on Starfire to help conceal the burner.
reddish 8
reddish 9
reddish 10
Our ribbon burners can actually raise the flames quite a bit!
reddish 11
reddish 12
reddish 13
This is one of our smaller 18" ribbon burners.
reddish 14
The pan is now installed in the fireplace.
reddish 15
reddish 17
reddish 18
reddish 19
Add a little fire
reddish 20
reddish 21
reddish 22
reddish 23
reddish 24
reddish 25
reddish 26
Now we install the surround to finish this fireplace off!
reddish 27
reddish 28
reddish 29
reddish 30
reddish 31
reddish 32
reddish 33
reddish 34
reddish 35
What we do is very simple, we listen to the customers needs and build from their imagination.
reddish 36

The fireplace below has a Starfire base with Citrine, Dark Red Orange, and Orange Toppers with a touch of our Ice Ice Ice. This was a complete remodel in natural gas and a remote control was added with a pilot light

kim 1

kim 3

kim 5

kim 6

kim 7

kim 9


kim 1

kim 2

kim 3


The fireplace below is in Palm Desert California and was a self install with a crushed lava base, Clear over the lava, Starfire on top of the Clear and topped with Amber diamond and a splash of our Gold . It looked great until they found the burner was too close to the back which burned the back wall. I don't know if this was repaired as we did send paint and instructions on how to prevent this in the future. The fireplace looked great except for the "skid mark" on the back wall.
joy 9
Above it still looked good here!
joy 8
joy 7
About our Diamonds, they are made of crystal and when you see them in the fireplace you actually see the fire reflection reflecting the flame backward as if the Diamonds were melting from the inside.
joy 6
joy 2
joy 1


The fireplace below is a before and after and a "how to" make it low and lean. A more contemporary look. This is a self install by Rich Kamins and one very nice job!. He used a Bronze Base Glass and Bronze Reflective Base Glass Topped with a bit of Starfire Base Glass. Ice Ice Ice Topper and about 2 pounds of Copper Ruby Red Topper for a splash of color.
Typical nasty fireplace before Moderustic!
rich 9
rich 1
A few bricks and some drywall
rich 2
rich 3
Some sand under the burner for filler to raise the base glass.
rich 4
rich 5
rich 6
rich 7
And here you have one nice finished fireplace.
rich 8


The fireplace below a Starfire base with

Copper Blue Topper

Cobalt Blue Topper

Dark Red Orange Topper

Cherry Red Topper

Jade Green Topper

Lime Green Topper

Lime Green Topper

Black Topper

and Lilac Topper

What make us different from anyone else is what we offer you as a selection. We offer hundreds of colors, sizes, textures, variations, categories and more importantly we set the standard which everyone else can only try to imitate us. We welcome your comments and suggestions so please send us your comments.Imitation is the highest form of flattery, thank you.

chris 3

chris 2

chris 1

The fireplace below is a propane fireplace with a propane burner and remote control. We used a Clear base with Starfire on top. Then we added:

Medium Amber Topping,

Yellow Amber Topper,

Steel Blue Topper,

Dark Red Orange Topper over the base glass. The controls were covered after the install was finished. If you look closely you can see the pilot light assembly.

w 3

w 1

w 2

w 4

w 5
The fireplace below has a base or Stafire with a 18" set of Calico Fire Stones, very nice!
gail 6
gail 5
gail 4
gail 3
gail 2
gail 1
The fireplace below has a mixed base of:
14 lbs Starfire, 14 lbs Amber and 1/4" Blue Green,
topped with 2 lbs of Blue Green Reflective and 1 lb of Jade Green Topper.
here are the pictures from start to finish, a couple of the pictures were a little fuzzy from the customer. Oh well.
robert 3
Now typically is your fireplace looks like yuck, put candles in it and everyone will tell you how nice it looks! NOT! So don't do it! If it's dirty or looks like a skid mark, clean it and or paint it but don't put candles in it.
robert 1
A typical fireplace where Fake Logs used to live. Now they are residing in the Fake Forest after leaving nice black skid marks on the walls of your fireplace, nice! Actually the soot you see in your fireplace is carbon monoxide but the fireplace manufactures which manufacture the Fake Logs just don't seem to tell you this little fact! It's poison and it's the furthest thing from being green that you could ever get. If you really still like Fake Logs then just sit in your garage with your car running and entertain your friends and family there. It's just a healthy.
robert 2
robert 4
The customer here could of painted his flex line to help hide it a little better. Again what was the plumber thinking, hanging logs? Maybe that's why we plumbed the line so high in the air?
robert 5
robert 6
Anyway after all of that it did turn out nice.
robert 7
The fireplace pictures below are a self install with a 2" layer of crushed lava and 2" of Starfire on top. They used an 18 24 double burner and splashed 2 lbs of Gold in the center.
ray 1
ray 2
Above you can install the burner with the flex line curling back under the burner or below
you can use a longer flex line or add a nipple. Which ever you prefer.
ray 13
ray 4
ray 6
ray 8


The fireplace below has a Starfire base with 2 lbs of Ice Ice Ice on top with 1 lb of Lavender Diamonds.
ice 1
ice 2
The fireplace below was a wood burning fireplace and the plumber never installed a key valve in or near the fireplace. So we made a fireplace key box which was installed on the right side of the fireplace. This is the only alternative when the plumber can't or won't fix the issue. So remember if your plumber installs a valve inside of your fireplace, ask him "how do I turn it off?" That's when you will see him run down the drive way. The glass that was used in this fireplace was Starfire.
fireplace sf3

fireplace sf2

fireplace sf1


The fireplace below has a base of Bronze with Bronze Reflective and Starfire on top.

 house 001

house 002

This is the back side of the peninsula fireplace.

house 012

house 013

The fireplace below has a Bronze base with Starfire on top. The customer installed a Maxitrol remote control on the right side

frank 1

frank 2

frank 3

If they would of used more filler it could of covered the remote at least on the top portion.

Putting a ceramic pine cone in a glass fireplace defeats the purpose, you think? I would of used a a fire stone or even a fire ball.

frank 4

frank 5

frank 6


The fireplace below has a Starfire base with White Drops layered on top. The was installed by Robin Rout of "www.RobinRout.com "in Palm Springs California. Very creative!
robin 7
robin 6
robin 5
robin 4
robin 3
robin 2
robin 1 


The fireplace below is a self install with a Hanover Red back ground, The glass that was used is a Clear base with Starfire on top. The Red and Orange Toppers were applied. Jon and Liz Kleinman even labeled their pictures for us.
 
jon 2
jon 3
jon 4
jon 5
jon 6
Then the Starfire and Toppers were added.
jon 1
 
The fireplace below has a Starfire base with Yellow Topper
doug 1
Very nice, can you even imagine putting logs in ever again?  
doug 2
doug 3
 
 
The fireplace below has a Starfire base with Dark Red Orange Topper, Clear Pyrite and Ice Ice Ice on top.
janis 1


The fireplace below has a Starfire base and we just sent samples out for some real wild colors! We will post these when they are available. In the mean time, one nice fireplace in Arizona.
lawanda 5
lawanda 6
lawanda 7
Now for the glass! Starfire!
lawanda 1
lawanda 2
lawanda 8
lawanda 9
lawanda 10
lawanda 11
 
                              The fireplace below was installed by George Foote who also built his own pan, great job! We supplied the burners and glass and George supplied the talent and labor. Great job George! The colors used were:
Starfire base glass,
Azurlite,
Azurlite Reflective,
Gray base glass,
and our Ice Ice Ice and you be the judge!
Before the pan and glass.
george 1
Here is the stainless steel pan that George built.
george 2
Start with Starfire.
george 3
Add some Azurlite.
george 4
george 5
and the rest of the colors for one nice design from George!
george 6
george 7
george 8
george 9
george 10
 
 
The fireplace below has a Starfire base with Yellow Amber on top
e 1
e 2
e 3
e 4
e 5
In our opinion we would of removed the screen and doors for a much cleaner look, what do you think?
e 6


The fireplace Below has a Starfire base with Ice Ice Ice on top.
mike 1


The fireplace below is a before and after with Solex base glass with Gold base glass and Starfire base glass on top. It does look much nicer with out the screens and new paint.
 
old fireplace
new fireplace 1
new fireplace 2


The fireplace below has a Starfire base glass with Copper Ruby Red Topper on top and 2 lbs of Ice Ice Ice on top.
cheryl 1
Here is a glimpse of what it used to look like, yuck!
cheryl 2
You have to try to understand, we see this transformation everyday and we still don't understand the lure to fake logs, do you? Take a closer look at your fireplace, is there anything nice about it in the daylight?
cheryl 3


The fireplace below is a self install with out any filler. They used a Clear base glass with a 17 lb layer of Starfire base glass to cover the Clear base glass.
 
 rick 1
rick 2
rick 3
rick 4


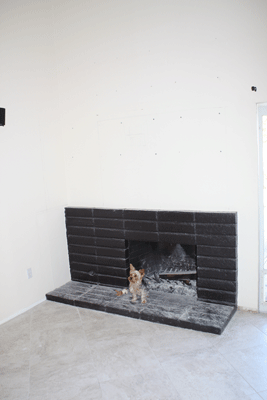
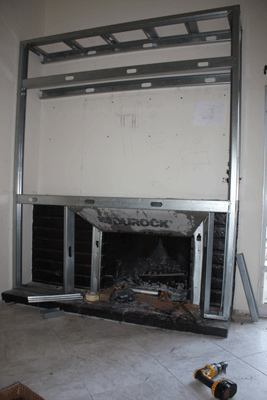
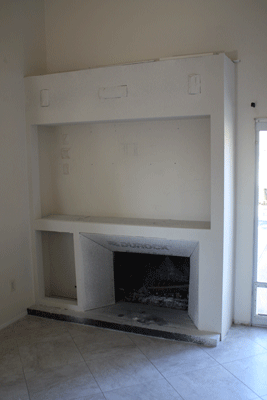
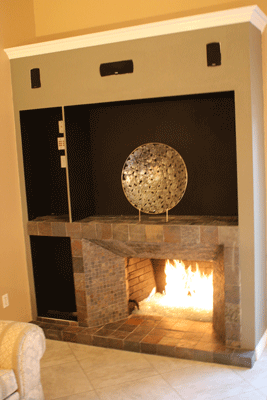
The Fireplace below belongs to Candice, Jonathan and Rocky (a cute little Yorkie). We converted a plain fireplace to a much more usable and modern fireplace TV entertainment area. Watch the transformation for beginning to end. We topped it with Starfire to finish it off.
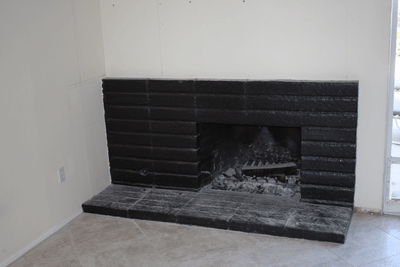
 candice 1

Below is Rocky, just supervising

candice 2

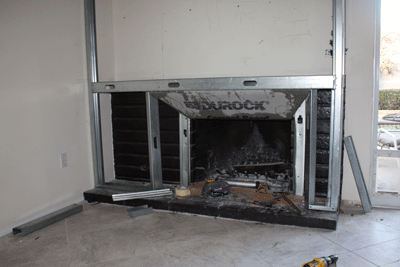
We started the metal framing in 16 Gauge steel studs. No wood was used and you should never use wood near a fire.
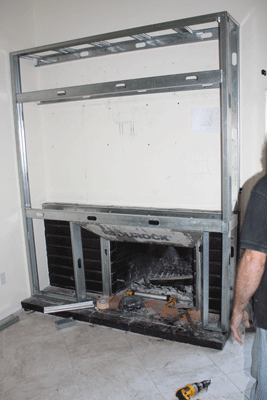
candice 3

candice 4

candice 5

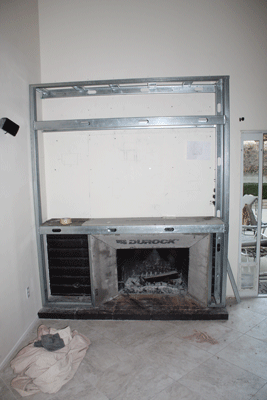
Below we wrapped the opening with durock, concrete board.
candice 6

Add a bit of drywall.

candice 7

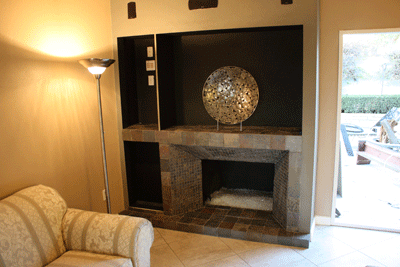
This was wired for a surround sound and electrical in the left cabinets.
candice 8

candice 9

candice 10

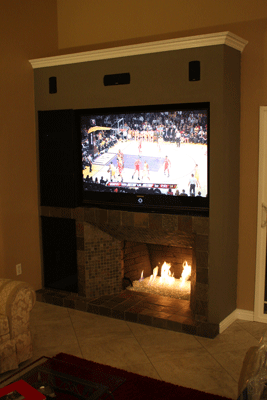
The TV that was used was a DPL (16" deep) and this is how you install a TV that is not a flat screen above your fireplace. In the left cabinets the components were installed and concealed by black glass doors.  On the top we installed a set of 6" lights on dimmers to give additional room/ mood lighting.
candice 11


The fireplace below was installed with a dual battery operated 100,000 BTU propane electronic ignition system. Each capable of 100,000 BTU's of fire. The first pictures show what we had to work with and how it progressed.
The glass that was used was Starfire, Gold and Ice Ice Ice.
ted 3
If this was in your house you would say NASTY!
ted 4
ted 5
Burning wood and logs is just nasty and dirty! True story!
ted 6
ted 7
Above you can see the soot that come out of the fireplace and and leaves your house smelling so carbon monoxide fresh! YUCK!
ted 8
Add a bit of lime stone.
ted 9
A few pieces of copper.
ted 10
Below you can see the sand bed and the ignition box we built.
ted 11
Below are the two vent we installed for the air mixers inside of the ignition systems.
ted 12
ted 13
ted 14
ted 1
and here we are finished. Now isn't that much better little feller?
Modern times call for modern measures! I guess that's why we are Moderustic!
ted 2


The fireplace below is in Santa Monica California. The fireplace is a Malm Fireplace which can be found at:
or
 
We used an 18" double stainless steel burner and a bed of Starfire topped with a few pounds of our Ice Ice Ice.
This is a very simple self installation as you will see.
1
2
3
4
5
6
7


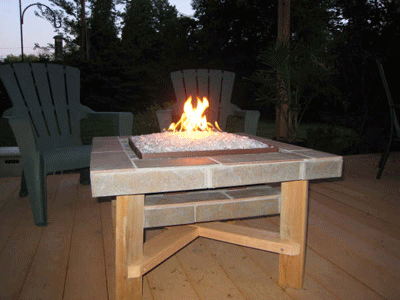
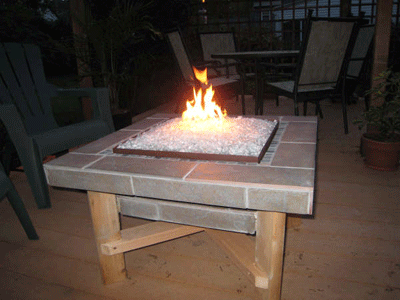
 The RV fire pit below and table was built by Kevin Harren. He pops the fire pit out when he goes camping and drops it back in the table he built when at home. Pretty cool idea! The glass he used was Starfire base glass.
KEVIN 1

kevin 2

kevin 3


The fireplace below was assembled by Nadine in Dallas Texas (Elegant Reflections USA) Great job on the skull! The base glass is Starfire and Black base makes up the skull. She also used Clear Diamonds and Clear Crystals from our Toppers.
skull 3
skull 2
You can see the Diamonds and Crystals around the outer edge for accents.
skull 1
The fire table below was built for Dr. Ramsey Burton in Kentucky. We are going to show you from beginning in the shop to the finished product that Ramsey envisioned for his patio. Ramsey did a wonderful job in planing, building and execution of this project. The glass he used was a Starfire base with Ice Ice Ice on top. Here we go:
Burton Fire Table 34
This was the lay out for the table to come!
Burton Fire Table 33
Burton Fire Table 32
these were the pictures we sent Ramsey after assembly and testing of the fire bowl, water pumps and fibre optics. The glass we tested with usually is our Multi Mix. It tends to show off many colors and always looks great.
Burton Fire Table 31
Burton Fire Table 18
Above you can see the gas line and electrical
Burton Fire Table 19
Burton Fire Table 17
Access panel below.
Burton Fire Table 27
Below the bowl was fitted.
Burton Fire Table 28
Don't ever forget to install a trimming valve!
Burton Fire Table 20
Burton Fire Table 24
Burton Fire Table 23
Burton Fire Table 16
There are 6 colors on Ramsey's color wheel in the fibre optics.
Burton Fire Table 15
Burton Fire Table 14
Burton Fire Table 13
Burton Fire Table 10
Burton Fire Table 9
Burton Fire Table 8
Burton Fire Table 6
Burton Fire Table 5
Above and below you can see the cover Ramsey have made to protect the fire table when not in use.
Burton Fire Table 1
Great job Ramsey!


The fireplace below has a 3/8" Starfire Base Glass with 1/4" Azurlite Base Glass, Citrine Topper, Hyacinth Topper, Lagoon Topper, and Platinum Base Glass laminated to the back wall. This was installed in Dallas Texas by Nadine.
nadine 2


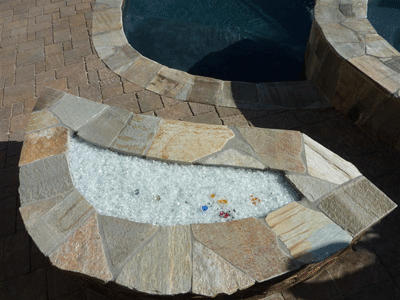
The fire pit below had the wrong type of burner let alone the location of the burner.
The burner must be with in 2" of the ultimate top of the surface of the fire pit. Filling the pit with gas and then trying to light it? Nothing good can become of this. We installed a #304 stainless steel "H" burner, covered it with crushed lava (1/4" / 3/8") over the larger lava rock. This is what keeps it from trickling to the bottom. Them we topped it with Starfire base glass. Then Eric is trying to decide which colors/ topper he should add if any at all.
Eric Tufts 1
Eric Tufts 2
Eric Tufts 3
Eric Tufts 4
Eric Tufts 5
Eric Tufts 6
Wrong type of burner above.
Our "H" burner below. Watch the flame pattern as the crushed lava covers the burners.
Eric Tufts 7
Eric Tufts 8
Eric Tufts 9
Eric Tufts 10
Eric Tufts 11
Eric Tufts 12
Eric Tufts 13
Eric Tufts 14
Now for the bid decision, more colors and which ones?
Eric Tufts 15

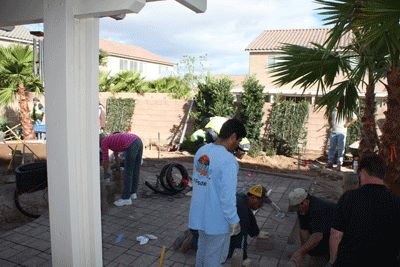
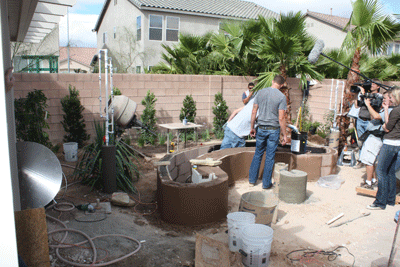
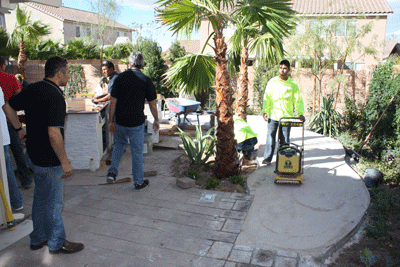
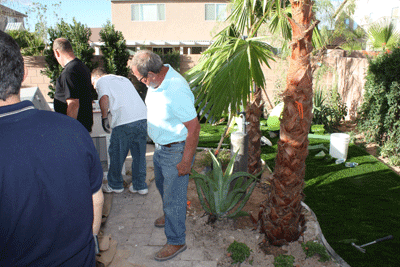
Las Vegas Yard Crashers!

This will air in April of 2010!

Here is a preview

Ahned Hassan

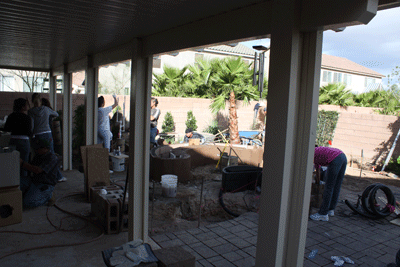
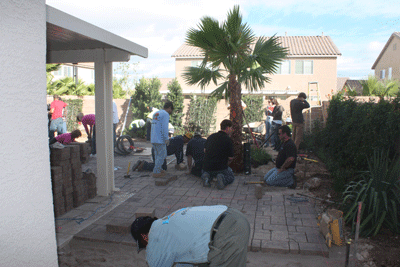
This is what was done on the first day. I showed up on the beginning of the second and the final day. It's amazing what can take place in just 12 hours!
Las Vegas Yard Crashers 1

Above the pavers were installed the day before.

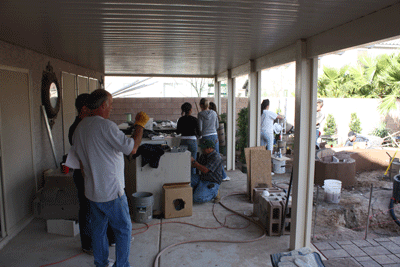
Below is the patio with the outdoor kitchen set aside for now.
Las Vegas Yard Crashers 2

Las Vegas Yard Crashers 3

Las Vegas Yard Crashers 4

Above is where the outdoor kitchen will reside later.

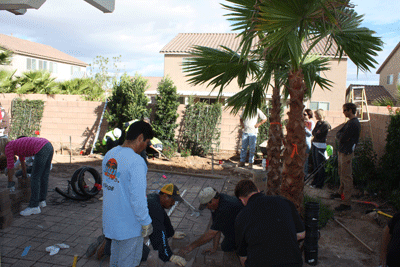
Even the palm trees were brought in! There was nothing on the site when it started the day before.
Las Vegas Yard Crashers 5

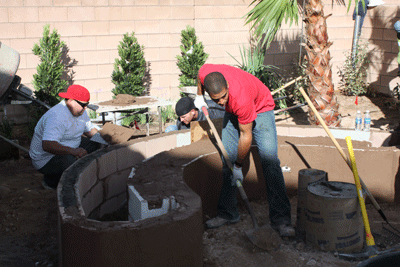
Below Ahmed was leveling the ground around the fire pit area. Ahmed worked all day, much harder than anyone else! I was very impressed how hard he actually works to get the show done.
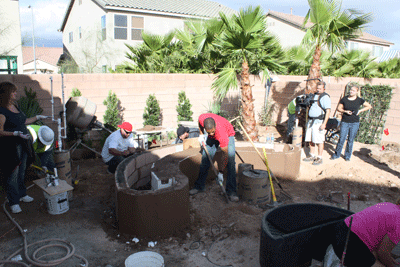
Las Vegas Yard Crashers 6

Las Vegas Yard Crashers 7

Below is where the propane fire pit will sit. The controller will be mounted to the side of the concrete base after the paper tubes are cut away.
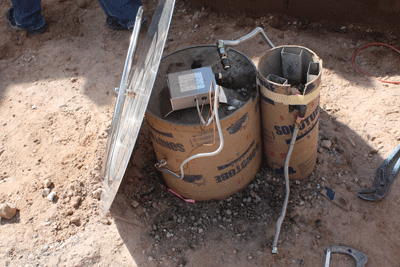
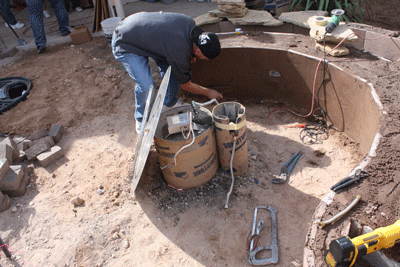
Las Vegas Yard Crashers 8

Las Vegas Yard Crashers 9

Las Vegas Yard Crashers 10

Above and below you can see the inside of the planter is coated to prevent water from leaching out.
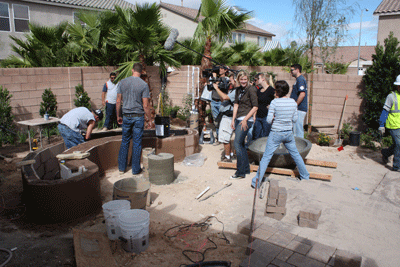
Las Vegas Yard Crashers 11

Above you can see on the ground that we brought the fire bowl in. Just so you know it was about 300 lbs!
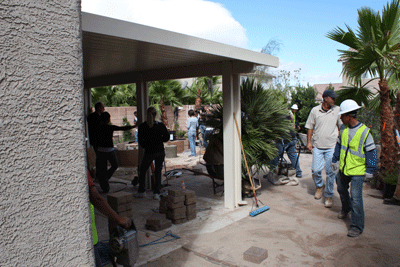
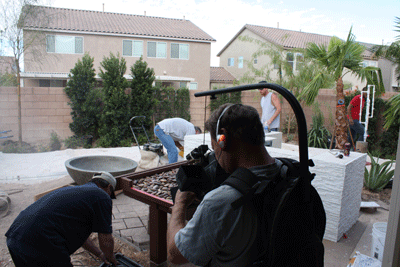
Las Vegas Yard Crashers 12

Las Vegas Yard Crashers 13

Above and below you can see outdoor kitchen. The trough coming out is actually water fall spilling into a dry creek bed below. The water feature was covered with a glass top making it a dining area as well. On the inner wedges they wrapped rope lights to accent the water and rocks under the glass top.
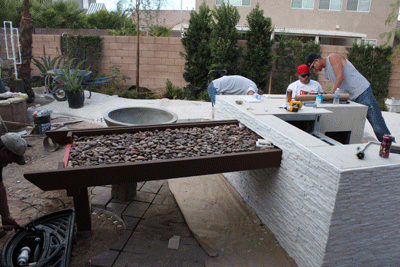
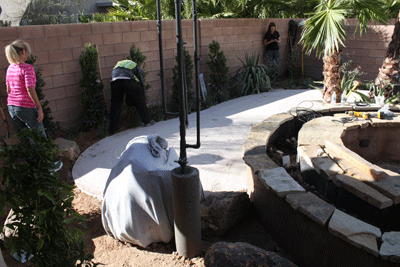
Las Vegas Yard Crashers 14

Las Vegas Yard Crashers 15

Above and below you can see the sand was installed as a base for the artificial grass to come.
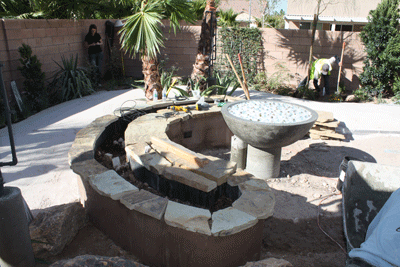
Las Vegas Yard Crashers 16

Las Vegas Yard Crashers 17

Above they are compacting the sand for the grass to be installed.

Below Ahmed is finishing the dry creek bed.
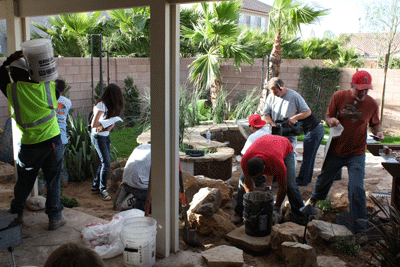
Las Vegas Yard Crashers 18

Below the grass is installed.

Las Vegas Yard Crashers 19

Below the dry creek bed is finished and the grass is now installed in the back are as well.
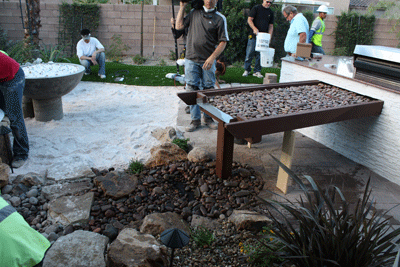
Las Vegas Yard Crashers 20

Las Vegas Yard Crashers 21

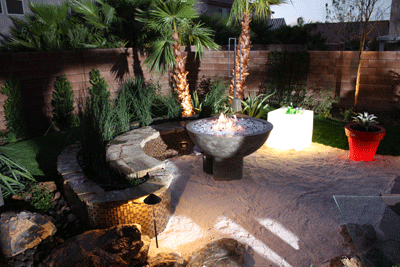
Above is our fire bowl on propane. We used Starfire base glass with Ice and Diamonds on top. We brought out several colors of diamonds for the customer to pick and choose bur she liked them all so much, she installed every last one!
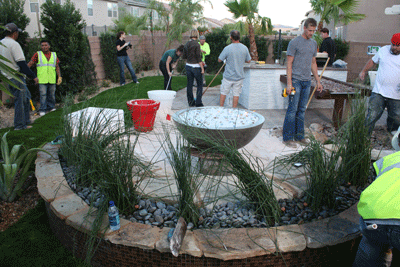
Las Vegas Yard Crashers 22

Below you can see after everything was cleaned up how spectacular it turned out!
Las Vegas Yard Crashers 23

Las Vegas Yard Crashers 24

Las Vegas Yard Crashers 25

Las Vegas Yard Crashers 26a

Las Vegas Yard Crashers 27

Las Vegas Yard Crashers 28

We are to feature several more episodes with Yard Crashers and we will be showing several more of our new product lines on their shows.  We still have several shows we need to post pictures of what we did. Please come back from time to time to see our latest updates.

I thank Ahmed and the producers of the Yard Crashers for giving us the opportunity to work with them.

Thanks to Tiffany, Krystal and Holly at the Idea Factory!

Idea Factory produces Yard Crashers for the DIY Network

"Click HERE for the DIY Network/ Yard Crashers Site!"


_____________________________________________________________________

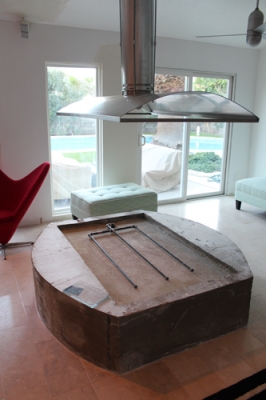
CLICK HERE or on the PICTURES below to see how this became what it is today!
Palm Springs Indoor Fire Pit

Palm Springs Indoor Fire Pit
_____________________________________________________________________

The fireplace below belongs to Todd. As you are going to see one great before and after transformation.

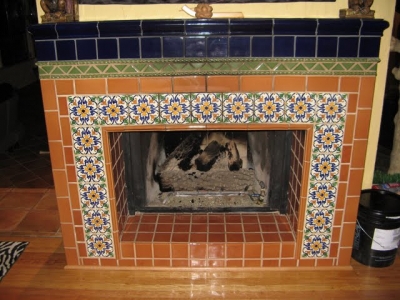
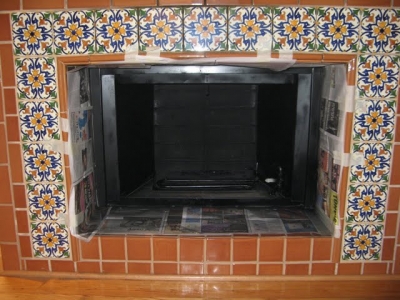
He used an 1/8" Clear base with Starfire on top. Then he added Red R Topper, Black Luster Topper and a few Clear Diamonds.
TODD SURLOFF 1

TODD SURLOFF 2

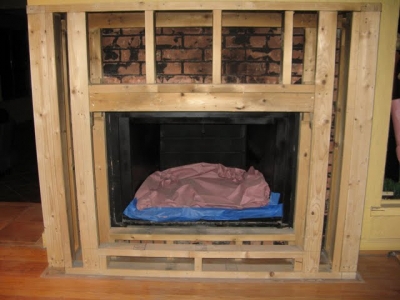
Out with the old and in with the new!
TODD SURLOFF 3

TODD SURLOFF 4

TODD SURLOFF 5

TODD SURLOFF 6

TODD SURLOFF 7

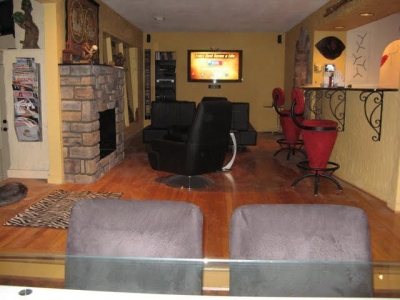
We would of liked more pictures of it burning but Oh Well!
TODD SURLOFF 8


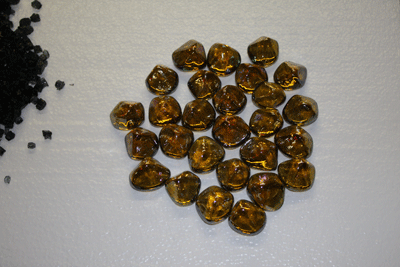
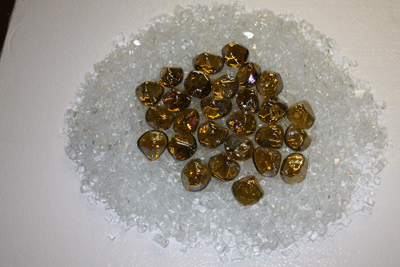
Below is a collection we took pictures for our customer to decide on which base to use under the Amber Diamonds.

Amber Diamonds alone
AMBER DIAMONDS ALONE

Amber Diamonds on Black Base Glass

AMBER DIAMONDS ON BLACK

Amber Diamonds on Starfire Base Glass
AMBER DIAMONDS ON STARFIRE

Amber Diamonds on New Yellow Base Glass
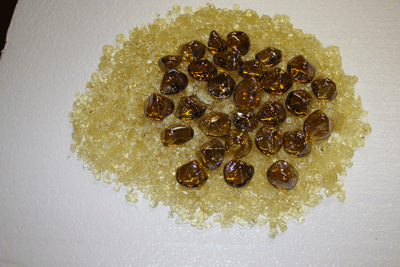
AMBER DIAMONDS ON NEW YELLOW

Amber Diamonds on Bronze Base Glass

AMBER DIAMONDS ON BRONZE

The same product can be displayed thousands of ways. What do you want to see? Our Diamonds are made with a convex base so when you look at the Diamonds in the fire they seem to be melting on the inside, like looking into a spoon. We cause it to reflect backwards. Visit out "Diamonds Page" to see many more colors!


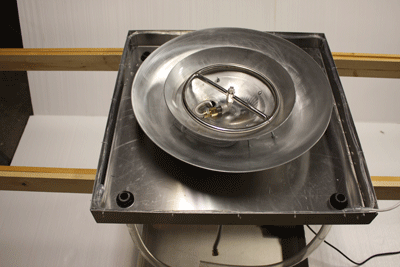
The fire pit below is going to be installed in Sacramento on 11 14 09 for the Yard Crashers/ DIY/ HGTV show. After it is and has been installed we will post pictures on the Yard Crashers page. In the mean time here is the how to and why. We can build any size, shape, design feature you desire. We build to your imagination.

Below is the catch basin to hold the water for the feature
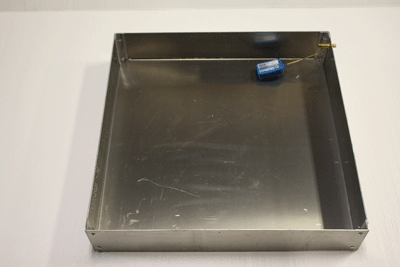
 

DIY PAN 1

Above you see the auto fill?

Below the water pump is now install below.
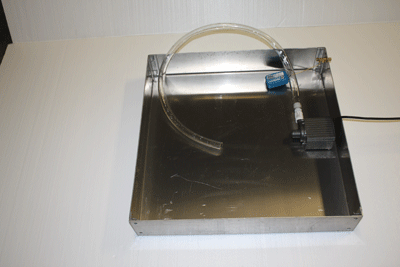
DIY PAN 2

Below the top pan is in place for testing with the fire and water bowls in place
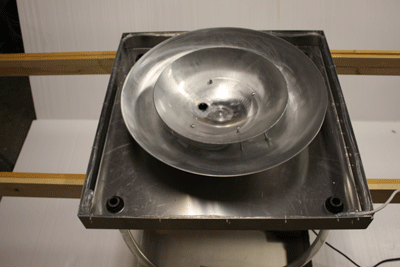
DIY PAN 3

DIY PAN 4

Below the stainless steel ring is installed.
DIY PAN 5

Below the glass (Bronze Base Glass) has been installed and the lights turned on.
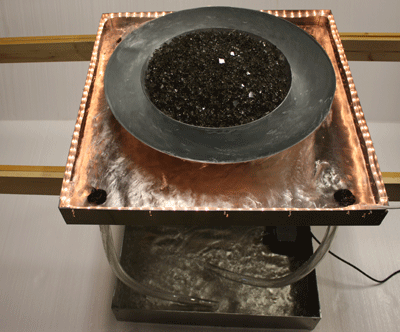
DIY PAN 8.

Below you can see the pump has been turned on.
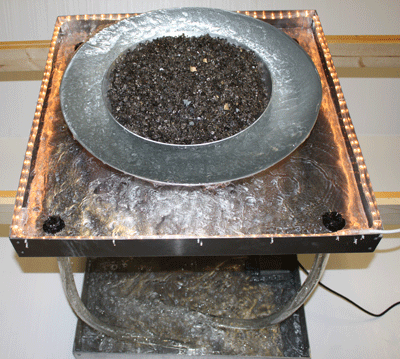
DIY PAN 9

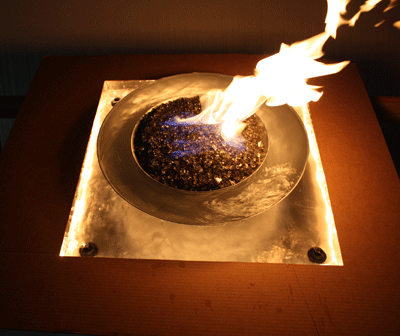
and now the fire.

DIY PAN 10

We placed a card board template to replicate the table top to conceal the lights as well.
DIY PAN 11

Now we add color to the water!

DIY PAN 12

DIY PAN 13

Here is the feature exposed with the blue water. You can change the water to any color you like.
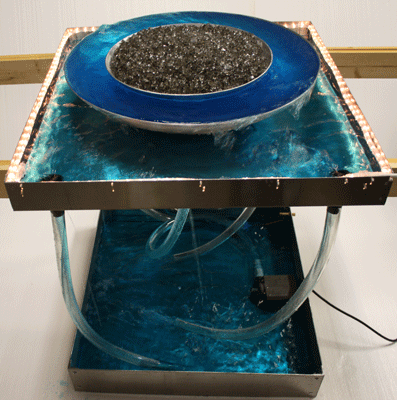
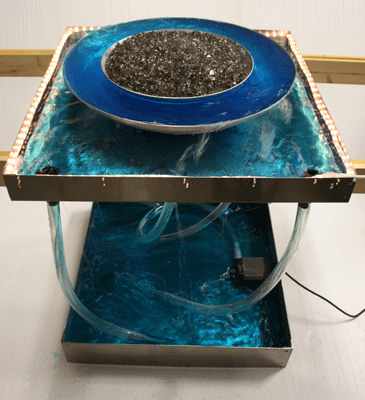
DIY PAN 14

DIY PAN 15

This feature is only 6 1/2" tall. You can mount this under the table top and keep it only an inch or so above the surface of the table top.
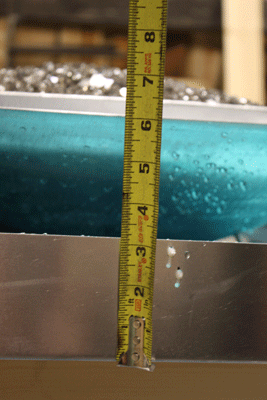
DIY PAN 16

So let's change it to red water and add Starfire Base Glass.
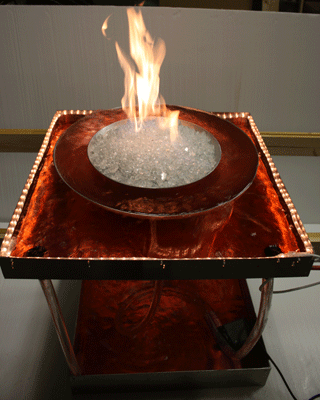
DIY PAN 17

DIY PAN 18

DIY PAN 19

DIY PAN 20

DIY PAN 21

Remember, we build to your imagination!
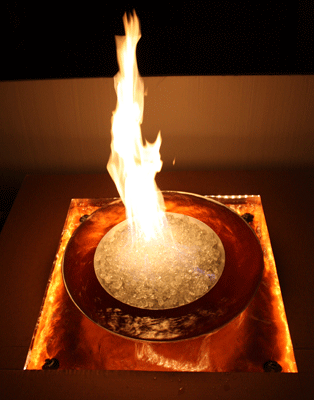
DIY PAN 22

The finished pictures will be posted on the Yard Crashers page when this project is installed after 11 14 09!


"CLICK HERE to see the "Yard Crashers" Sacramento show!" See this feature finished here!


Do it yourself fireplace remodel made easy, or at least it seems that way.

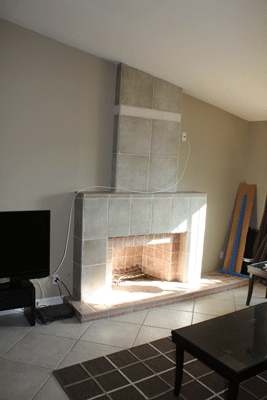
First, the tile that was installed is not rated for fire. This tile would of popped off as soon as the fire was turned on. So do a little research before you begin. We can help in many ways, just call and ask.
Christy's Fireplace 1

It may have of seemed to be a good idea at the time, but it wasn't!
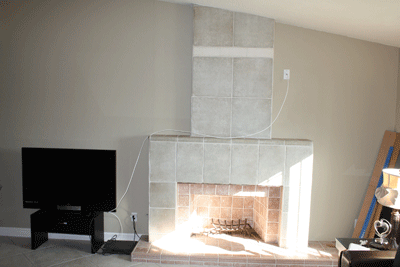
Christy's Fireplace 2

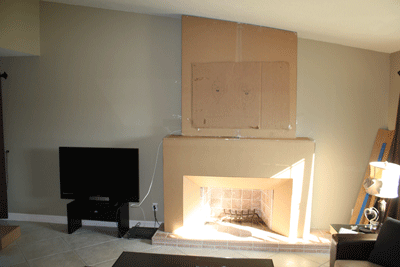
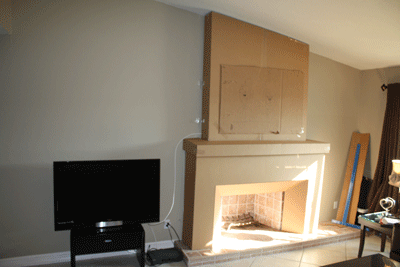
When redesigning a fireplace we suggest card board mache'. A card board board mock up so you can see a basic preview of your project.
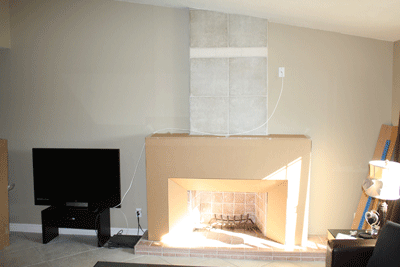
Christy's Fireplace 3

Christy's Fireplace 4

Below you can see the bottom, top and mantle in card board.
Christy's Fireplace 5

Christy's Fireplace 6

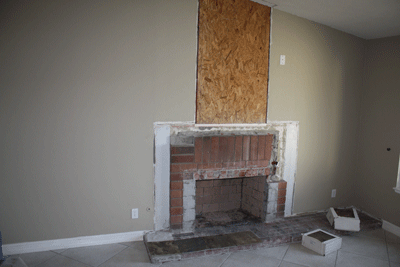
Now the rip and tear process begins!
Christy's Fireplace 7

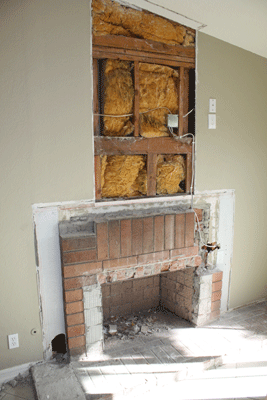
Below we installed the extra electrical for the components and the TV. The components will be installed on the right side out of view with a black glass door. This will be installed later.
Christy's Fireplace 8

Below the framing begins.

Christy's Fireplace 9

Christy's Fireplace 10

Below we now added the Durock at the fireplace opening. This is key to the whole project. Math is very important when doing these layouts!
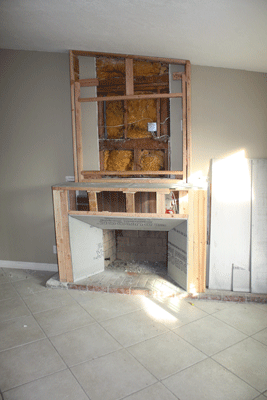
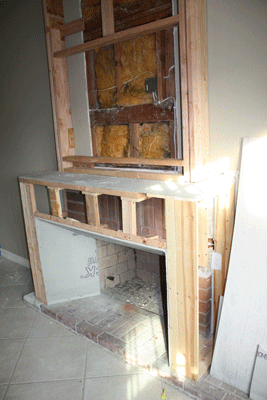
Christy's Fireplace 11

Christy's Fireplace 12

Christy's Fireplace 13

Christy's Fireplace 14

Christy's Fireplace 15

Below you can see the slate is being added.
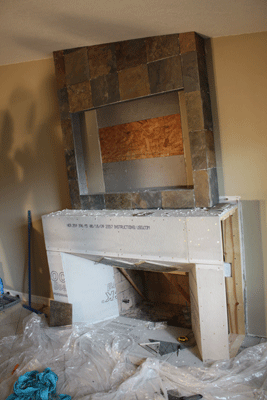
Christy's Fireplace 16

Christy's Fireplace 17

Christy's Fireplace 18

Christy's Fireplace 19

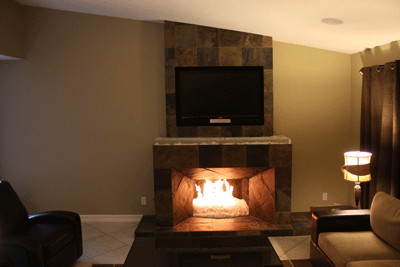
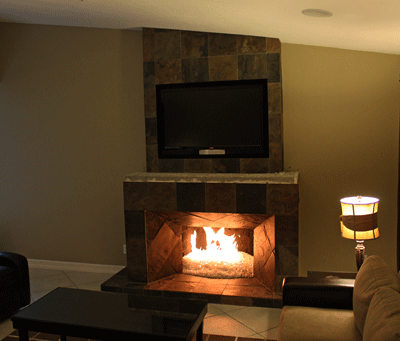
Above and below the fireplace is 90% finished. The mantle needs to be installed and the door on the right to conceal the components needs to be installed as well. The inside of the fireplace will have 3 pieces of black galaxy granite installed. We will post these pictures of the fireplace when it is completely finished as well.
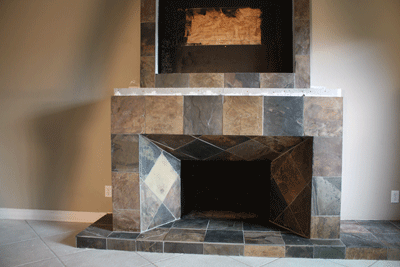
Christy's Fireplace 20

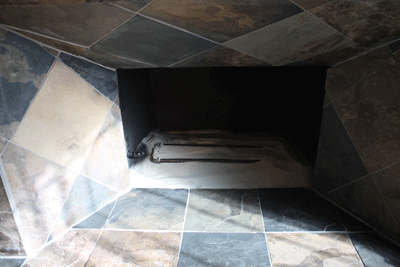
Now for the glass installation. We started with a satin black paint on the back walls, until we install the granite.  Then we bulked up the base with 2" of white sand as this will save you a bunch of money! We used sand because we were pouring Starfire base glass in the fireplace. If we were to use a darker color of glass we would of used our crushed lava rock as a filler. When using sand, always make sure the burner is on top of the sand.
Christy's Fireplace 21

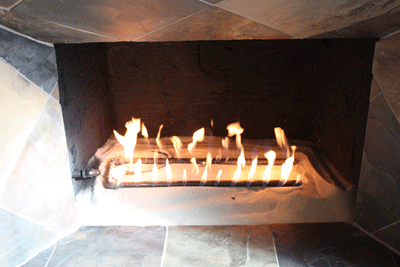
Test the burner/ location making sure the flames don't hit the walls.
Christy's Fireplace 22

Christy's Fireplace 23

Then pour the glass!

Christy's Fireplace 24

Christy's Fireplace 25

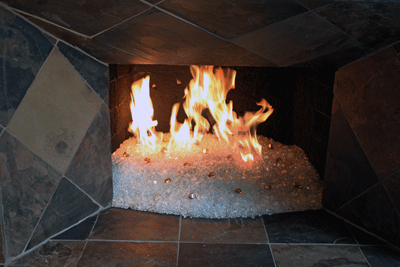
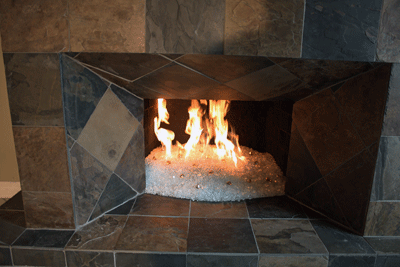
We added a few pink diamonds and then later added Ice Ice Ice and Clear Diamonds. These products because of the way they are made appear to be melting on the inside.
Christy's Fireplace 26

Christy's Fireplace 27

Christy's Fireplace 28

Christy's Fireplace 29

The sealer that was used was a stone enhancer, not just a regular cheap sealer. When using rock you always want to see the beauty of the stone you are using.
Christy's Fireplace 30

Christy's Fireplace 31

Christy's Fireplace 32

As you can see the mantle is still missing. We have a few more details to still do and as soon as we have time to post the pictures, they will be here.

We encourage imagination to all of our customers and we support you and your projects. Regardless how simple or how creative. This is one of the elements that spawned our success and continues to do so.


Kentucky Fireplace Remodel

The next fireplace was built by Dave Luerman in Kentucky and you will now see his before and after also using a base of Starfire base glass.

Below you can see where it all began. Dave is one very creative customer.

Luerman 1

The fireplace that was replaced was very nice but just met the needs of Dave.

Luerman 2

Out with the old and lets frame up the new.

Luerman 3

Luerman 4

Luerman 5

Add the durock panels.

Luerman 6

Luerman 7

Luerman 8

Frame the Hearth

Luerman 11

Luerman 10

Luerman 12

Install a triple 24" burner.

Luerman 13

Luerman 14

Luerman 15

Luerman 16

Luerman 17

Luerman 18

Add Starfire base glass and you're done.

Luerman 19

The fireplace below is from Steve Calderon and he used a Starfire base glass with Gold and Bronze Rust Copper on top.

This is from beginning to end.
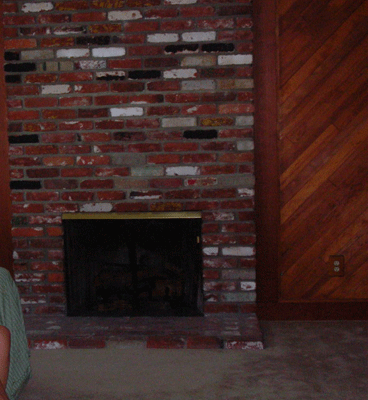
Calderon 1

Above is the before believe it or not. As you can see Steve did a terrific job. This was a wood burning fireplace before. he installed a gas line and control valve on the right side.
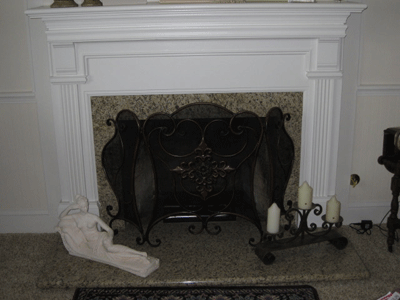
Calderon 2

Calderon 3

Below you can see the old burner which we replaced with the new double 18" burner.
Calderon 4

Calderon 5

Calderon 6

Calderon 7

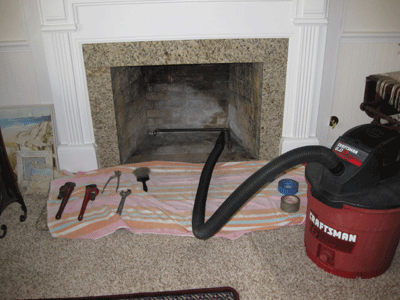
Mask it, vacuum it after wire brushing the walls clean.
Calderon 8

Calderon 9

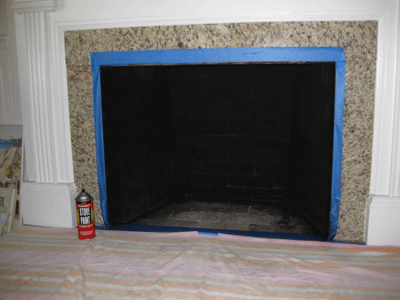
A bit of Thermolux 1200 degree high heat paint.
Calderon 10

Fireplace Glass used:

Pour in a Starfire base with a splash of Gold and Bronze Rust Copper on top.
Calderon 11

Calderon 12

.Calderon 13

Calderon 14

Then you have one nice fireplace, great job!
Calderon 15

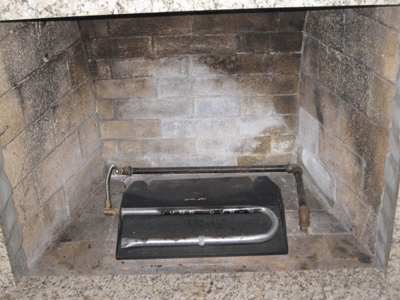
The fireplace below had a few issues, but easily repaired. Be sure to not let this happen to you! If anyone tries this type of installation, stop them and throw them out!  This fireplace installation was in Palm Springs California. It was done with the 2" method which is fine except for the burner the fireplace shop installed. We will explain as we move forward and show you the finished fireplace.

Below is what we saw when we arrived.
Palm Springs 4

Then we tested the burner we were to replace, oh my!
Palm Springs 5

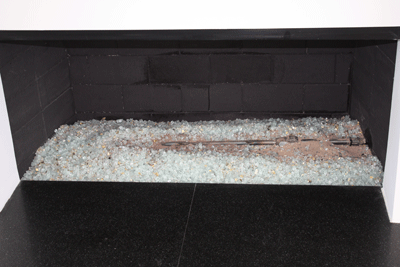
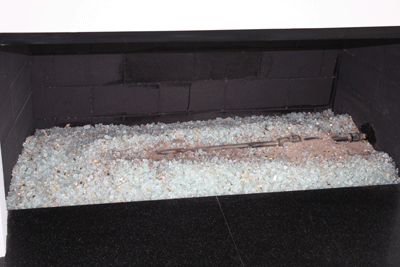
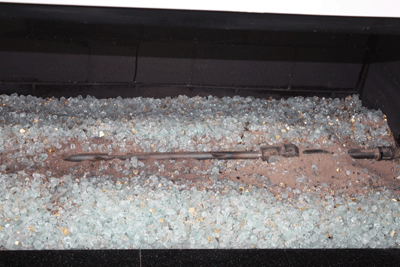
We uncovered to see what was installed and found a single pipe burner. Great Flame! Another issue was the paint job was hideous which was later repainted. Don't let these ignorant installer tell you their stories. They told the customer the paint would dry to match.
Palm Springs 1

We do approve of a sand filler indoors under lighter colored glass, but the burner must be on top!
Palm Springs 2

Palm Springs 3

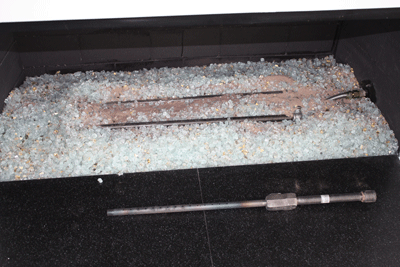
Now we installed a double burner and just watch!
Palm Springs 6

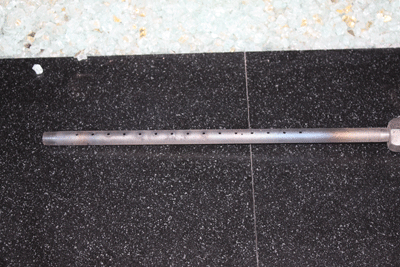
Below is what they pawned off on the customer, DON'T LET THIS HAPPEN TO YOU!
Palm Springs 7

Palm Springs 8

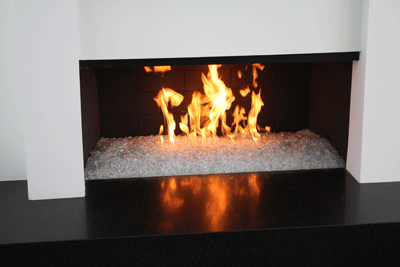
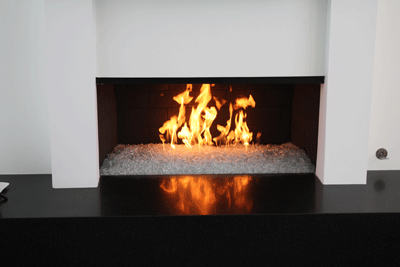
Much better. Then we took several pictures of the fireplace just because! We did top it off with about 15 lbs of Starfire to help hide the sand that was exposed and it worked out just fine.
Palm Springs 9

Palm Springs 10

Palm Springs 11

Palm Springs 12

Palm Springs 13

Palm Springs 15

Palm Springs 16

Palm Springs 17


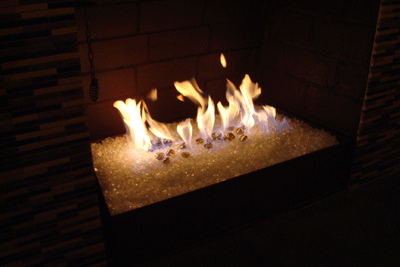
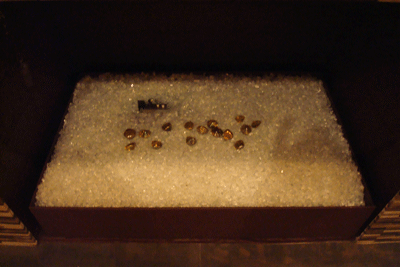
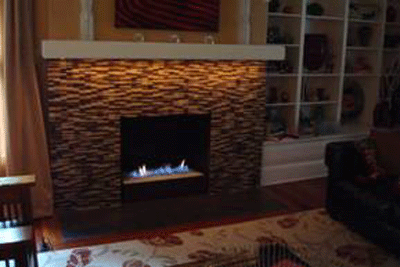
The fireplace below has a steel pan underneath to conceal the 12 volt remote control. We used a Clear base glass and topped it with a Starfire base glass and then added Amber Diamonds on the surface.
Jim Malless 1

Jim Malless 2

Jim Malless 3

You can see the front plate that was painted to match which is removable if and when necessary to change the batteries. The legs were 4 1/2" and the pan was 2" tall. The removable front metal curtain was 6 1/2" tall.
Jim Malless 4

Jim Malless 5


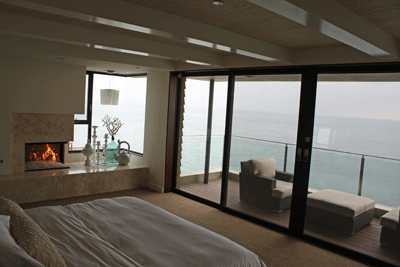
The next fireplace were installed in Malibu California. The master bedroom was on the third floor. We did a little paparazzi photo shoot while we were there. The glass we installed was 1/4" Starfire base glass.
Malibu 7

Malibu 6

Malibu 5

Malibu 8


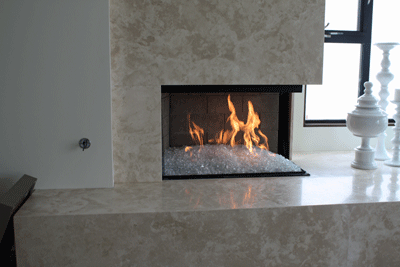
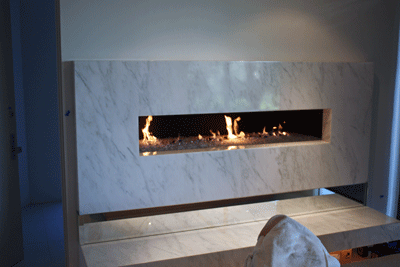
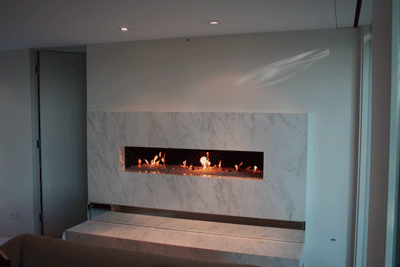
The fireplace below is in Beverly Hills California. We used a Starfire base glass with Clear Diamonds and Black Luster Topper.
Rosen 7

Rosen 8

Rosen 9

Rosen 10


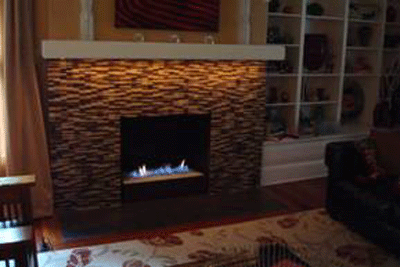
The fireplace below had a steel pan built so we could conceal the 12 volt battery operated electronic ignition

beneath the pan. The glass that was installed was:

Clear base glass under the Starfire base glass Topped with Amber Diamonds.
Jim Malless 1
Jim Malless 2
Jim Malless 3
Above and below you can see the solid cover as it hangs over the face to conceal the remote control ignition.
Jim Malless 4
Jim Malless 5

The fireplace below is in Palm Springs California. We used Starfire base glass over a 2"
 bed of sand. We will narrate as we go:

Here is the fireplace with the screen removed
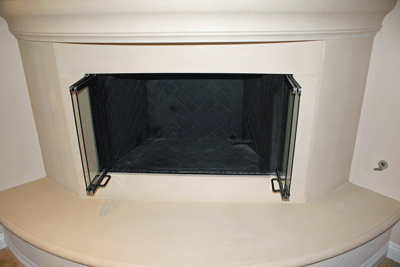
Palm  Springs Install 1

Palm  Springs Install 2

Now we remove the doors, very simple. One screw on each side at the top generally removes the doors.
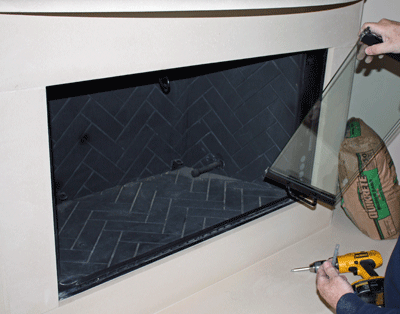
Palm  Springs Install 3

Below, remove the end of the flex line and screw it on to the stub out coming out of the wall.
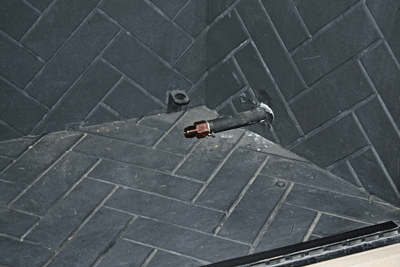
Palm  Springs Install 4

Below, now attach the flex line from the burner to the stub out. Keeping the flex line curled under the burner.
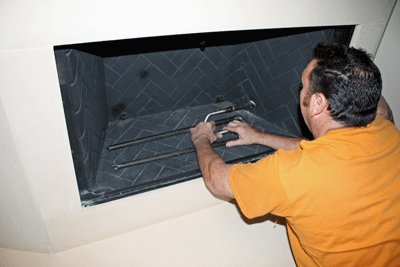
Palm Springs Install 5

Below, pour in as much sand (on lighter colors) as you would like to raise the glass bed.
Palm  Springs Install 6

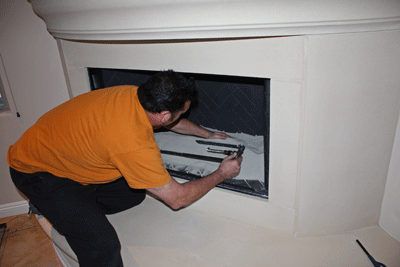
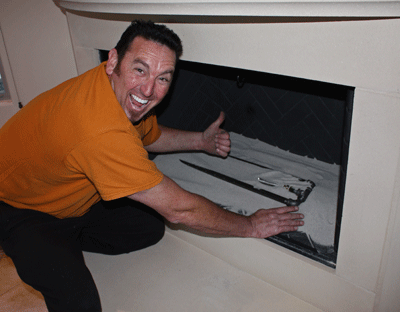
Look how easy! Even my installers can do it! Bring th burner to the top of the sand so it can operate properly. With crushed lava you can keep the burner below the surface. Keep your sand/ lava at least 3" to 4" away from the front!
Palm  Springs Install 7

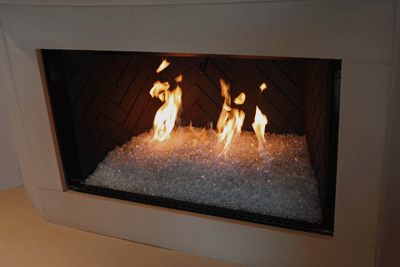
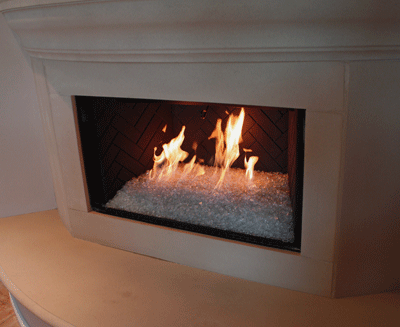
Pour the glass and you're done! Our typical install where we don't have to paint is about 12 minutes!
Palm  Springs Install 8

Palm Springs Install 9

Palm Springs Install 10

Looks awesome!

Palm  Springs Install 11
                                                                                                                                                   
The 2 fireplaces below are
 Claremont California.
We installed Starfire base glass in each of them and then the customer ordered Ice Ice Ice and diamonds to accent each fireplace.  Very nice stone work!
Claremont 1
This is the living room fireplace and we poured about 3" of sand under the Starfire base glass. We used a 44" "H" burner under the Starfire.
Claremont 2
Claremont 3
Claremont 4
Claremont 5
Claremont 6
Claremont 7
Claremont 8
Claremont 9
The family room fireplace was filled with about 8" of sand under the Starfire base glass. We installed a 38" "H" burner on top of the sand.
Claremont 10
Claremont 11
Claremont 12


The fire pit below was purchased locally and then we converted it to burn propane without soot! The colors used were:
Starfire Base Glass,
and topped with 1 lb of Copper Ruby Red Topper. I guess he wanted a lot of color.
James 2
Here is what is looked like when he started. These manufactures have no imagination!
James 3
James 4
This only cost about $100.00, complete!
James 1

The fireplace below is typical wood burning fireplace which we see every day. Once uncovered it looks like an incinerator. They are pretty nasty looking with out the fire burning. We like to show the before and after so you know what you really have.
Steve 1

Nice! Very Nice!

Steve 2

We had Starfire base glass installed with Ice Ice Ice on top.
Steve 3

Steve 4

Steve 5

Steve 6


The fire pit below has a Clear Base Glass with  Starfire Base Glass and 1/2" Starfire Base Glass, Yellow Amber Topper. Cobalt Blue Topper and Emerald Green Topper and a little bit of ICE ICE ICE Topper. The earth as the back yard and a lot of friends, wow!
This next fireplace was done with lack of knowledge! First they installed a 18" single burner and some real interesting choices of glass. What they did do correct is have a 3" sand bed under their yuk glass. The first issue we repaired was the stub out on the left side of the fireplace floor. All we did was install a 90 degree elbow and connect a 1/2" flex line to the new double 24" burner. They had left the flex pointing in the air and then reduced it to a 3/8" line and to top that off added they very sad single 18" burner. We repainted their futile attempt (of painting) with dark metallic brown, added 10 lbs of sand and poured 75 lbs of Starfire base glass over the new burner and sand filler. We will explain as we move forward:

PS Convert 1

PS Convert 2

Below you can see the black marks under the paint.

PS Convert 3

Below you can see the flex line that was installed was left above the surface. Now if we tried that I think our customers would take us out and string us up, what do you think? To top it off this customer was an attorney! Completely happy with what we did.

PS Convert 4

Here is the new paint on the back walls.

PS Convert 5

Now we added the Starfire base glass. One thing we have been doing a little bit different is to bring the glass out from the front of the fireplace. We let the glass come out of the fireplace from 3 to 6 inches to make it look even more grand. What do you think?

PS Convert 6

PS Convert 7

PS Convert 8

Here is a the almost finished product of what we do! We left several colors with the customer to add. We will post pictures when they arrive.

PS Convert 9

Below are teh finished pictures of what else was added:

Yellow Amber,

Ice Ice Ice,

Clear Diamonds,

Fuchsia Topper,

Purple Topper,

Red R Topper,

Roma Red Topper

I think it turned out very colorful! Check it out!

Joan Sklar 1

Joan Sklar 2

Joan Sklar 3

Joan Sklar 4

Joan Sklar 5

Joan Sklar 6
The fire pit below was installed in Sydney, Australia by Ian Sutherland. He did a great job on his new patio and fire pit. We inspired him to build this really nice back yard project and we were glad to help. The glass that was used was Azurlite and Starfire base glass.
Australia 11
Australia 11
Australia 10
Australia 8
Australia 6
Australia 5
Australia 3
Australia 2
Australia 1
The fireplace pictures below show the before and after from Bob Kobus. The glass that was used is:
Starfire base glass and Ice Ice Ice, Very nice, contemporary and simple!
Let's go from start to finish:
Bob Kobus 1
Nice Logs! NOT!
Bob Kobus 2
Bob used an aluminum brick metalized panel.
Bob Kobus 6
Then they did their grind pattern.
Bob Kobus 7
And here you have it finished!
Bob Kobus 4
Bob Kobus 5
Yes the logs will be leaving very soon!
Bob Kobus 8
Starfire and Ice.
Bob Kobus 9
Bob Kobus 10
Much better, don't you think?
Bob Kobus 11
                                                                                            

The next fireplace has quit a mix! Fred

 Pollakov decided on these colors:

Starfire base glass,

Bronze Rust Copper base glass mixed in,

Gold Reflective base glass,

Azurlite base glass,

Cobalt Blue Diamonds,

Amber Diamonds,

Caribbean Blue Cubes!.

The fireplace looks outstanding! There is a glass sculpture in the center which and is amazing!

Fred Pollakov 5

Fred Pollakov 4

Fred Pollakov 3

Notice the 3" tall 1/2" thick front screen at the bottom! Pretty amazing!

Fred Pollakov 2

Fred Pollakov 1


The next fireplace was installed by Brian Cooper. The glass that he installed is:

 Starfire base glass,

Bronze Reflective base glass

and

Emerald Green Topper.

Brian Cooper 1

Nice, huh?

Brian Cooper 2

2" method, sand base for lighter colored glass.

Brian Cooper 3

Brian Cooper 4

Brian Cooper 5

Brian Cooper 6


The next fireplace was installed by Jim Esposito in Palm Springs California. There used a larger variety of color and it shows wonderfully!
The installed:
1 pound each of
all over a bed of Starfire base glass.
Jim Esposito 2
Jim Esposito 1
Jim Esposito 3

Jim Esposito 4


The next fireplace

 ventless conversion was from Eric at Neutral Interiors.

We built a pan to recess into the floor of the fireplace and to access the controls Eric cut a hole on the left side of the fireplace for easy access in the event it had to be reset or turned off.

We will explain as we move on:

The lower hole is the access hole.

Neutral Interiors 5

Neutral Interiors 6

Neutral Interiors 7

Neutral Interiors 2

Neutral Interiors 11

Neutral Interiors 12

Neutral Interiors 13

Simple, clean and finished! He installed Starfire base glass.

Neutral Interiors 14


Starfire and Olive Green Topper taken with the flash on
Starfire Olive Green Flash
Starfire and Olive Green Topper  taken with the flash off
Starfire Olive Green No Flash
Solex and Olive Green Topper taken with the flash on
Solex Olive Green Flash
Solex and Olive Green Topper taken with the flash off

Solex Olive Green No Flash


Starfire w/ dark blue ED 1
Starfire w/ dark blue ED 2
Starfire w/ deep royal 1
Starfire w/ deep royal 2
Starfire w/ split dark 1
Starfire w/ split dark 2
Starfire alone and then we added 5 lbs or E.D. Diamonds
Starfire and Red ED 1
We laid this out on a 16" x 32 area to show the customer how much 5 lbs of E.D. Diamonds actually was.
Starfire and Red ED 2


Here are two different color combinations we were asked to send to a customer. We include flash from the camera and  no flash to show the variation of color. The first picture of each set has flash and the second has no flash.
Starfire Gold w/ flash
Starfire Gold no flash
New Yellow Gold flash
New Yellow Gold no flash


The next fireplace was installed by Kirk Lewis. He wanted a splash of matching colors and he got it!

He installed:
Bronze base glass,

Bronze Rust Copper,

1/4" Black base glass,

California Gold,

 Platinum,

1/2" Bronze base glass,

and 1/2" Starfire.

Kirk Lewis 6

Kirk Lewis 5

Kirk Lewis 3

Kirk Lewis 2

Kirk Lewis 1


The next fireplace has a Starfire base, Gold (15 lbs) 2 lbs of Ice ice Ice and 3 of our new 4" Black Porcelain coated Fire Balls! What went wrong was they left the screens on and the burner was not centered, very important!

I hope she removed the screen centered the burner...

Traci Watson

Traci Watson

Traci Watson

Traci Watson

Traci Watson

Now it looks nice!

Traci Watson

Traci Watson


The next fireplace was a self installation by Chris in Palm Springs California. He used about 3" of a sand base under the Starfire base glass. Then he added:
Here we go:
Chris Paul
Chris Paul
Chris Paul
Chris Paul
Chris Paul
Chris Paul
Chris Paul
Chris Paul
Chris Paul
Chris Paul


The next pan is a stainless steel pan we manufactures for our customer in Hawaii. The system that was install was a ventless burner to burn propane with our glass. We will explain as we go forward.
Mary Ellen Markley Hawaii
On the front of the pan we we bend an open back hemmed stainless steel curtain to conceal the controls but it is still easy access.
Mary Ellen Markley Hawaii
This is the ODS (Oxygen Depletion Sensor) it speaks for its self.
Mary Ellen Markley Hawaii
Here we are burning propane with a Starfire Base glass, please note what a clean burn! We do it right.
Mary Ellen Markley Hawaii
All of our pans are built for each application and fireplace.


The next fireplace is in Tennessee and was installed by Rocky. Interesting fact, his house sits on the state line. When you go out of the back door you are in Mississippi!. We built a control / key box (now located in the front of the fireplace) to turn his fireplace on which he never had. Rocky installed a Starfire base and topped it with 2 lbs of Mixed Toppers.

There is about 4" of sand underneath.


The next fireplace was installed by Tracey Watson. She used a Starfire base glass, added Gold base glass, and topped it with Ice Ice Ice,  4" Black Terrra Cotta Fire Balls. Now for the bad part: Always test your burner to insure your flames are in the center and I recommend removing the screens. When you remove the screens, you may want to paint the interior, just a thought!

Off center burner

Off center burner

Off center burner

Off center burner

Off center burner

Off center burner

Off center burner


starfire-amber-no-fire

Starfire Base Glass with Medium Amber Topping on top

starfire-amber-orange-red-t

Starfire Base Glass with Red Topping, Orange Topping and Medium Amber Topping

starfire-amber-red-topping


The fireplace below has Starfire Base Glass, Rhubarb Topper, Gold Base Glass, 3/4" Starfire Base Glass  and Green Pyrite Base Glass.

dave 2

dave 3

dave 4

dave 5

dave 6dave 7

dave 8

dave 9

dave 10

dave 11

dave 1


The five pictures below are a Starfire Base Glass with Ford Blue Base Glass, Ford Blue Reflective Base Glass, and V Blue Reflective Base Glass

and as you can see most fireplaces start very drab.

kaylene 1

logs are now gone

below sand and lava rock are poured over the burner

kaylene 2

kaylene 3

kaylene 4

kaylene 5

The five pictures above are a Starfire Base Glass with Ford Blue Base Glass, Ford Blue Reflective Base Glass, and V Blue Reflective Base Glass


Larry Kraines Fireplace Surround

Larry Kraines Fireplace Surround


_________________________________________________________________________

Click HERE or on the picture below to see how this was installed!

Rosanne Rosanne Bandana Surround Mantle
And what was used

_________________________________________________________________________

1/4” Starfire “CLICK HERE TO SEE THIS PRODUCT IN THE E STORE!”

Ed@Moderustic.com 909 989 6129

9467 9th street Unit D

Rancho Cucamongs, California 91730
Moderustic Aquatic Glassel Fireplace Glass Rocks Propane Fireplaces