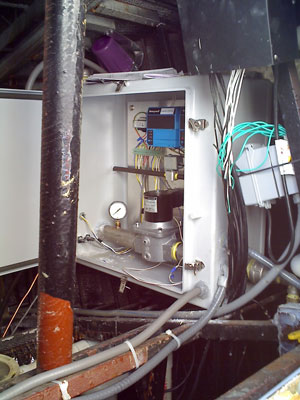
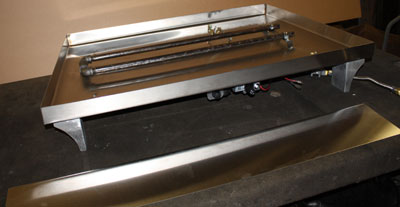
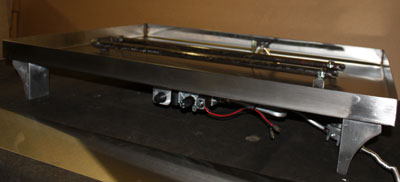
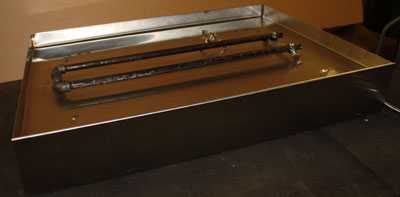
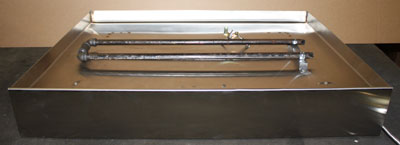
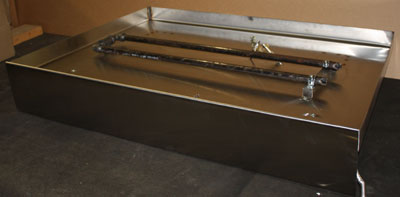
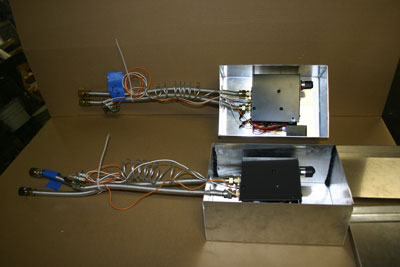
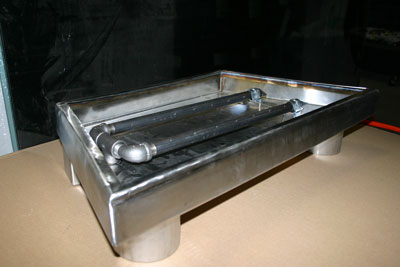
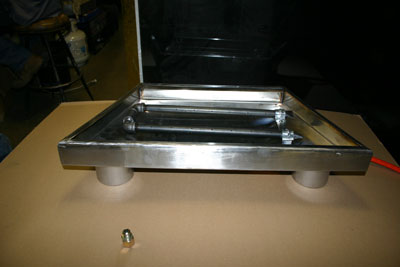
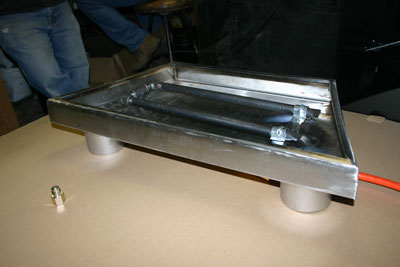
The two boxes below are our IPI battery operated electronic ignitions which are 100,000 BTU rated. The exterior boxes are for protection from the weather and keep the unit and batteries safe and dry. These are typically installed under the glass in a fire pit our doors under the glass or in a sub panel just like our 110 volt electronic 415,00 BTU units.
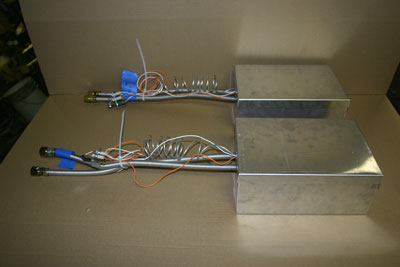
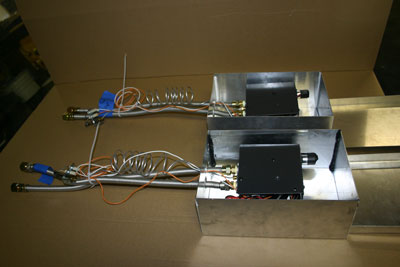
On the left you can see the gas lines, one in and one out along with a 60" IPI lead (Intermittent Pilot Ignition). This allows the ignition system to be 60" away from the flames if required.
_____________________________________________________________________
"CLICK HERE" to see how it was made or "CLICK on the PICTURE" below

_____________________________________________________________________
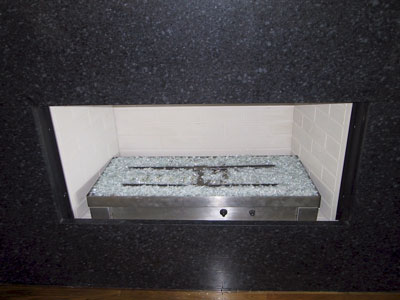
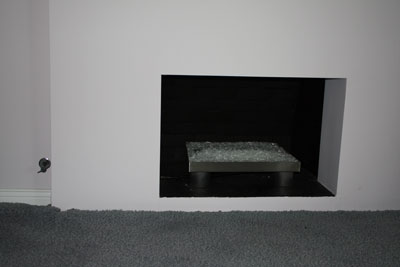
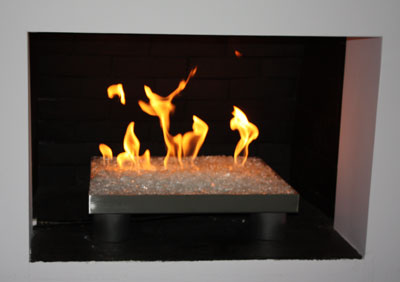
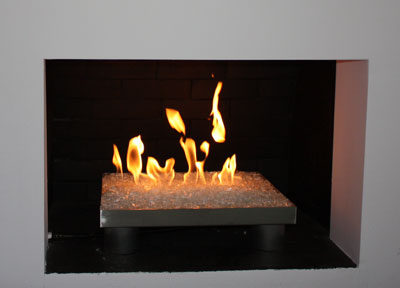
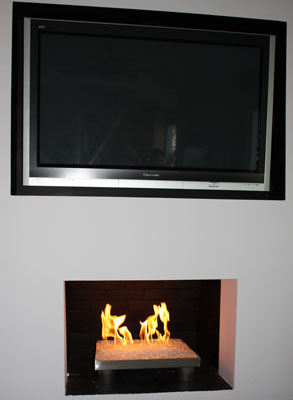
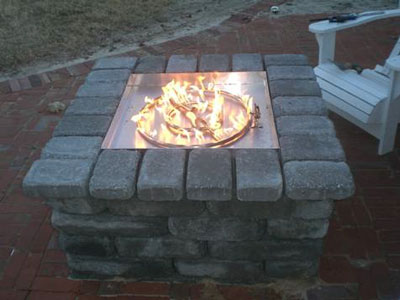
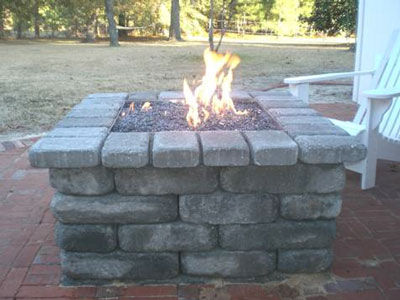
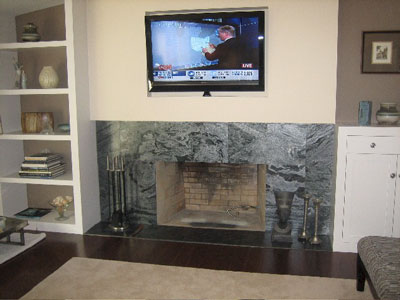
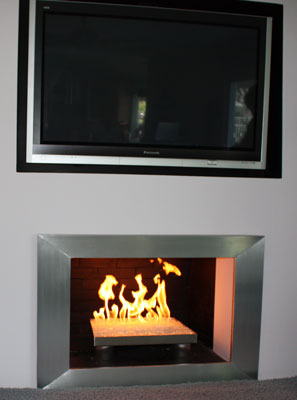
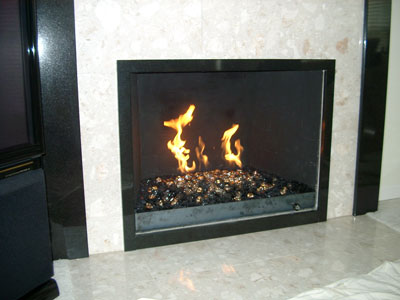
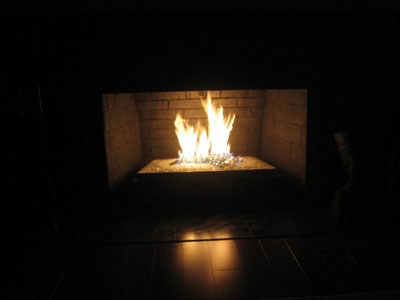
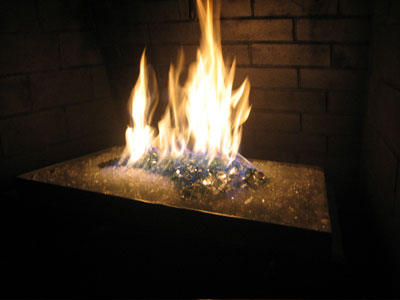
The fireplace below is the fireplace of "Bill" and he wasn't sure where the burners went. So he put them on top and as you can see he should of put them under the glass.
Bill ordered a rectangular pan and it would of looked better if we would of built a trapezoid shape pan to contour the fireplace. Bill did drop his burners under the glass. This was a propane ventless conversion. Looks much better than those log thingies! Hopefully Bill will send us pictures of it finished and burning, maybe. We used Starfire glass in the pan.

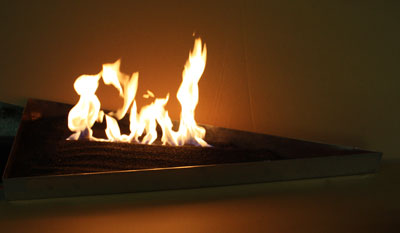
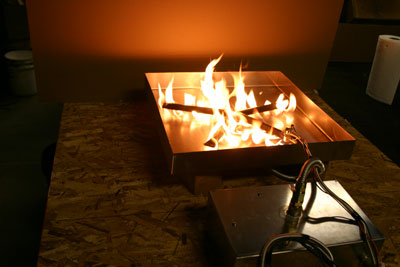
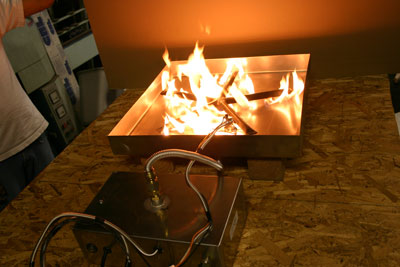
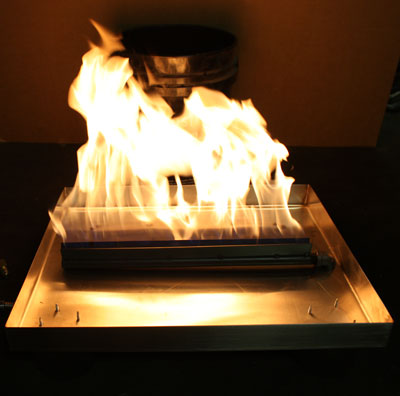
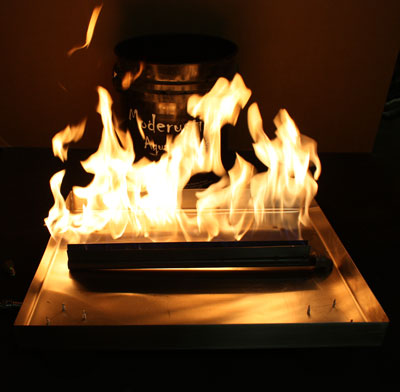
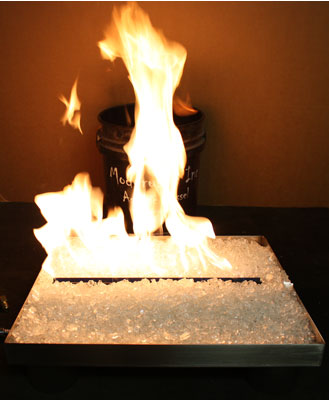
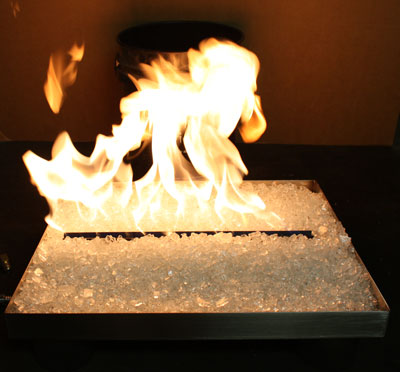
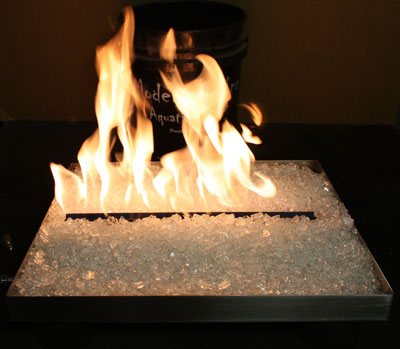
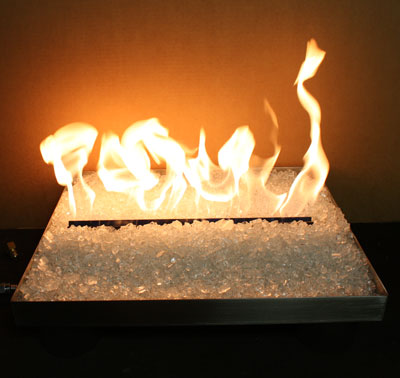
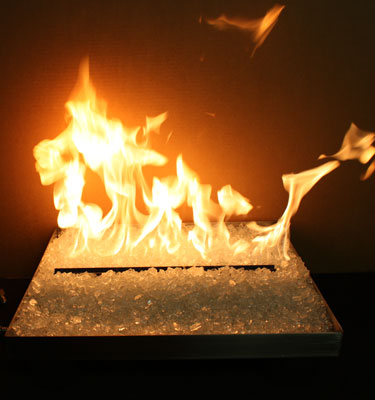
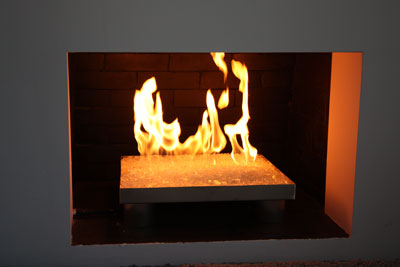
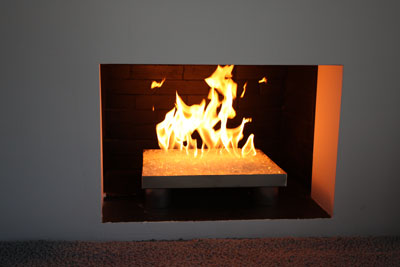
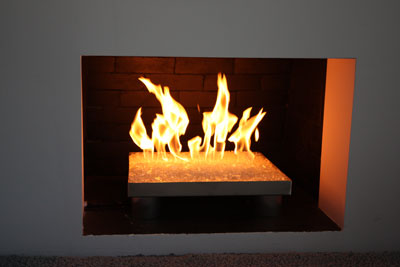
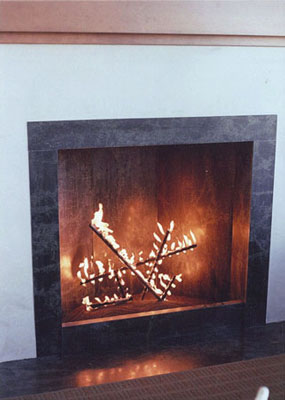
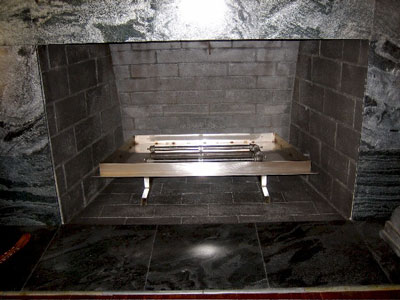
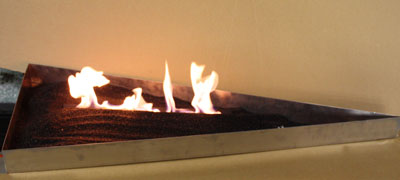
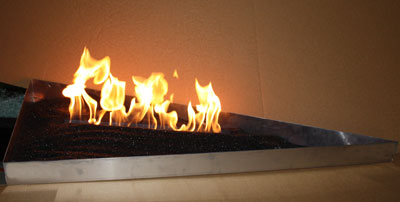
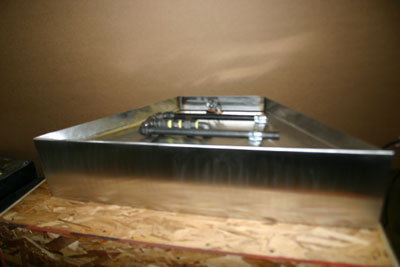
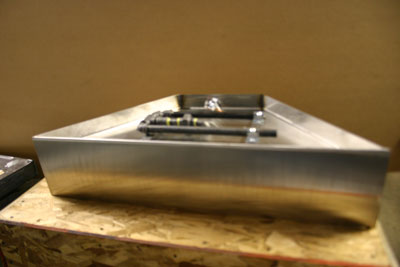
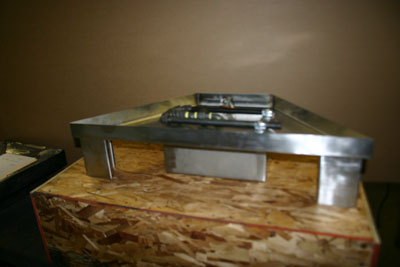
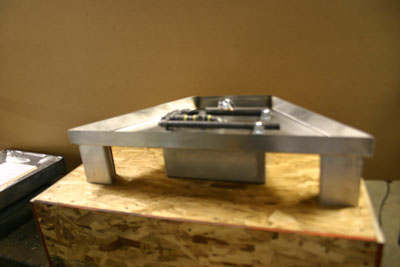
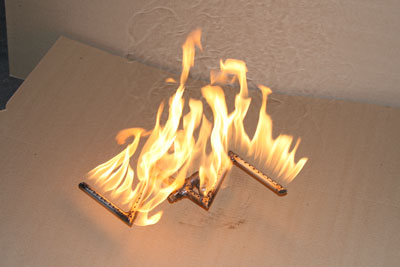
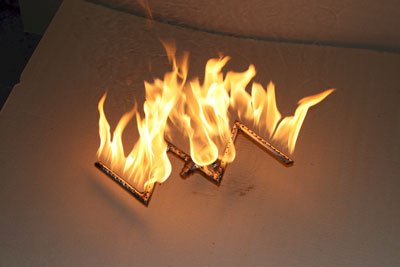
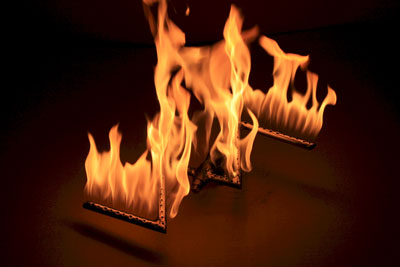
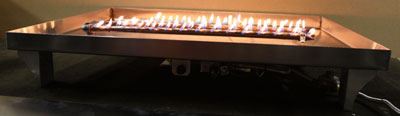
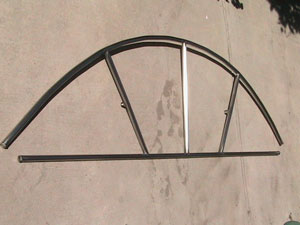
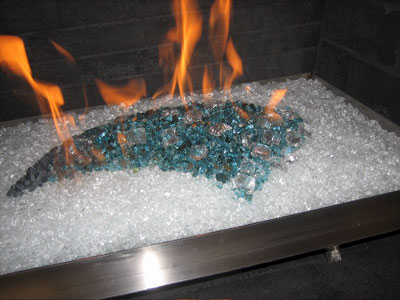
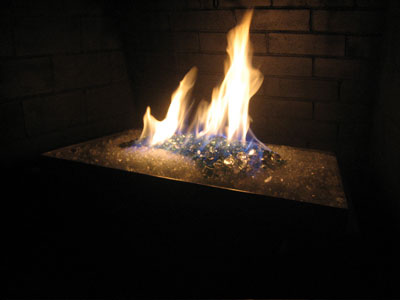
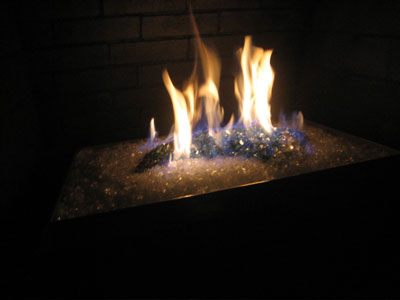
The next several pictures are of a 24" x 54" x 3 1/2" deep triangle pan with our first Ribbon Burner! It lays in a bed of black silicone carbide "Black Magic"
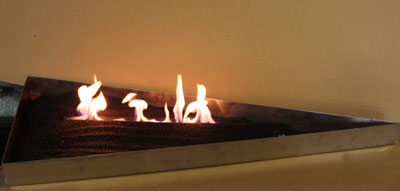
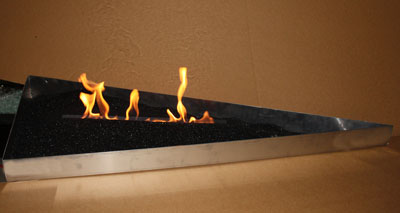
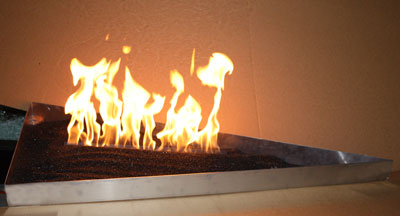
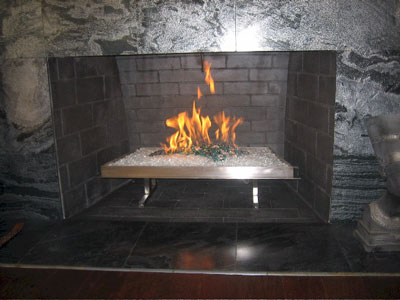
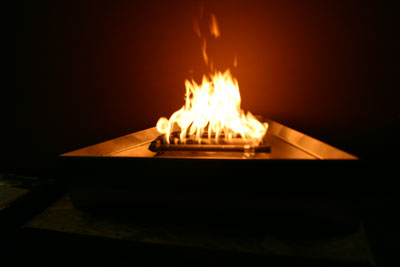
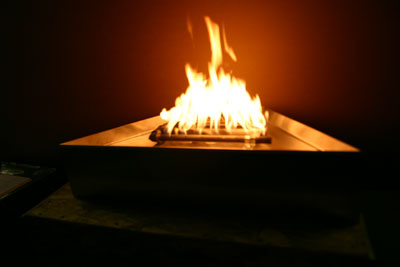
The flames measured 24" tall below! Because of the design we implied to this new burner they seem to be coming from nowhere!
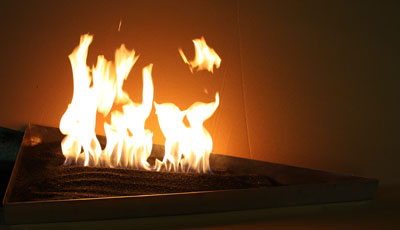
We didn't fill the pan with sand just because. These ribbon burners will be available very soon and we will post dozens more pictures as we have time to post them for you to see. The will be available in steel or stainless steel. With or with out a pan. This burner was built for another customer in Palm Springs for their fireplace and we will post pictures of it as well.
This pan will be installed in a custom table built by the customer in Palm Springs.
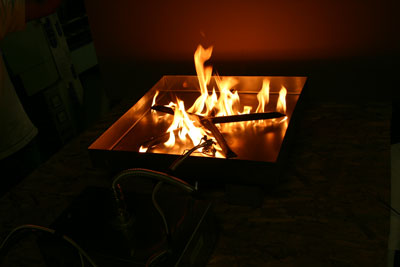
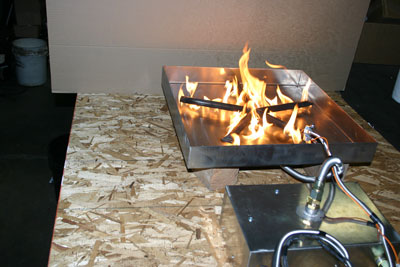
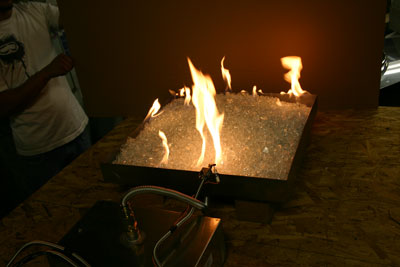
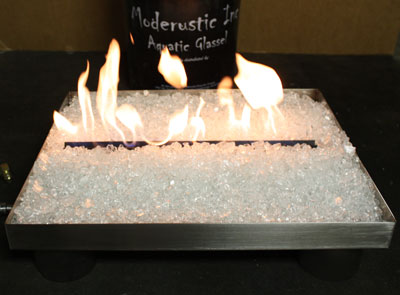
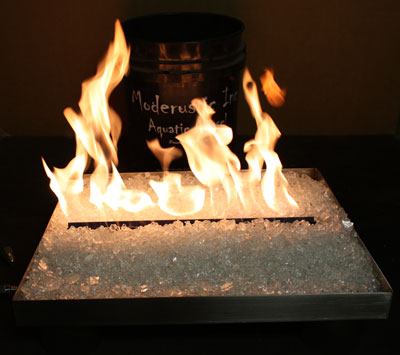
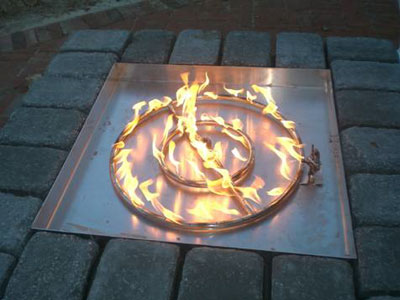
The stainless steel pan burner below has a 24" stainless steel star burner installed and it is connected to our 110 volt electronic ignition. This is a propane burner.
We then covered it with our starfire to test for soot and as you can see, a clean burn.
The pan below is a stainless steel pan with a 3/4" lip on top and it sits on 4" round brushed front legs. We will post pictures of the finished pan with glass when we get them.
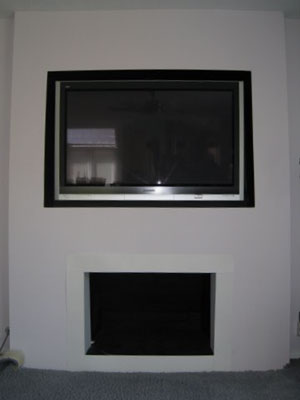
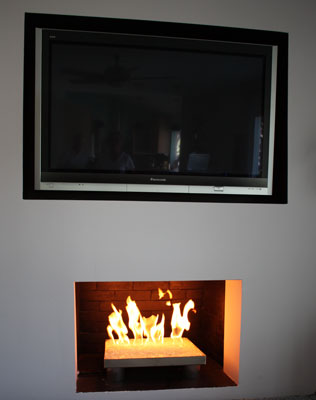
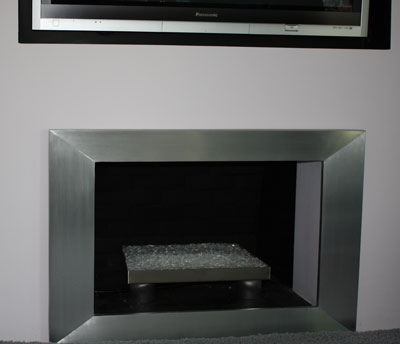
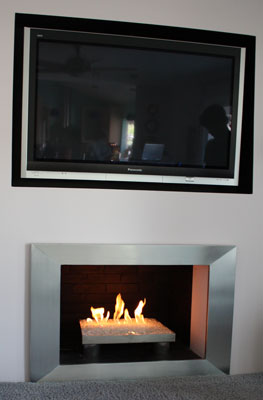
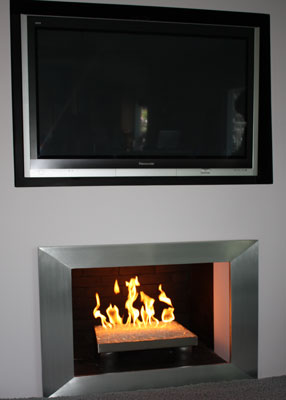
The fireplace below has a stainless steel pan installed with a ribbon burner. The front legs of the pan are 4" round brushed legs with our standard legs in the back. Here you can see the different flame patterns of our ribbon burner. We then installed a brushed aluminum surround.
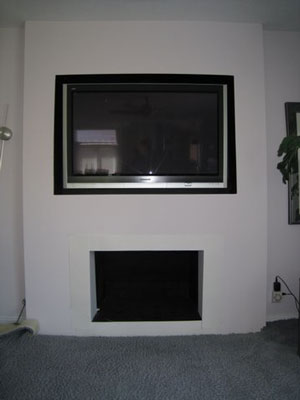
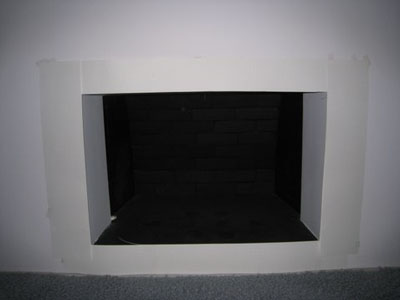
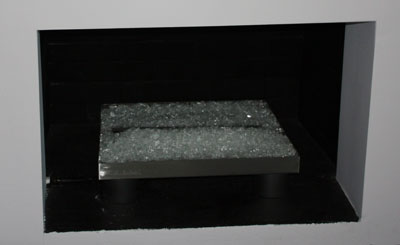
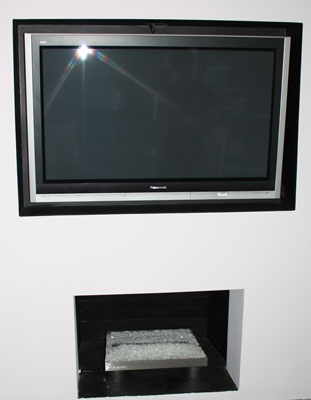
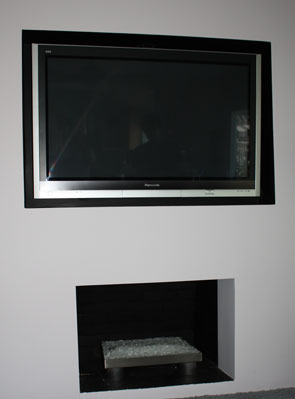
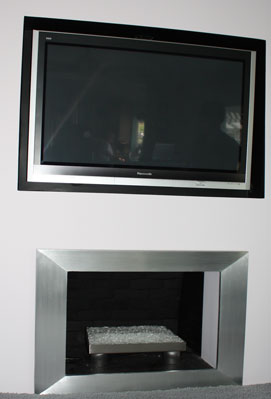
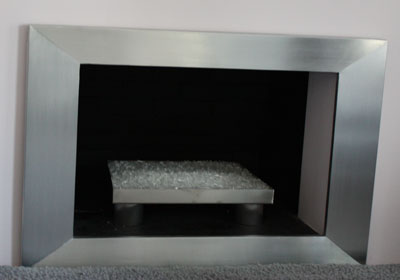
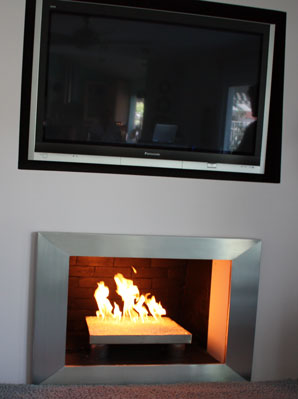
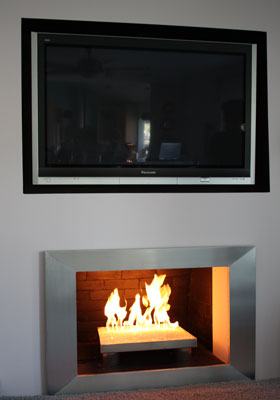
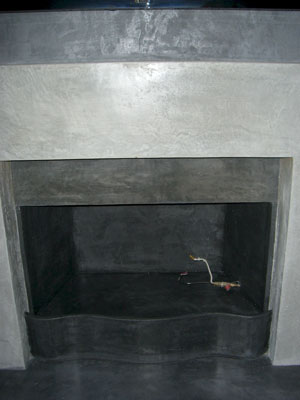
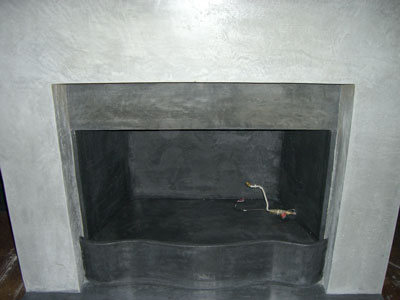
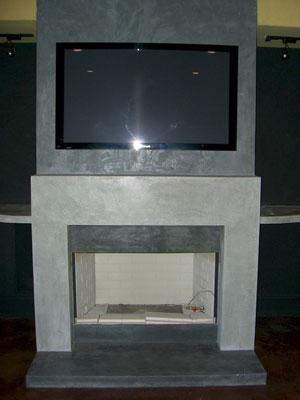
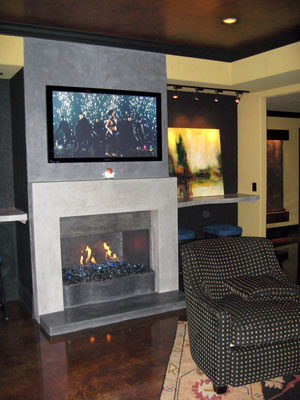
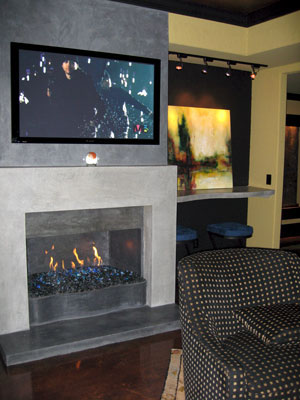
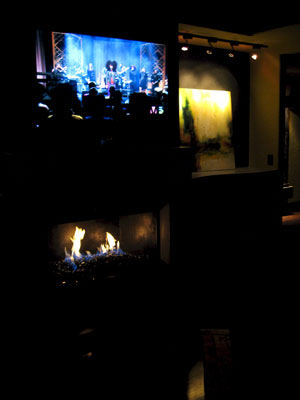
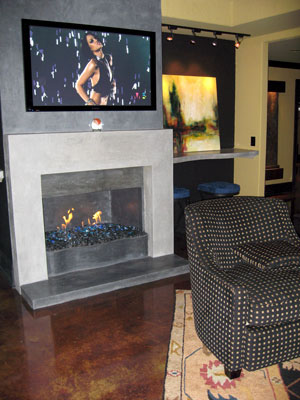
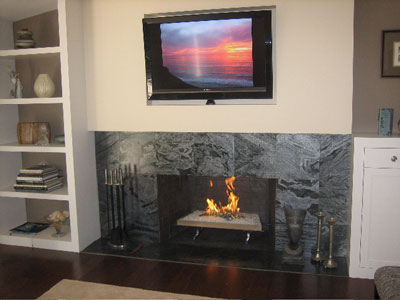
The first 3 pictures are of the fireplace before we started on it. The wall was built out 8" for the flat screen above the fireplace.
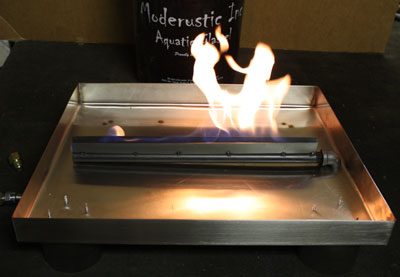
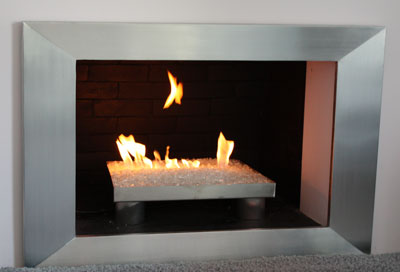
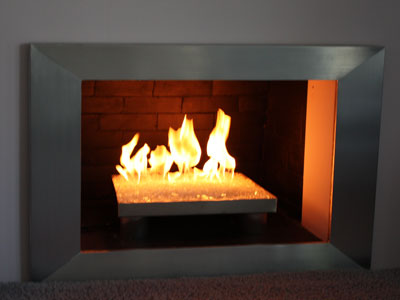
The next 4 pictures are of our ribbon burner after fabrication.
Now we pour on starfire to help conceal the burner.
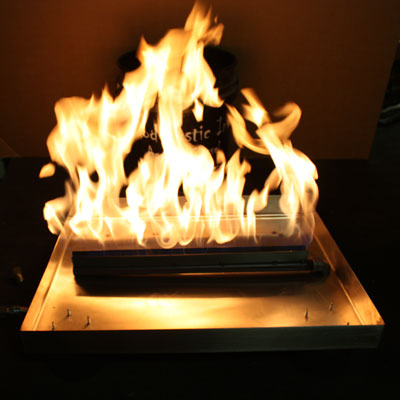
Our ribbon burners can actually raise the flames quite a bit!
This is one of our smaller 18" ribbon burners.
The pan is now installed in the fireplace.
Add a little fire
Now we install the surround to finish this fireplace off!
What we do is very simple, we listen to the customers needs and build from their imagination.
The pan below is a stainless steel pan with a 415,000 btu electronic ignition installed under the pan. It's what the customer wanted. It's like hooking your car up the the shuttle for more power. This pan was installed in Nipomo/ Pismo Beach California, Shea Homes and we get up there we will take finished pictures as we installed 6 other fireplace which we will take pictures of as well.
The front stainless skirt hide the control box which is 4" tall.
The fireplace below belongs to Ross Barnett in Florida. This was a ventless propane installation. Ross built a front wave design and we built a special wedge pan with the controls underneath. This is a remote control ventless burner. Great job Ross! The glass that was uses was:
Black and Black Reflective
Gray and Gray Reflective
Aquamarine Topper
Copper Blue Topper
Light Blue Tubes
Cobalt Blue Topper
Pale Cobalt Blue Topper
and here are the before and after pictures.
Above is before the wave
and below is the wave before out ventless burner was installed.
What makes us different from anyone else is that we allow you to exercise your imagination. If you see it, dream it, draw it, imagine it we can build it for you. Ross saw what we did for other customers and he came up with this very cool design for us to build for his family room, thanks Ross!
Below is one of the two Fire Sticks we built in Nopomo, California at the Shea Homes Trilogy project. Each fireplace had an electronic ignition located on the side of the fireplace in a cabinet inset into the side of the fireplace.
We have over the last few years helped design and and sold dozens of custom fireplaces. The one here was installed in Beverly Hills, California. We designed the fireplace, custom candle pan burner with electronic ignition. We used a clear base glass fro a simple a modern look. We will be posting the pictures as we have time in the near future.
We did the fireplace not the white onyx. What we did does not show but it's what made the fireplace what it is,
designED !
If you take the time to notice the nice texture of the glass. It's because we tumble it (patent pending) that's what also make us and our glass different from anyone else.
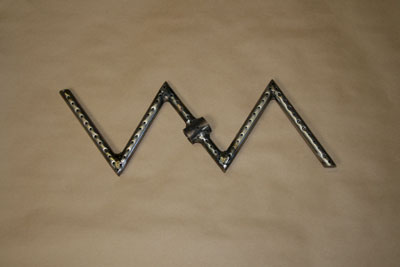
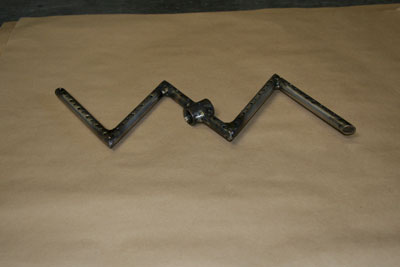
The Zig Zag burner below was designed by the customer and it measures 6" x 18" and is made from stainless steel tubing. The burner can be used as a propane burner or a natural gas burner.

The fire pit below was build by Mike Phillips ( a customer). First he ran a propane line to the fire pit area and then blocked his fire pit into shape. We use a FPPK (fire pit propane kit) in an aluminum pan 24" x 24" with a double 18" double stainless steel ring.The glass that was used was gray with a gray base and gray reflective on top to add sparkle.
Below you can see the placement of the thermo coupler and safety pilot light used for propane.
Below on the right side the controls were installed in the bricks.
Below is one of our newest designs of fireplace pans. This one was designed by the customer for propane and they added remote control. This first pan will be made in Stainless Steel. We will finish this proto type in about 4 to 5 weeks and we will post pictures when we finish. These will be available in stainless steel, steel (painted or bare) or any other metal you desire.
The fireplace below is a propane fireplace with a black base and clear diamonds on top. We built a pan to hold the glass with out the legs and covered/ protected the burner controls inside of the pan. The controls are on the right side and they are shielded and buried under the glass. The customer was going to finish the front of the steel pan after he installed it.
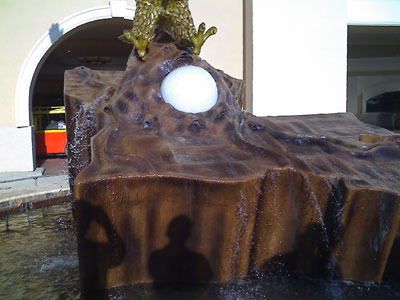
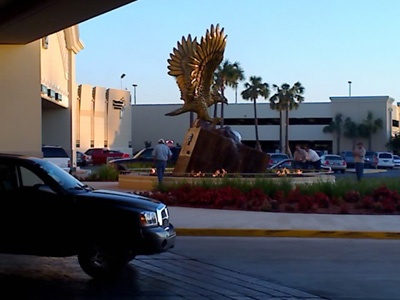
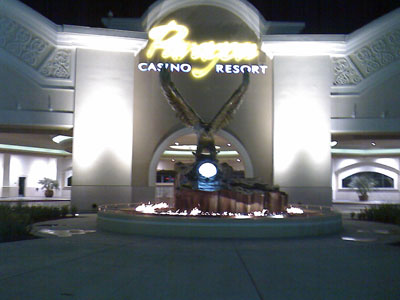
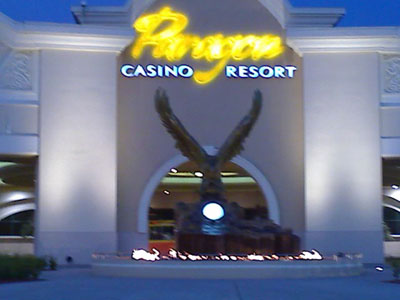
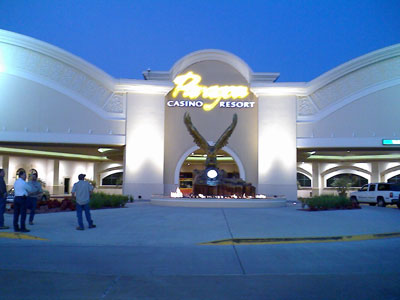
The fire pit below is in Marksville Louisiana and is at the Paragon Casino. The fire pit had an 18' fire ring installed in #304 stainless steel. The was done in and aluminum trough with 10 individual center feed burners. The gas line was a 1 1/2" and 5 lbs ofpressure at 7" water column on natural gas. The ignition system is a Honeywell Infrared Flame Detection system. We will post more information on these larger fire features.
The big white ball is actually the Pearl of Louisiana.
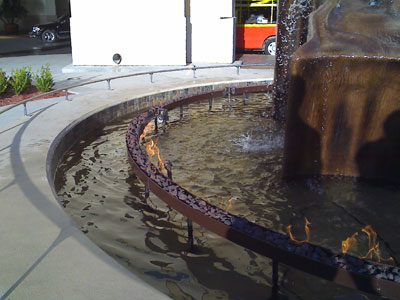
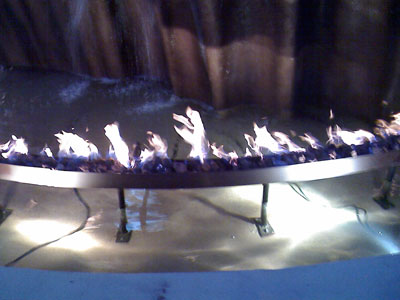
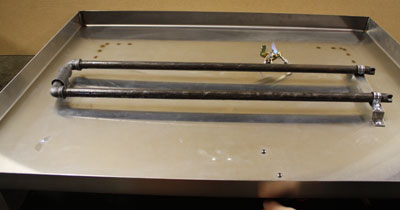
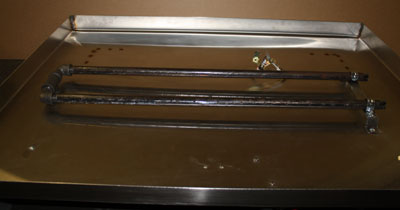
Below is the fire ring in its trough surrounded by the water feature.
Below is one of the sections with the stainless steel burners. The complete feature is filled with water all around the fire ring.
The pan below is a stainless steel pan made to the same size as the fireplace. We installed a front curtain to hide the controls. This is a propane ventless burner pan. We will post pictures when the customer sends them to us after the installation.
We installed a 30" double burner in the middle. The maximum btu's on a ventless is 38,000 and any larger burner will make the flames much smaller.
Below the customer wanted sculpted front legs.
Below you see the front curtain in stainless steel.
and here you have it burning with out the glass
This stainless steel burner was designed and built by one of our dealers, Todd Janssen in Orange County, California. If you dream it, we can build it! This was build for a custom shaped fire pit.
The fireplace below was installed by George Foote who also built his own pan, great job! We supplied the burners and glass and George supplied the talent and labor. Great job George! The colors used were:
Starfire base glass,
Azurlite,
Azurlite Reflective,
Gray base glass,
and our Ice Ice Ice and you be the judge!
Before the pan and glass.
Here is the stainless steel pan that George built.
Start with Starfire.
Add some Azurlite.
and the rest of the colors for one nice design from George!
The ribbon burner below is made from 1/8" brushed stainless steel. The center was water jet cut and then we bent the two center fins down to install the ribbon burner with electronic ignition. The base plate measured 94" x 26" and was installed in San Diego, California. The architect is Kelly Crain of San Diego.
Hopefully we will be sent the finished pictures of the fireplace.
We can build these in any size, shape, material and in natural gas or propane.
This was tested in the shop with a minimal of 1/4 lb of natural gas. This burner is capable of at least an 18" ribbon burn. If you look in the center you will see the ignition head for the electronic ignition.
The fireplace below has a steel pan underneath to conceal the 12 volt remote control. We used a Clear base glass and topped it with a Starfire base glass and then added Amber Diamonds on the surface.


You can see the front plate that was painted to match which is removable if and when necessary to change the batteries. The legs were 4 1/2" and the pan was 2" tall. The removable front metal curtain was 6 1/2" tall.


The fire pit below was built to the customers specs. It was 48" round, 10" tall with 8" legs and constructed from 1/4" aluminum. Then powder coated to match the customers request. We will fill in the details as we go.
Above you can see the cross grid to support the false bottom.
Above you can see the false bottom making it possible to fill it with a 2" fill over the ring.
A custom 42" stainless steel burner had to be built.
The center leg was for the gas and electrical for the electronic ignition
Hopefully we will get pictures of the fire pit installed on top of the water fall in New York.
Our products do not require any certification from the AGA, CSA or UL as it is considered a stand-alone product by these agencies. We are told that we would need a certification if sand and or lava rock would need certification. The agencies are franchise operations and they are privately owned and they are not a government agency. These agencies are hired for mass production testing and AGA, CSA and or UL do not certify custom one of a kind projects. Custom burners need no certification as this only applies to production equipment. Just so you can understand that a certification costs about $15,000.00 and certification was developed for production/ mass production to assure quality. Any parts that would normally need AGA or UL do in fact have these approvals. Parts with function need and should have some sort of approval. The pan burners we sell that do have UL, CSA and or any other listings are produced by other companies. The custom pan burners that we produce are just that, custom. Therefore do not require UL, CSA and or any other agency listings as these are custom. The parts that we use to build these pans are UL, CSA listed as they should be. We would never use any “Third World Country” or any unlisted, untested parts to build any products and or parts to endanger any product performance what so ever.
We built a set of fire stick for an architect "Woody Dike" on the Nipomo, California project (seen above) a few years ago. Then Woody contacted us to build a set for him. He even sent us a drawing and included a diorama!
Check it out and tell us what you think!
Here is the blue print:
and diorama:
Woody is over the top!
Above and below you can see the control valves at the bottom of the Fire Sticks.
Below after installing and fine tuning the gas flow they then covered the base with sand and then topped it with Black Magic and several toppers. Awesome job Woody!

The pan below was created by John Webber of San Diego. He made a cardboard mock up of what he wanted in his fireplace and we duplicated it in stainless steel. Here is John's fireplace now, our pan and we will posts pictures of the finished fireplace with our pan when John sends them to us. The glass that was installed in this pictures of the pan is Pink Rosa base glass.


The propane pan below has a brushed finish on the front metal shield. This is a two part shield, one to retain the fireplace glass and second to conceal the controls. This is part of the fireplace design that was asked for. The first pictures shows the front completely up.


The picture below shows the complete front dropped down to access the controls.


The burner below was a custom 14" hexagon designed burner by our customer for their fire pit.


The burner below is a propane ribbon burner with all stainless steel construction.


The pan and all around was filled with glass hiding/ concealing all of the workings.
A ribbon burner will mold all of the flames together making it look like a ribbon of fire.

The burner below is a rectangular burner specified by the customer.

For some reason they ordered 2 1/2" legs underneath, so we just did it!

Below you will see how simple it is to convert/ install a propane into your table:
This is our FPPK box with controls and air mixer calibrated to the burner we are using

A better view

The burner on the top side with the thermo coupler, pilot light and battery operated ignitor exposed

Pout teh filler/ lava/ glass? and drink beer! Put a fork in it, Your done!

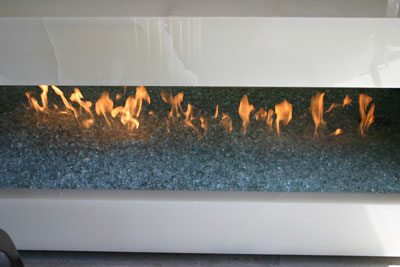
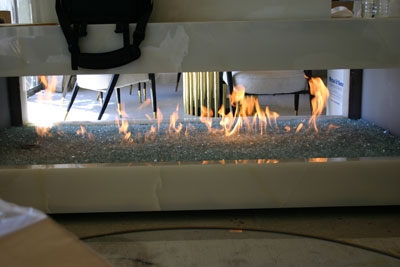
Here are two interesting new style burner pictures! These are floating flames! It's our pan burner/ manifold with Floating Flames!See other burners in our
"Pans Burners and Baskets" page!
Float on!
The stainless steel pan below was created by John Webber of San Diego, California. He created a card board mock up (card board mache') model for us to reproduce for his pan in the fireplace. This is a good way to provide a preview of what is to come. Our philosophy is "Your thoughts, My Hands!" we can build anything you desire. Here are the fire place pictures and pictures of the pan before, during and after!
We are not showing the burners or the controls as everyone we build is different.
Above you see John Webber on the right. He was excited to see his model come to life.

The fire pit below was built and designed by Brett Parks in Indiana. Brett came to us to help hm create his water fire feature for his back yard and be able to winterize it during their frigid winters. The glass he used was a:
Clear base glass,
E.D Scarlett Diamonds,
E.D. Clear Diamonds.
We then built a custom shape stainless steel burner to fit his idea. We will explain as we go.
Here is his original concept drawing:
Below is his layout with pavers, electrical and gas line coming up.
6" deep water tank.
Stack a few more pavers.
Let's test it!
A custom size and configuration ring was fabricated.
Now your done!
The next one we had to put in for you to see.
The next pan burner is almost beyond belief! The company who builds and sells these is R.H. Something-son. I don't know! They actually tell you this is how it has to be. Don't be fooled by lies. It has to be what you want it to be and look like you want it to look like! This is their "Sand Pan", it looks like a bad cat box to me. But what do I know? There is more on the
How Not To Do It Page!Not only do they have no class or taste, they don't even know how to paint.
A bad paint job is just that.
The manufacture didn't even try to conceal the controls whatsoever!

The next fireplace is a propane fireplace with a
propane pan we built. The colors used were a
Gray base glass,
Amber base glass and
Bronze Rust Copper all mixed on top.
This fireplace and pan reside in Mexico!
Below is the fireplace as it started.
As you can see below is the dog house to allow air to flow to mix fresh air with the propane.


The next set of fireplace pictures are from Jim Malless. We made a
4" tall pan and installed a
battery operated remote control under the pan. The pan has a removable front face to conceal the components. The glass that he installed is:
Starfire base,
Clear base under the
Starfire, (more cost effective)
and a few
Amber Diamonds!


These pans are built to fit each fireplace one at a time. Yours will be made just for you.


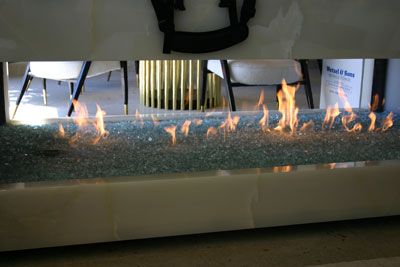
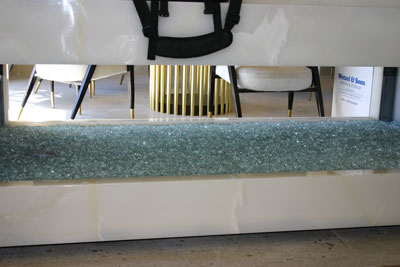
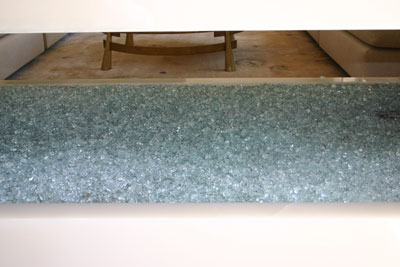
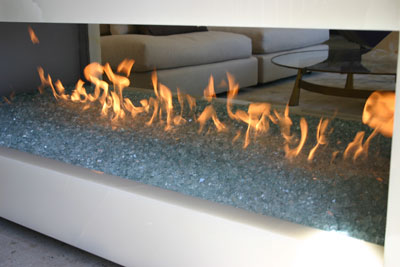
The next fireplace
ventless conversion was from Eric at Neutral Interiors.
We built a pan to recess into the floor of the fireplace and to access the controls Eric cut a hole on the left side of the fireplace for easy access in the event it had to be reset or turned off.
We will explain as we move on:
The lower hole is the access hole.


Simple, clean and finished! He installed Starfire base glass.

This next fireplace was installed in Mexico by Roy Quick. It turned out amazing. The base glass that was used is:
1/4" Clear White
and Scarlett Toppers
accented with Gold on top of it all.
The propane pan has a removable front skirt/ cover to conceal the controls.


The next fireplace is in Palm Desert California. It is a propane pan burner with Sky Blue base glass. We will show you step by step on how to install a clean burning propane pan burner, no really!
The next pan burner is a propane pan burner with Skytech Controls. This unit has a standing pilot light with a remote control. Th conceal the controls we manufactured a removable lift off front plate.

The next pan was built to the customers specs (round with 3" lip) and wrinkle finish powder coated.
Propane as well.
Note the thermo couple, pilot light and Copreci valve. We calibrate every burner to burn clean.
The next pan was built to the customers specs (round with 3" lip) and wrinkle finish powder coated.
Propane as well.
Note the thermo couple, pilot light and Copreci valve. We calibrate every burner to burn clean.

The next pan was built to the customers specs (round with 3" lip) and wrinkle finish powder coated.
Propane as well.
Note the thermo couple, pilot light and Copreci valve. We calibrate every burner to burn clean.
The next pan is a stainless steel pan we manufactures for our customer in Hawaii. The system that was install was a ventless burner to burn
propane with our glass. We will explain as we go forward.
On the front of the pan we we bend an open back hemmed stainless steel curtain to conceal the controls but it is still easy access.
This is the ODS (Oxygen Depletion Sensor) it speaks for its self.
Here we are burning propane with a
Starfire Base glass, please note what a clean burn! We do it right.
All of our pans are built for each application and fireplace.
We can build any size, shape or configuration of burner that you may want. The next "S" burner was made to a template from #304 stainless steel pipe. This particular burner was made for a propane fire pit. But it also can be used for natural gas as well.


The next fireplace is from Chris
Ackopiantz in
Palos Verdes California.
Chris lives in a condo complex with only wood burning fireplaces. Chris received permission from his complex to add a propane fed fireplace. Burning wood is not only dirty and nasty, it is very unhealthful as well.
Here are his pictures from beginning to end:
The glass he used was a: