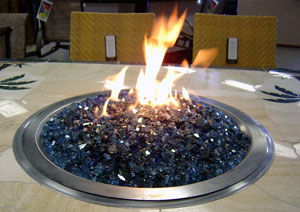
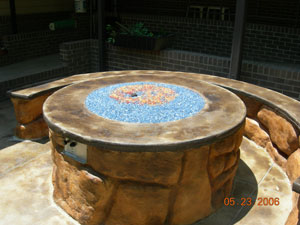
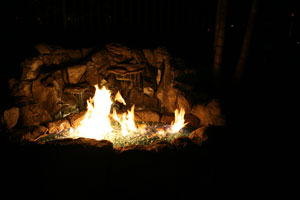
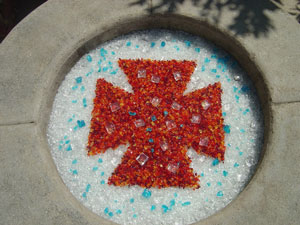
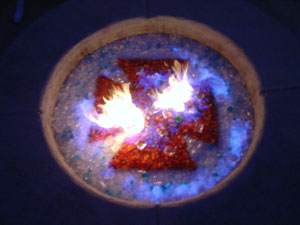
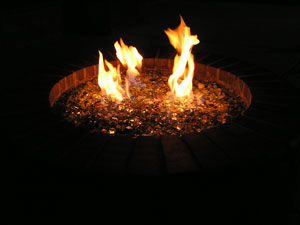
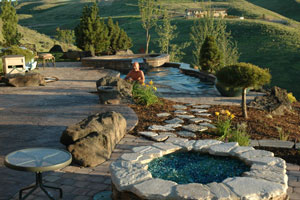
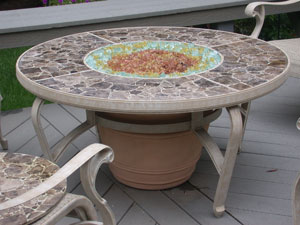
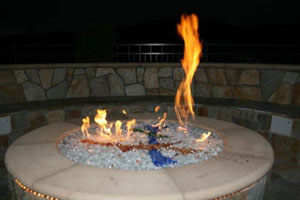
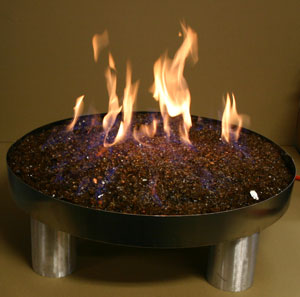
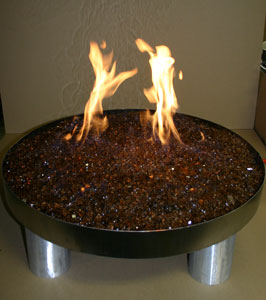
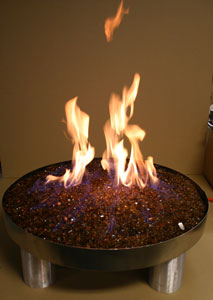
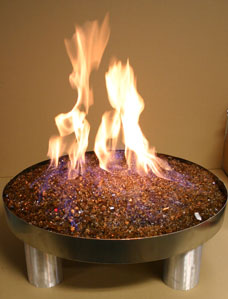
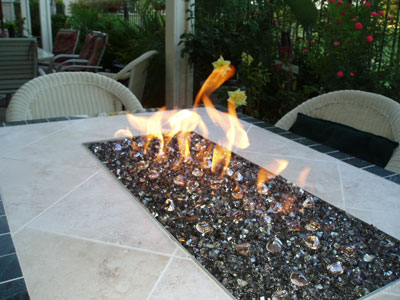
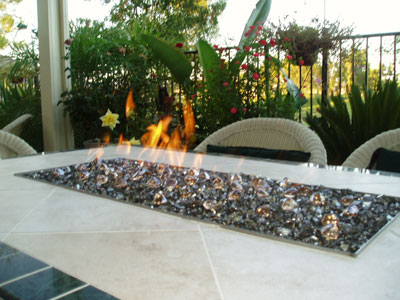
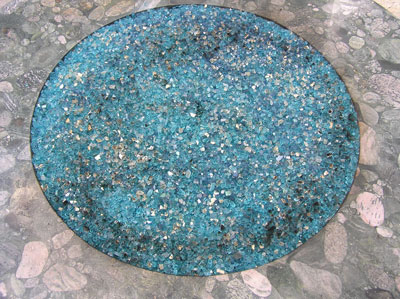
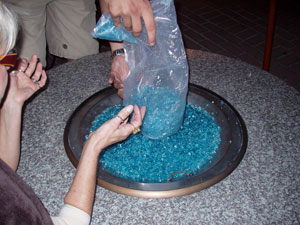
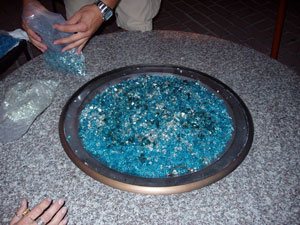
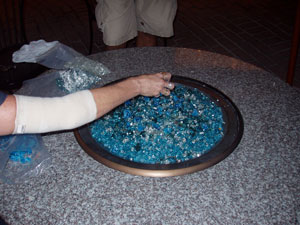
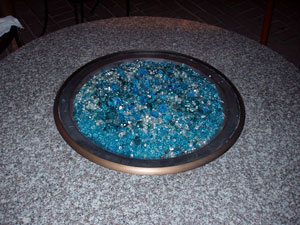
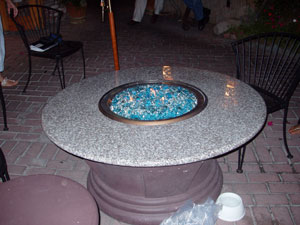
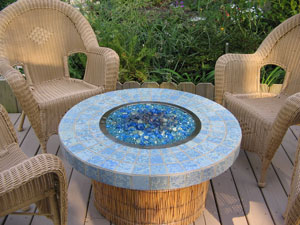
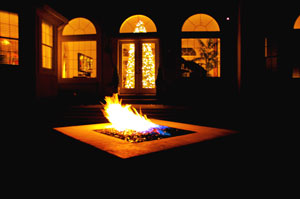
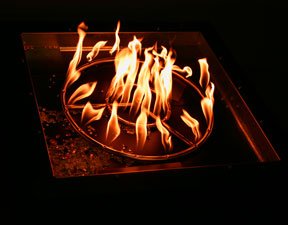
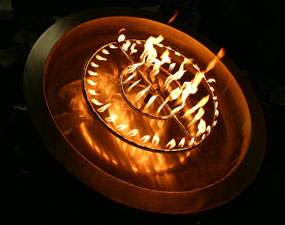
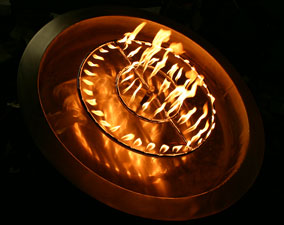
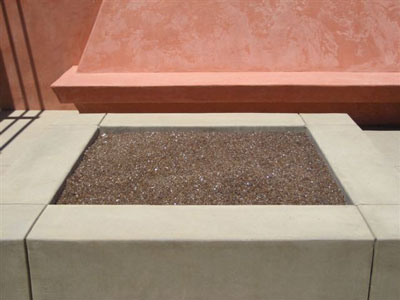
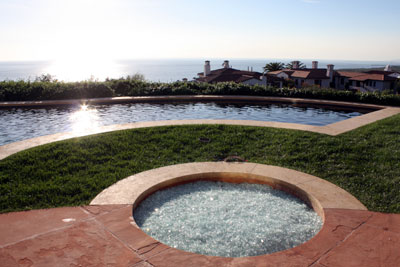
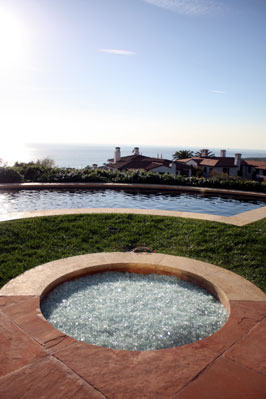
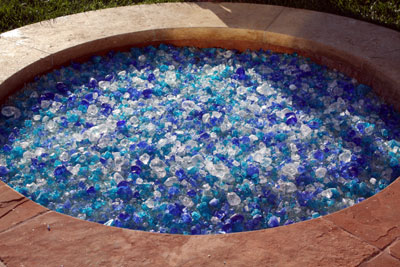
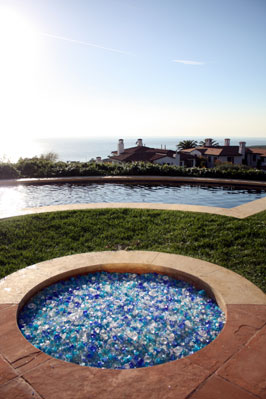
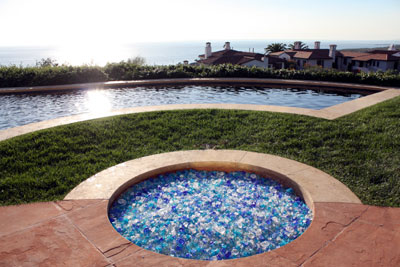
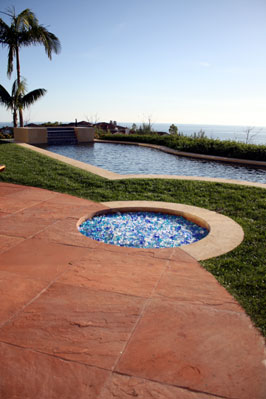
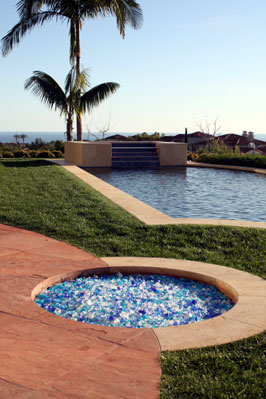
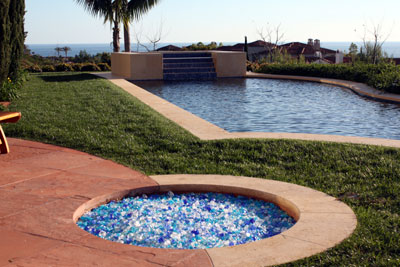
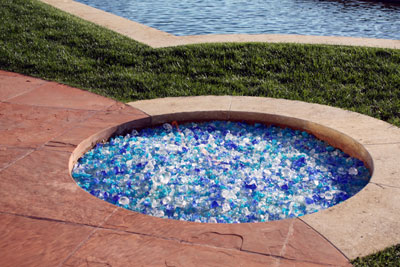
Cobalt Blue Topper,
Copper Blue Topper and
Azurlite base glass for one very nice fire pit and back yard!
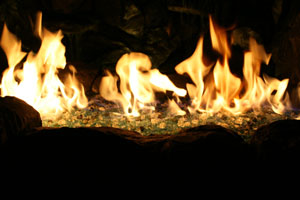
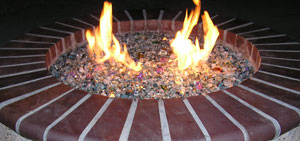
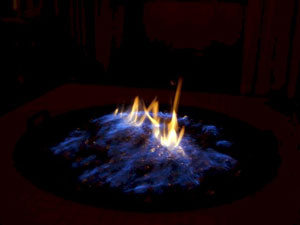
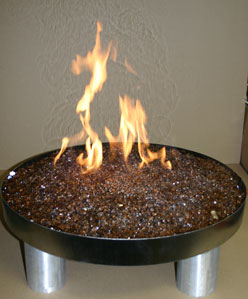
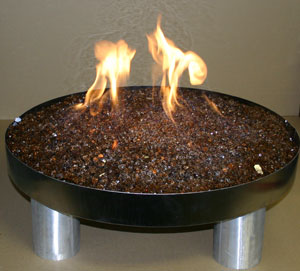
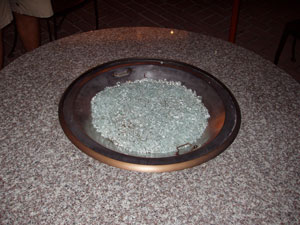
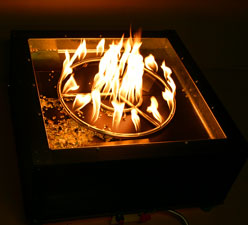
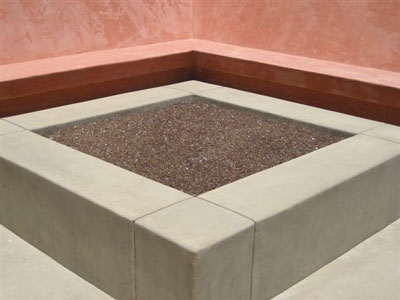
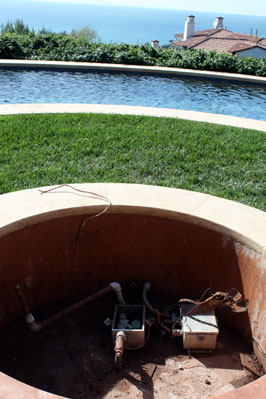
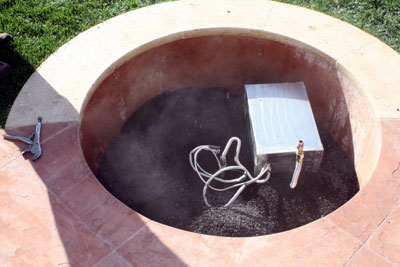
The fire pits shown are in the finishing stages and we should get our glass pictures soon.
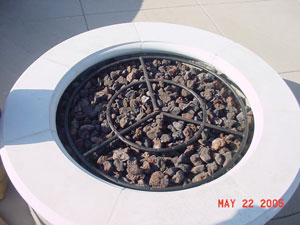
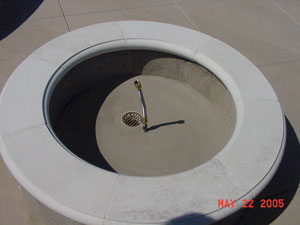
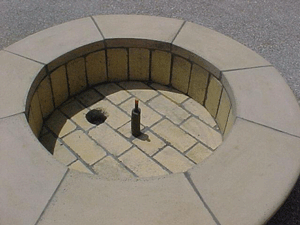
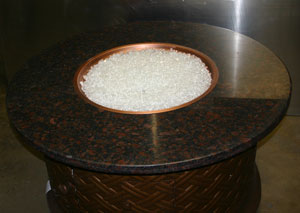
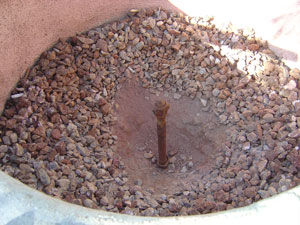
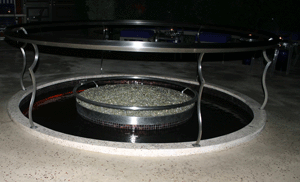
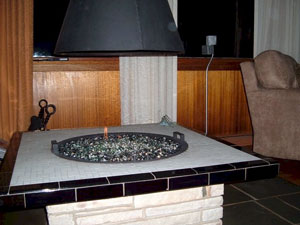
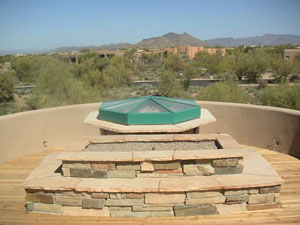
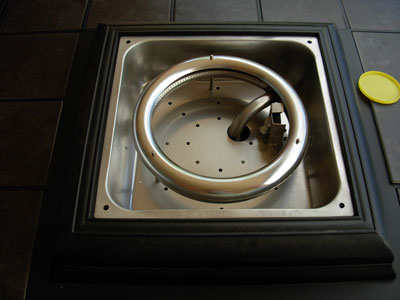
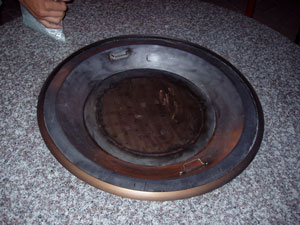
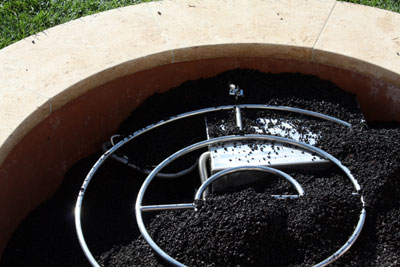
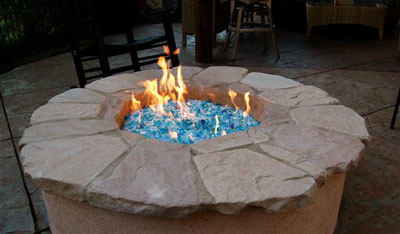
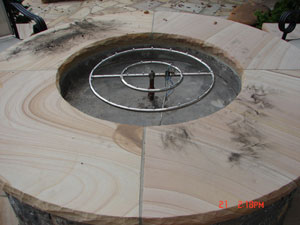
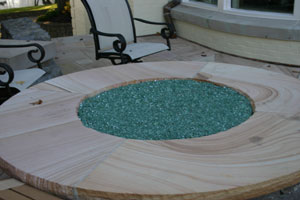
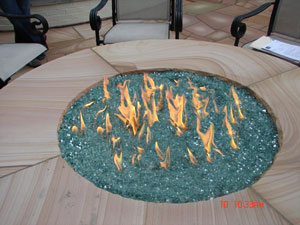
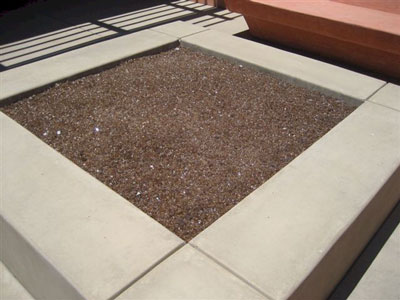
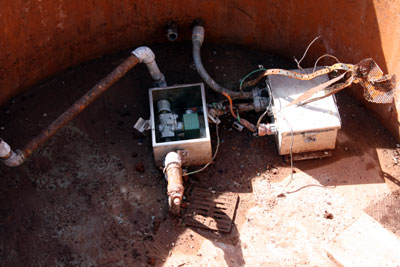
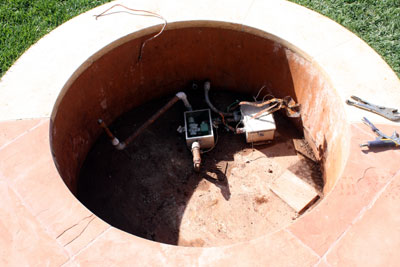
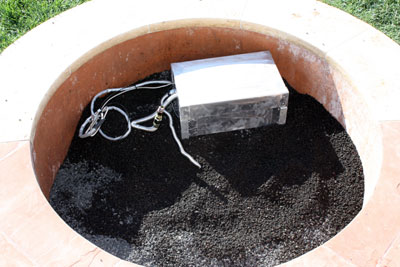
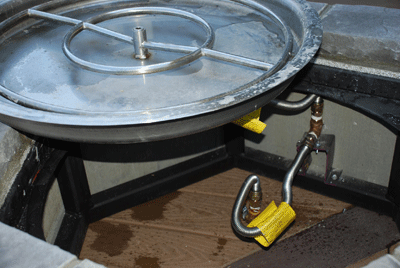
1:As you can see there is a solid bottom and a drain.
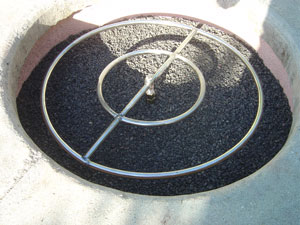
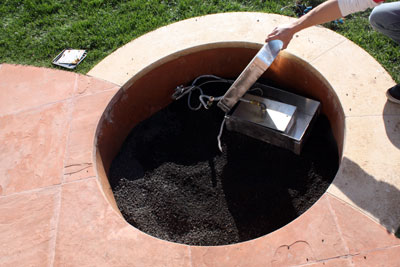
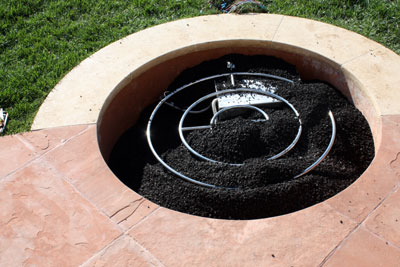
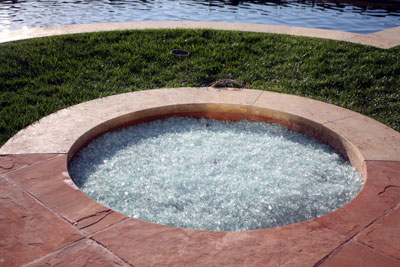
2: The lava rock goes just below the fire ring and then the crushed lava rock and a thin layer of sand on top of that. Then you pour the glass and your done!
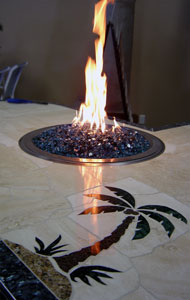
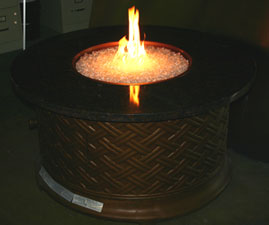
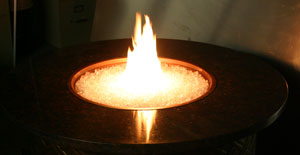
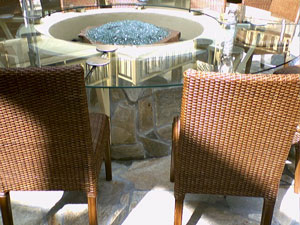
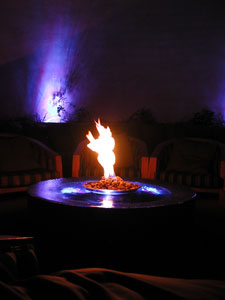
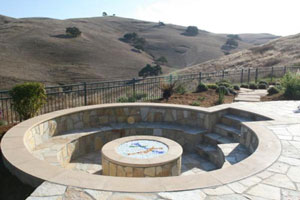
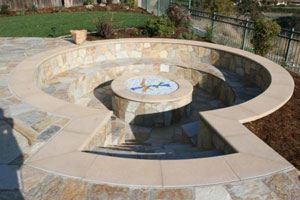
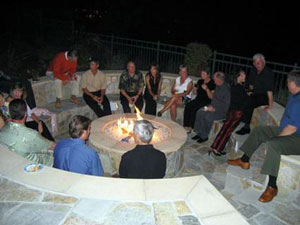
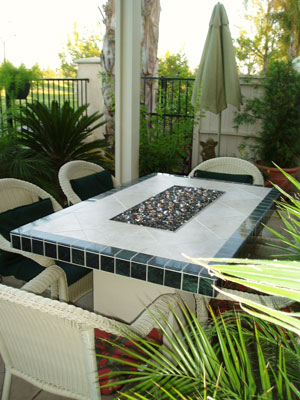
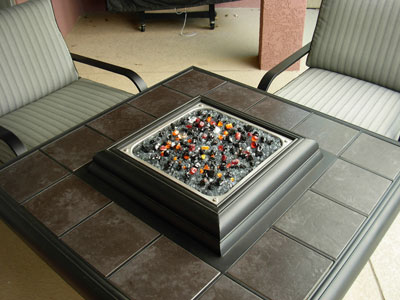
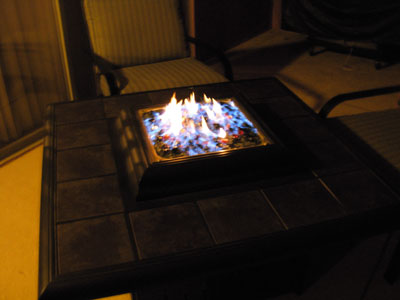
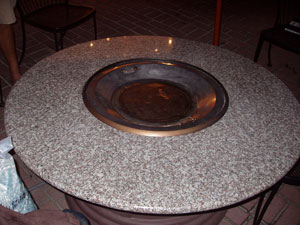
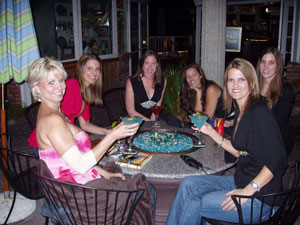
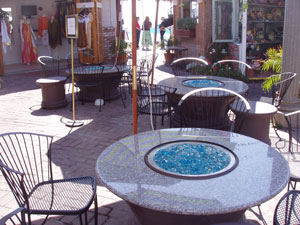
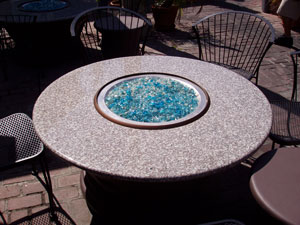
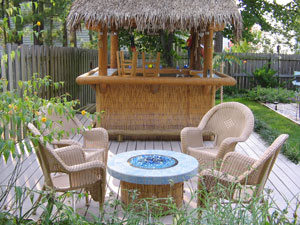
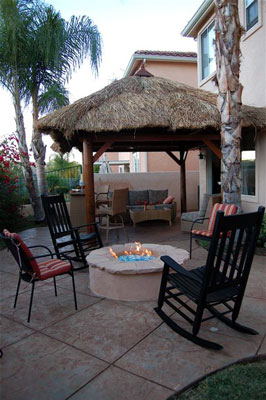
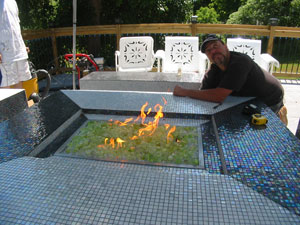
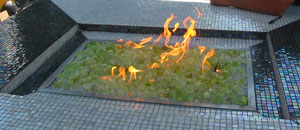
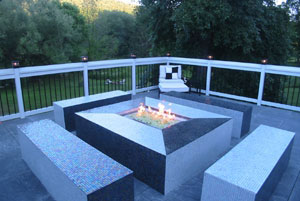
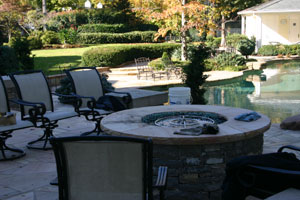
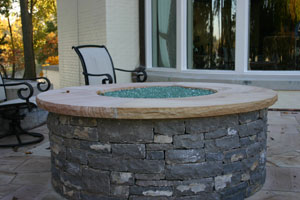
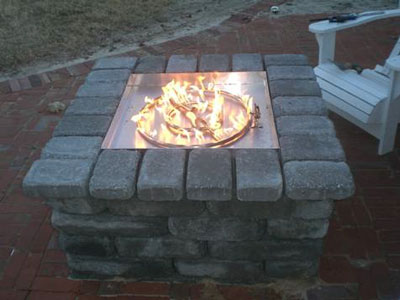
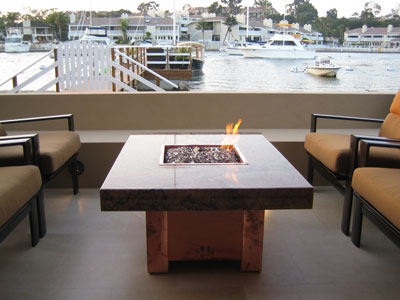
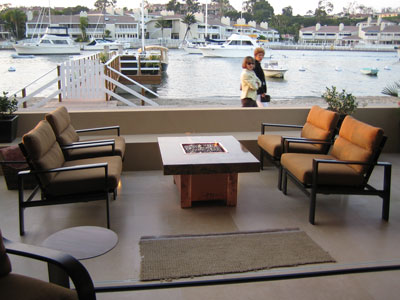
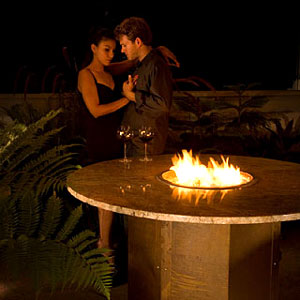
Fire Tables in Temecula, California.
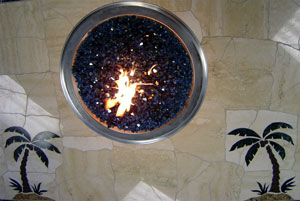
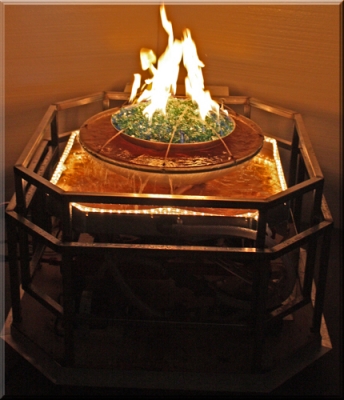
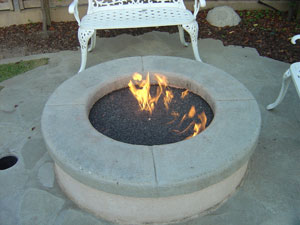
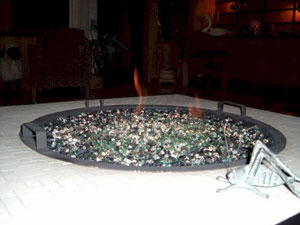
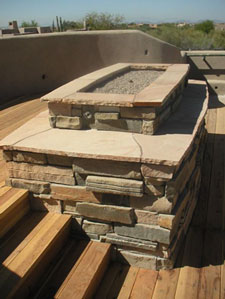
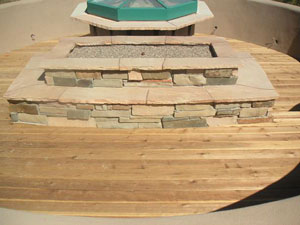
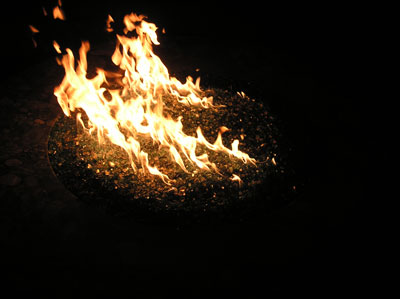
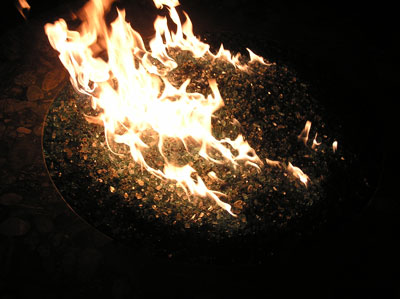
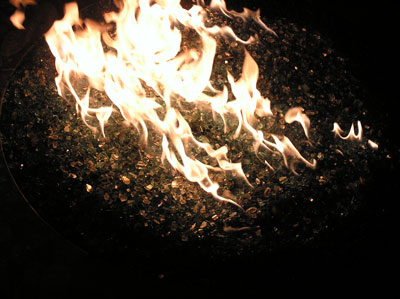
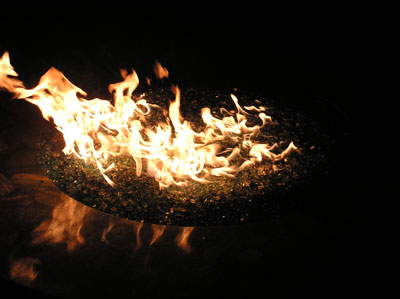
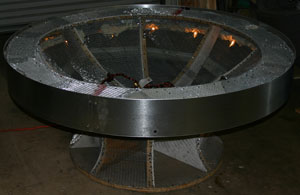
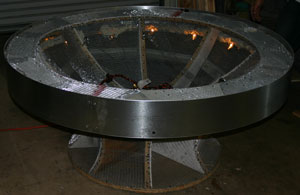
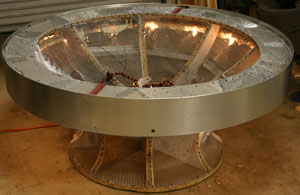
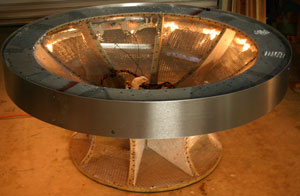
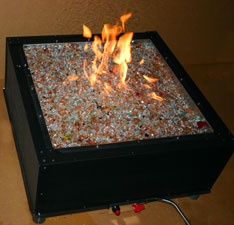
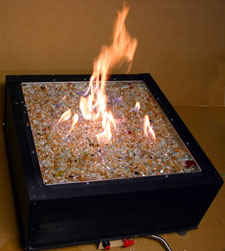
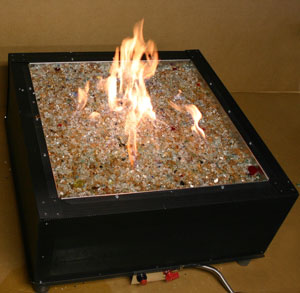
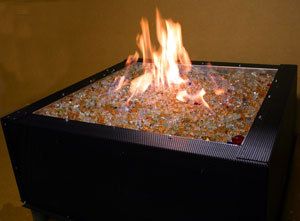
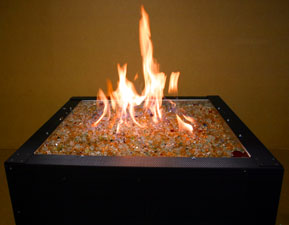
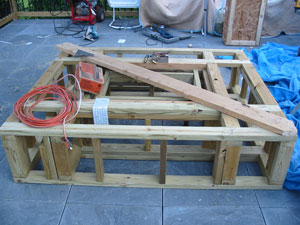
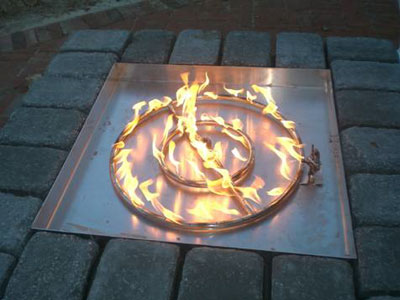
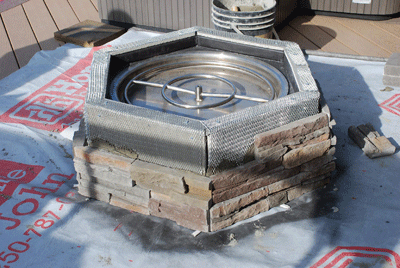
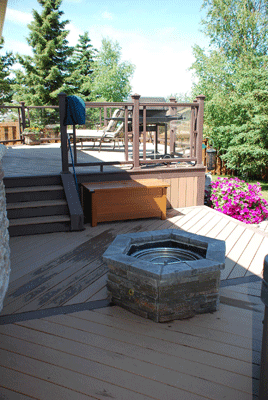
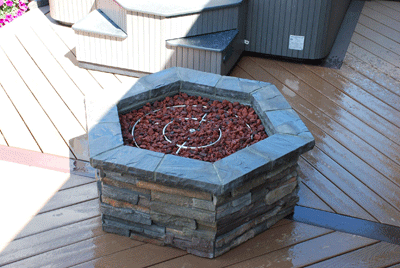
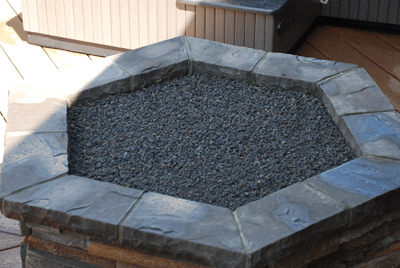
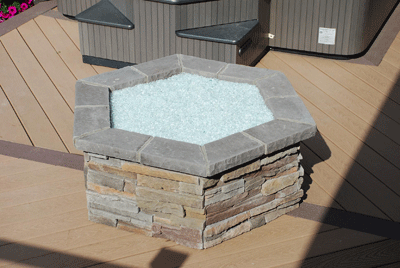
The beginning of a pretty cool man made fire pit
THESE WILL BE OUR NEWEST FIRE PITS WITH GRANITE TOPS AND OF COURSE GLASSEL IN THE FIRE PIT AND YOUR CHOICE OF COLOR. THESE WILL BE NATURAL GAS OR PROPANE BOTTLE FUELED. WE WILL POST MORE DETAILS IN A FEW DAYS.

The fire pit/ fire table has Ford Blue and Ford Blue Reflective in the center.
This is a 4 piece glass surrounding a fie pit.
The pit below has Gray and Gray Reflective

The fire pit below has a Clear base with Azurlite and Ford Blue on top. Then it was topped with Dark Red Orange Topper, Yellow Amber Topper and Amber Topping.

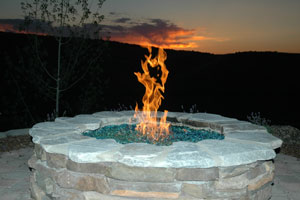
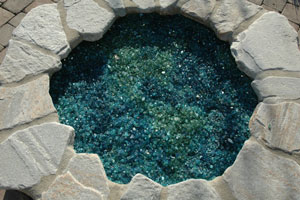
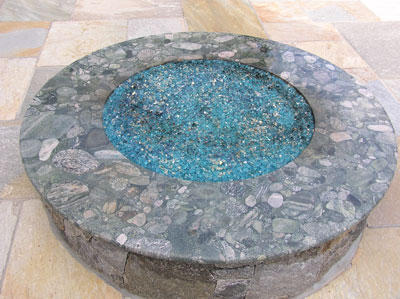
A simple fire pit with Azurlite below
This fire pit has Clear, Chunky Clear, Starfire and 1/2 Starfire and a water fall going into the fire, pretty cool!
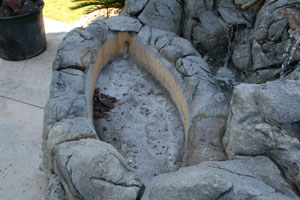
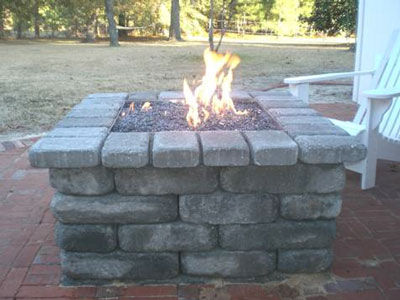
The fire pit below was a traditional lava rock fire pit

Now filled with lava rock (crushed 1/4" 3/8") over 3/8" 1/2" crushed. Remember the larger is under the smaller to keep the glass from falling through.

Above a flex line was installed to raise the ring to the surface. You don't want to leave the ring at the bottom unless you want an explosion or if you want to get rid of the significant other.
Below
Pour more crushed lava to make the desired shape of the fire pit and test burn for flame pattern.

Starfire base and a few other colors were added
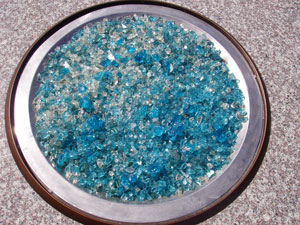
Azurlite, Scarlet Topper, Red Topping, Ice, Copper Blue Topper, Copper Blue is a chameleon as when it gets hot it turns green and when it cools it turns back to blue!
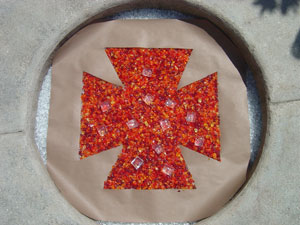
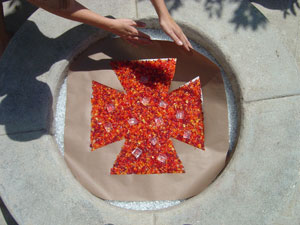
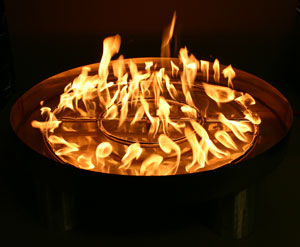
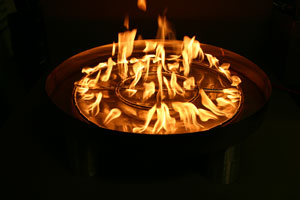
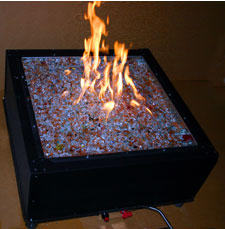
Patterns, can you do better?
Pretty creative!
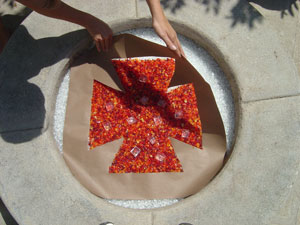
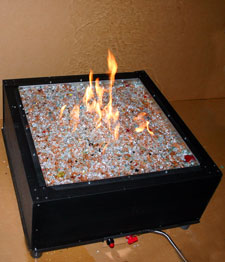
Great job and very creative.

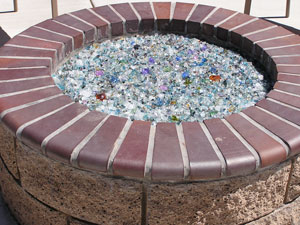
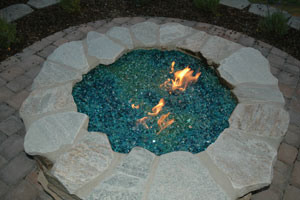
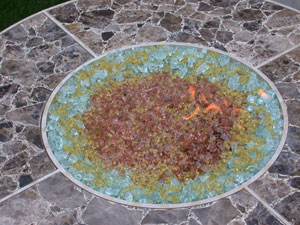
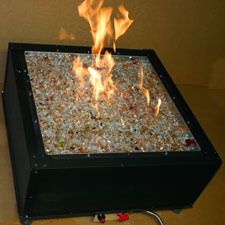
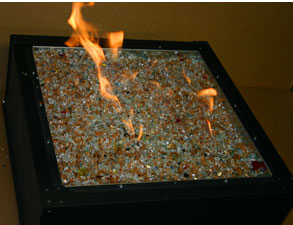
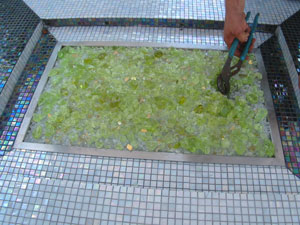
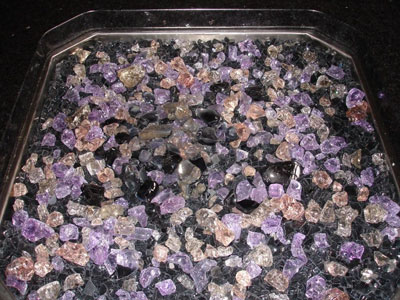
The 4 pictures are of Multi Mix in a simple but nice fire pit. Multi mix is off of our test table in the showroom which everyone who comes in can sample mix their fireplace glass and after the table fills up we then have Multi Mix. There is usually a lot of Toppers and Toppings in the Multi Mix.
The fire pit below is in Boise! It has
Evergreen and Reflective
Azurlite and Reflective
Ford Blue and Reflective. Looks great.
Makes me want to go to Boise!
The fire table below has 1/2 Chunky Clear, Amber and Pink Rosa.


The fire table below was created in Las Vegas by one of our dealers with a water feature surrounding the center fire.
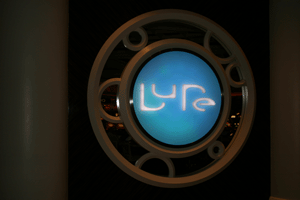
The pictures below are from the Lure Lounge at the Wynn in Las Vegas. This was done for Steve Wynn with all Gold. This was taken without the flame on and when we return we will have pictures of the fire pit lite up
Wynn Las Vegas
3131 Las Vegas Boulevard
Las Vegas, Nevada 89109
Phone: (702) 770-7100
Website: www.wynnlasvegas.com
Another site with a nice picture of the pit (two pictures down from the top).
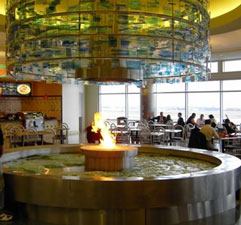
Boise International Airport
Fire Water feature in the lobby/ food court
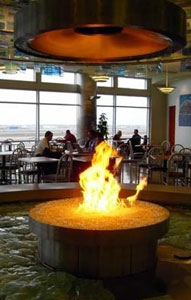 This fire pit featured Starfire surrounded by water. We only did the glass and the burners were by another company.
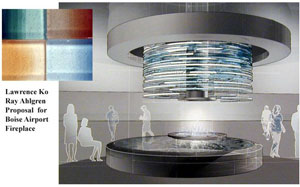
Three Public Art Projects Selected for Boise Airport
BoiseCity Council has approved the selected artists to design and build an art glass fireplace with Aquatic Glassel, a cast and fused glass wall feature, and a fabric mural for the new buildings of the Boise Airport. Art projects will complement the modern, curvilinear architecture inspired by Idahos natural resources.
Project: Fireplace/Water Feature Artists: Lawrence Ko and Ray Ahlgren from Portland, Oregon and Moderustic of Rancho Cucamonga, California
Budget: $155,000 Site: Food Court in New Terminal Completion: September 2004
Sponsored by: Boises Percent-for-Art, Aviation and Public Transportation Department
A fireplace made of glass (Aquatic Glassel) with a surrounding water basin feature inspired by the stepped landforms of the Boise Riverbanks and nearby reservoir will act as a beacon of light within the new food court area. Sited below a skylight, the fireplace will be a focal point and gathering space for travelers.
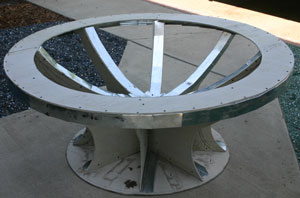
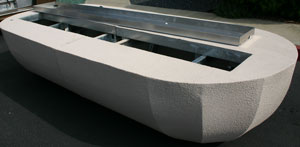
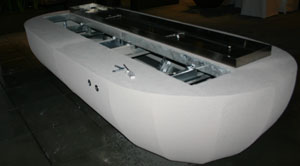
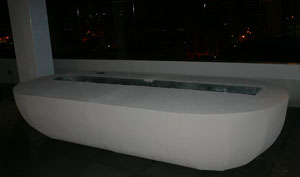
The table below was and has been designed for the Marriott Hotels. This is a pro-to type which will be wrapped in wire and then coated in a special mix of concrete for use with fire. The table will have a brushed metal edge with lighting on the under side which will be activated just by touch (switch-less). The table measures 60" wide, 24" tall and a base of 36". There will be a base door to access all utilities, gas, electric and water.
This table will have a water feature, fire feature and electronics. After installation we will post pictures of the finished product.The first tables are going to Idaho in Boise and other cities in Boise.

The indoor fire table below has:
Bronze, Black, Emerald Green, Reflective Green, Black Reflective and Gold

The fire pit below has a Clear base with 1/4" Starfire and 1/2" Starfire, Yellow Amber Topper. Cobalt Blue Topper and Emerald Green Topper and a little bit of ICE. The earth as the back yard and a lot of friends, wow!
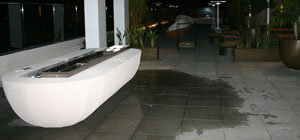
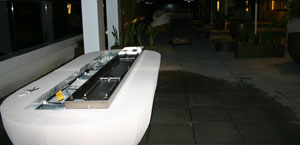
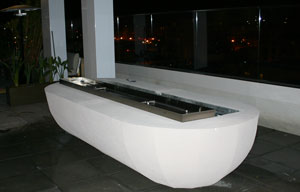
The tables below were made for the Marriott in Boise Idaho
Marriott Hotel Boise Idaho
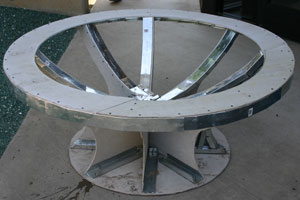
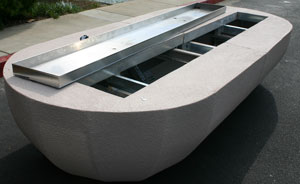
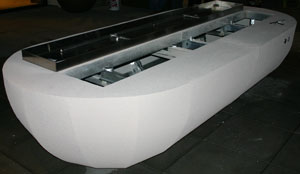
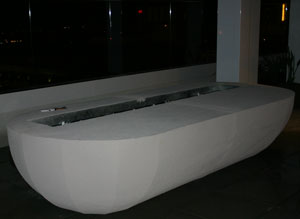
This is a pro-to type fire table that when finished will be wrapped in wire and finished in smooth high heat concrete mix with a 48" fire bowl in the middle. There will be a 6" brushed metal finished edge to cover under table lights. The table is 60" wide and 24" tall. These will be delivered to Boise Idaho, Marriott Corp. We will post finished pictures as soon as we can.
A brushed finish 8" edge was added along with a touch sensor to turn the lights on under the table. It is a 3 position sensor (high, medium and low).
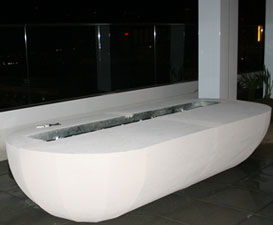
Now the high heat concrete is applied and shaped.
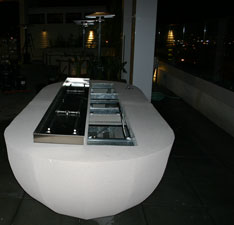
As it turns out there is a 36" triple ring under the lava rock and we are down sizing it to a 24" double ring. As you can see when the wind blows the fire get a little bit close to the edge.
If you had a drink near the edge it would be a little bit warmer now. The sides will be dropped about 3 inches and the center raised about 3" and a 24" ring will finish it off. We will post the pictures of the glass and ICE when it is installed in a few days.
Fire Falls and Real Stone Fire Boxes!


Fire Falls $2400.00
plus glass and shipping
Fire Falls components only 1350.00
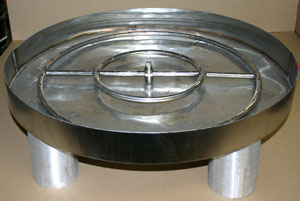
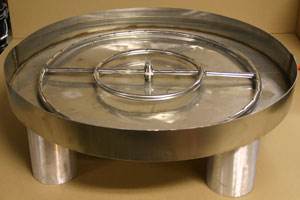
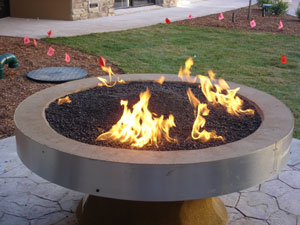
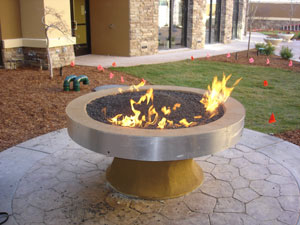
Here is our first project in our metal shop. A portable fire pit for propane or natural gas. These will be available in unfinished (as shown) just add your stone, plaster, marble, granite, brushed stainless steel or? The fire pit shown is a natural gas with multi mix glass (about 30 to 40 colors from our mixing counter. The target price will be about $550.00 plus shipping. The size is a 30" x 30" x 12" tall. The fire pit shown is a
www.FireScapes.net fire pit of which they offer 3 different styles. The custom fire pits we will be building will be single wall construction with a drop solid bottom pan for propane or natural gas.
The fire pit/ table is at the Roxbury Hotel and we will show you the progress here from beginning to end. This was a propane installation with our FPPK burner. The colors used were:
1/4" Starfire, 1/2" Starfire, Gold, Lime Green Topper, Pale Olive Green Topper, Olive Green Topper,a little bit of wood and tile and here you go!
Above shows the framing and the gas line coming in.
Below shows the pipe coming out of the floor and the thermo-coupler on the glass next to the igniter
Roxbury Hotel, a cool fire pit!
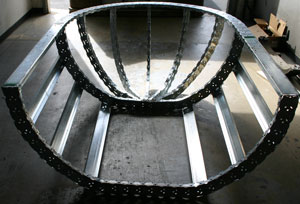
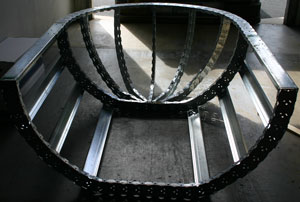
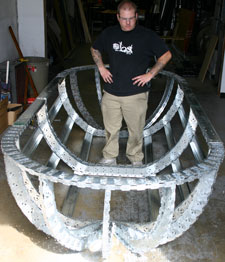
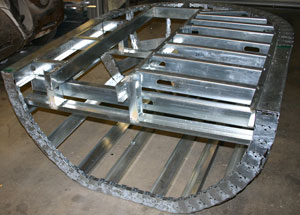
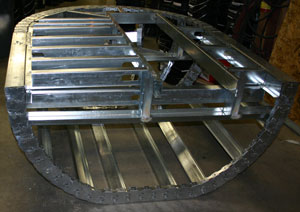
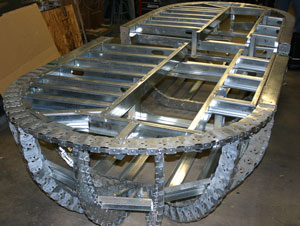
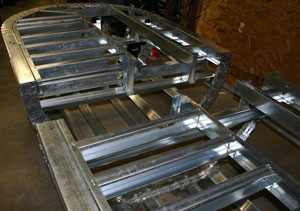
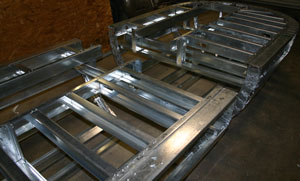
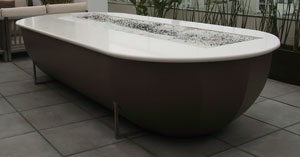
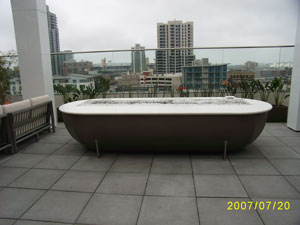
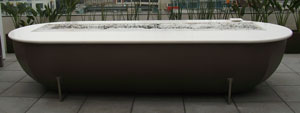
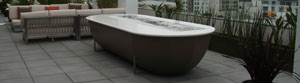
The first project we are working on is the Maryland Hotel (Ivy Hotel now) Roof Top Fire Pit in downtown San Diego, California on the 7th floor roof top!
www.IvyHotel.comIt measures 60" across, 30" tall and 144" long!
The fire table/ fire pit will and a 5' x 12' surface top in smooth concrete with a 16" x 120" stainless steel fire tray of to one side. We will post pictures as the project grows on.
Te fire pit is constructed with a new flexible track and about 3,000 screws, 240' of galvanized channel, 450 welds, 600 lbs of GFRC/ Wonder Board and coated in smooth texture concrete.
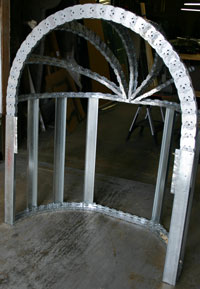
This was just before delivery, dry fit.
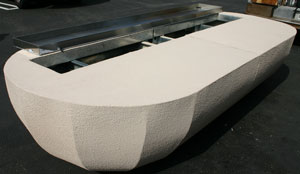
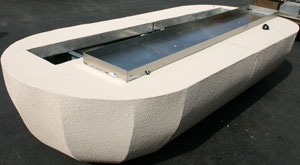
Once on the roof top the two halves were attached and the pan was installed
There were two burners and two controls installed
The glass is going in after the position of the fire table was adjusted. Pictures will be here soon!
If you look at the walls of the roof top you can see most of San Diego.
The table now has had a different coat of colored concrete applied and a granite top. The glass that is installed is Starfire. The Hotel plumber was not very careful as he mixed the lava with the glass and now it looks like salt and pepper. We will be taking a trip to San Diego to fix this mixing issue because we would like to post finished pictures of the fire table burning at night time.
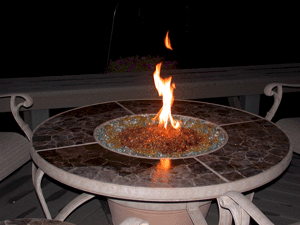
Below is just a nice propane fire table with multi mix
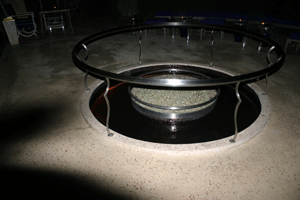
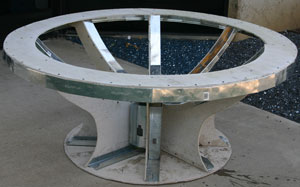
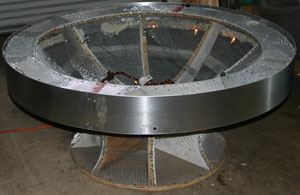
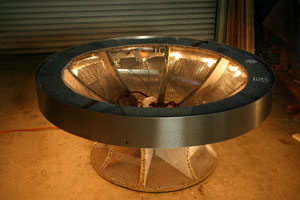
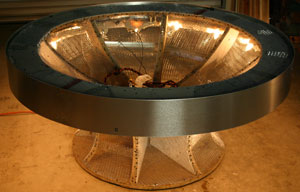
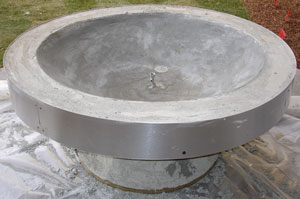
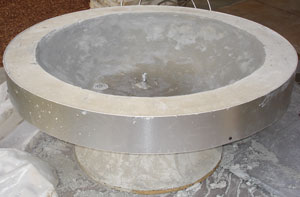
The fire bowl below is one of our newest products/ projects. The first one went to Ramsey Burton in Kentucky of which after he installs it is his ten foot granite table we will show you pictures of his project. This is a 48" spun aluminum bowl with a 24" center bowl with a water feature with fibre optics. The outer bowl has a stainless steel ring for a full surround fire feature. So here are the first proto-type pictures from the shop.


These pictures show what happens when it gets darker as the fire is attracted to the water. Opposites attract, maybe this is why most of us are still together. The question is" Who is the FIRE?"


No we add the fibre optics in the center bowl.


The glass we used was our multi mix. At least 80 colors are showing.


You can change the water head for a different effect.


We are going to be showing this for the first time in Palm Springs on December 06 2007 on Thursday evening at the Village Fest. This is just a base you would build your table around and we can add any feature or effect you would like. We will be adding several features to this fire/ water feature in the next few weeks. We will be posting pictures from the Village Fest after the first showing. If you dream it, we will build it.
The fire pit below is a 36" round stainless steel pan with a 24" stainless steel ring. The glass is bronze rust copper. This pan can easily be adapted for propane as well.
We used Bronze base glass and stainless steel burners in this fire pit on the roof top. Great design and view.

The table below was built for Jim Shaw in Riverside California. The stainless steel tray with stainless steel burners was build to Jim's specs. We used Bronze base glass, Bronze Reflective glass and Pink Diamonds.This was a natural gas burner and could be easily converted to propane.


The fire table below is a propane model and is a very easy conversion. Just call and we will convert it for you and or show you how. The glass used was a layer of black lava under the base of Grey base glass, Black Luster Topper with Copper Ruby Red Topper. This fire table belongs to Eric Bergman in Palm Springs and he loves it.
The fire pit below is a failed attempt of a propane conversion without our help in the beginning. You can't just burn propane! If you try this, this is what it will look like. You need to calibrate the amount of air to propane or it will back fire, burn black or explode! We recommend a thermo coupler, air mixer/ venturi along with several other important factors. We won't tell you who tried this but we will tell you we did fix the issue and now the customer is very happy. We did use Azurlite with Azurlite Reflective.


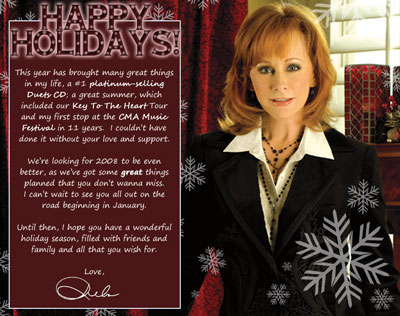
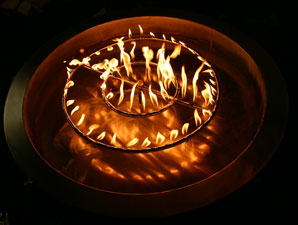
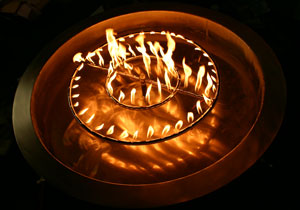
Below we have the fire pit that we installed for Reba! In Nashville Tennessee.
Here is her stainless steel fire pit pan as we manufactured it for propane with electronic ignition.
Below is a 36" aluminum pan burner for propane with a 3" outside lip. These can be made to fit any fire pit, fire table of fire fit for natural gas or propane. We can build anything! This pan has a thermo-coupler for safety and air mixer built in to eliminate soot.
Now here is the fire pit with Evergreen, Evergreen Reflective, Blue Green and Blue Green Reflective installed. We also drifted withe the camera and took a few shots of the back yard on the river in her back yard. Enjoy. You can also visit
www.Reba.com for some real cool information and pictures.
The fire pits below are located in Laguna Beach California at the Cliff Restaurant
5775 South Coast Highway Laguna Beach 92651
We used a Clear base with Azurlite on top with Azurlite Reflective. Then we added Emerald Green Topper and Copper Blue Topper which turns green when it gets hot. Then it turns back. Because the chrome is seen when its cold and the copper changes the color to green when it get 500 degrees.
The fire pit below has an Azurlite base with Azurlite reflective on top. Then topped with Pale Lime Green Topper and Aqua Marine Topper.
The fire pit below has Bronze Rust Copper and a hint of Bronze added
The fire pit below was build by Mike Phillips ( a customer). First he ran a propane line to the fire pit area and then blocked his fire pit into shape. We use a FPPK (fire pit propane kit) in an aluminum pan 24" x 24" with a double 18" double stainless steel ring.The glass that was used was Gray base glass and Gray Reflective on top to add sparkle.
Below you can see the placement of the thermo coupler and safety pilot light used for propane.
Below on the right side the controls were installed in the bricks.
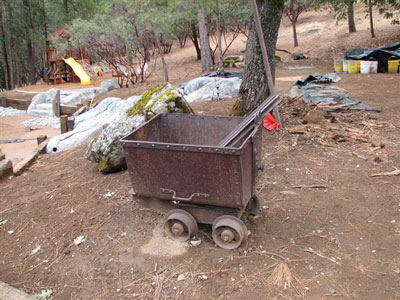
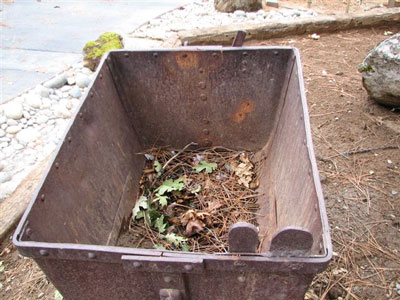
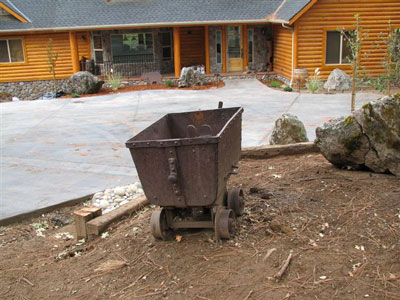
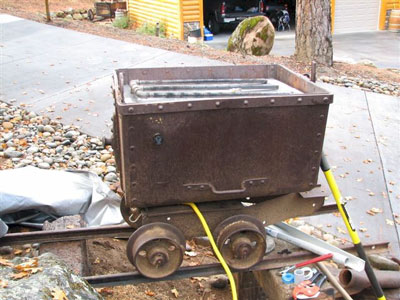
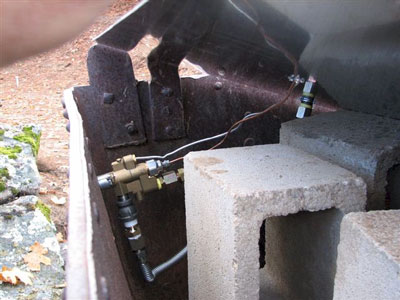
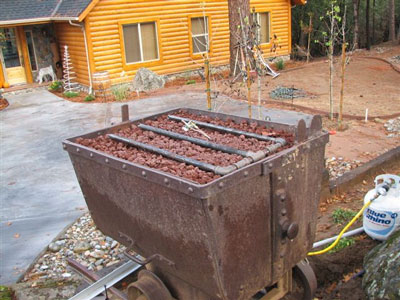
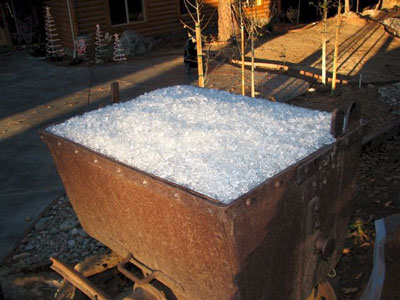
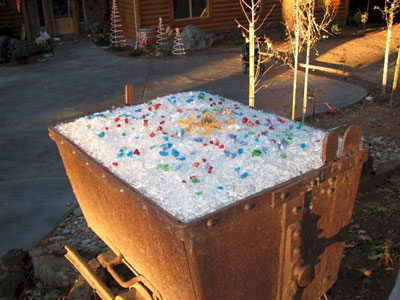
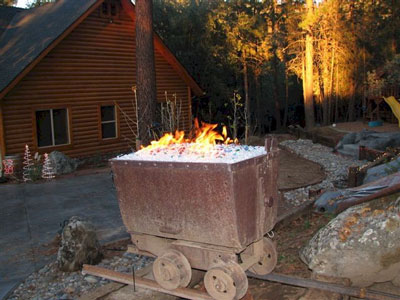
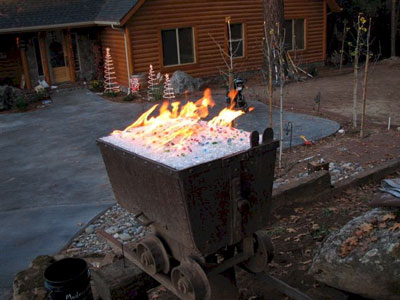
The fire pit below belongs to Mike DeVito in Northern California. When I saw his idea I was excited to help him create something new and wonderful. He took a very old mining cart in his front yard and we helped him convert it to a propane burning fire pit! Turned out pretty cool! Net he is getting a fire pit cover made to cover it from debris and who else knows what.
We use a FPPK (fire pit propane kit) with valves, thermo coupler, pilot light and air mixer. The glass that was use is:
Starfire base glass over a bed of crushed lava rock,
Yellow Amber Topper
Steel Blue Topper
Turquoise Blue Topper
Green Tubes
Copper Ruby Red Topper
Ice Ice Ice
and of course our Diamonds in Clear, Pink, Amber and Blue.
I think this is one really nice idea!
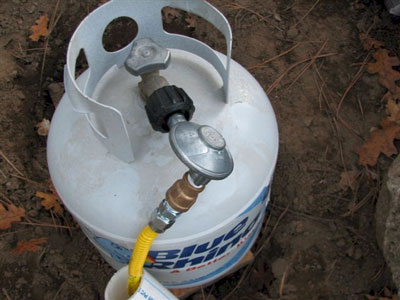
It is all supplied by this 20 lb propane tank
Here is the mining cart with the base plate installed with the burners
Here you see the controls, air mixer and thermo coupler and pilot light lines under the base place
You can use a larger (3/4", 1" lava) as a base under our 1/4" crushed lava as this will save you a few dollars.
Now we pour on the crushed lava to keep the glass from sinking into the larger lava.
Add some Starfire
Splash a few colors
Have your spouse light it in case something should go wrong! (Just Kidding)
Again here are the first pictures we saw of the mining cart. Great Idea!
Mike, you did a great job!
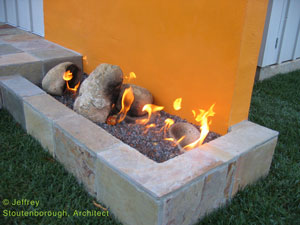
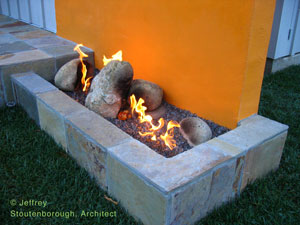
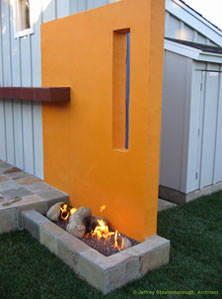
The fire pit below was designed and built by Jeffrey Stoutenborough in Santa Barbara, California.
He started with a Bronze Base,
Bronze Reflective on top,
Black Reflective,
Ice Ice Ice.
Dark Red Orange Topper and
Blue Green and a few large rocks left in place.
The fire table/ fire pit below is in Texas and was designed with our glass in mind to be installed and it has a Black base,
Purple Topper,
Black Luster Topper,
Rhubarb Topper,
and Bronze Topper.
The Terra Cota pot below is fed by natural gas and was topped with a 1 1/2" layer of Clear over a bed of crushed lava rock.
The gas line was drilled from the bottom of the deck and the pot was placed on top
The collection of Fire Tables below are from D Cook, one of our dealers and a manufacture of some really nice high end fire tables and planter boxes in any and all metals. Tell us what you think!
The fire pit below is one of several Katrina builds in the San Francisco Bay area. She will build anything thing you can imagine in here field of design. Please contact us so we an put you in touch with Katrina.
The fire pit below she used a Clear base glass.
The fire pit below has a black Base with Black Reflective on top.Not too great of a fire pit picture but you get the idea. Even with Black as a base glass you will only see the color of glass under the fire. The flames don't change color nor does the glass, but the glass is what will reflect the light at night.
The fire pit below is in Newport Beach California at Newport Coast Development. We replaced a hot spark ignition which did not work, with our IPI (intermittent Pilot Ignition) electronic ignition system. The fire pit was 18" deep and 48" across. This is what was installed:
1 IPI Electronic Ignition for Natural Gas connected to a 1" gas line
1300 lbs crushed lava
144 lbs Clear base glass for a 2" fill over the crushed lava
36" triple stainless steel burner ring
20 lbs Clear Topper
20 lbs Cobalt Blue Topper
20 lbs Copper Blue Topper
We will show your from beginning to end:
Looked pretty nasty when we got there
We started to pour the crushed lava with our electronic ignition being raised to the surface by the lava rock
We built a double box to protect the equipment in the fire pit as well
The ring is now installed
The electronics
can be accessed if ever there was a failure of the equipment and you can access it from the surface. Before the equipment was 20 inches below the surface, not a very good idea!
Now we poured the 144 lbs of Clear base over the crushed lava
We only did the fire pit, not the view. That came with the home. But one very impressive view!
Then we spread the Clear Topper, Cobalt Blue Topper and Copper Blue Topper over the Clear base
As you have looked at all of our pictures we would like you to know we use Crystals as our toppers and toppings. We don't use "Recycled" glass, ever! We are actually the only company that produces Crystals for fireplace and fire pits.
We tried to get pictures of it burning, but the flames just didn't show. Look above and you can see a flicker in the daylight. Actually the flames were over 16" tall but you can't see this in daylight.The contractor will get a few night pictures when they and if they can.
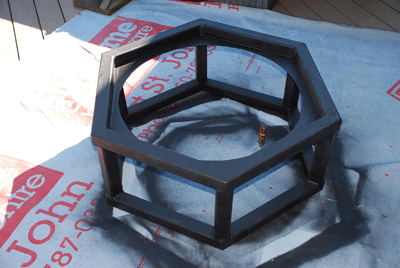
On this page (as if you needed another page) We are going to show you how to build a basic fire pit for your deck/ back yard.
This was built by Glenn Harvey of British Columbia.
This first picture is the frame he had started with.
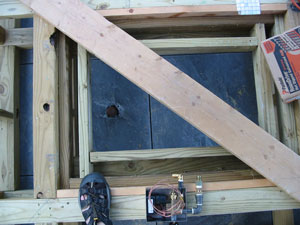
You can make one from metal studs, aluminum studs, etc. Anything non flammable.
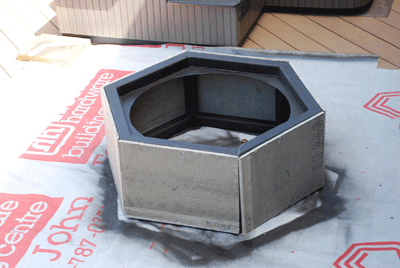
Wrap it with wonder board or durock/ cement board.
Below you can also wrap it with wire for better adhesion to the backer board.
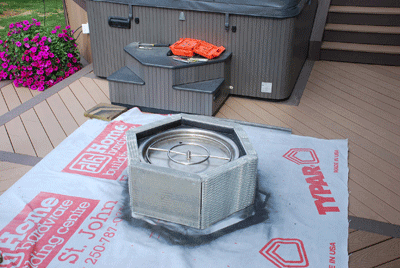
This fire pit was natural gas. We also manufacture the burners for propane. Well, we are the only ones who actually manufacture propane burners for your projects.
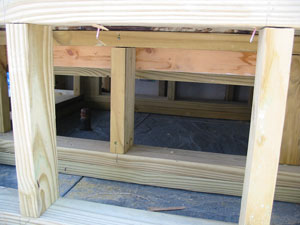
Below you can see the gas connection coming up from the deck. Glenn used a pan but he also could of used an aluminum/ stainless steel base plate as well.
The stacker stone is now being applied.
As you can see below the trimming valve is installed on the side. You would be surprised on how many plumbers don't think of this little detail, a valve to turn it on or off. I have seen the valves installed inside of the pit or not even at all. You also need to be careful as to not have a gas line installed that is too small for the application.
Now the stone and cap are done, great and simple job!
Below you an see the larger filler lava rock was installed. If a flat plate were to have been used you wouldn't need the larger filler lava rock base.
Below our crushed lava was used to cover the larger lava rock to insure the glass does not fall through. This makes an even base. What ever shape you make the lava is the shape the glass will take.
Below we installed Water White base glass (32 lbs) for a 1 1/2" cover!
The stone on the side of the fire pit used was to match the stone on the house as well. Looks awesome!
Below is just the Water White before the colors were added.
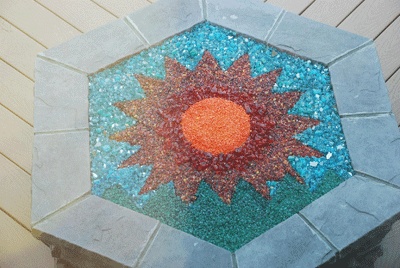
The colors that were added are as follows:
Azurlite and Azurlite reflective for the sky area.
Brilliant Yellow R20F4 Topper for the sun center
Scarlett G072F3 Topping for the suns rays
Orange R140F4 Topper for the ring around the suns center
Emerald Green 1417 Topping for the bottom trees/ grass?
Deep Blue 2507 Topper mixed in around the Azurlite in the sky area.
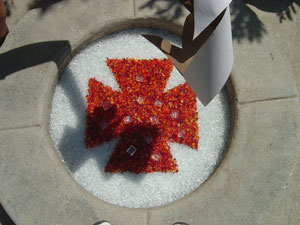
If you notice below the center of the sun, it changes when it get hot! This one of our chameleons that change when the glass gets hot. If you look real close at the Orange Topper (next to the suns center) as well, it turns a bright cinnamon red when it get hot also! All of our chameleons will be posted when we get a chance. This is just another one of our product lines that we have not had time to further promote.
Above is the fire burning and
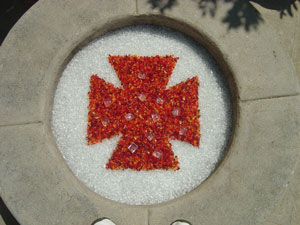
below the fire was just turned off.
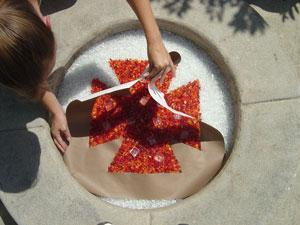
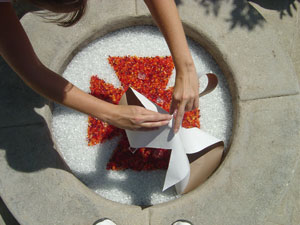
Glenn spent a few hours placing all of the glass to make this very cool scene. So don't just think you can just throw it on and it knows were to go. Very creative!
The fire pit below is a custom fire pit in Covina California with one really great back yard design. This back yard was designed for great parties. If you look and see the glass wall with the etching you will also see the fire pit in the back ground. The glass that was used: Gray and Clear Pyrite base glass Gold Reflective Copper Blue Topper This is one really good looking table.


The fire pit below had the wrong type of burner let alone the location of the burner.
The burner must be with in 2" of the ultimate top of the surface of the fire pit. Filling the pit with gas and then trying to light it? Nothing good can become of this. We installed a #304 stainless steel "H" burner, covered it with crushed lava (1/4" / 3/8") over the larger lava rock. This is what keeps it from trickling to the bottom. Them we topped it with Starfire base glass. Then Eric is trying to decide which colors/ topper he should add if any at all.
Wrong type of burner above.
Our "H" burner below. Watch the flame pattern as the crushed lava covers the burners.
Now for the big decision, more colors and which ones?

The fire table below was built by Christina "Stina" in the San Francisco area. With a little ambition, imagination and our help, she now has one very nice fire table.

Here is where it started. She made a template of the pan and where the mounting tabs would be located. Then we built the aluminum pan and propane burner for Stina to install.

Below is how the teak table started. We just brought it into the future.


Below the pan was installed with Galaxy Green base glass.


Below you can see the top installed and what a difference.

Below is her wonderfully finished project, Great job Stina!

Below you can see the pump has been turned on.
and now the fire.
We placed a card board template to replicate the table top to conceal the lights as well.
Here is the feature exposed with the blue water. You can change the water to any color you like.
This feature is only 6 1/2" tall. You can mount this under the table top and keep it only an inch or so above the surface of the table top.
So let's change it to red water and add Starfire base glass.


 .
.