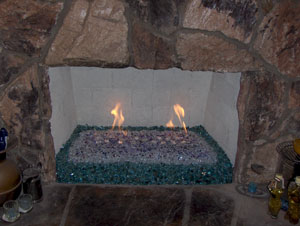
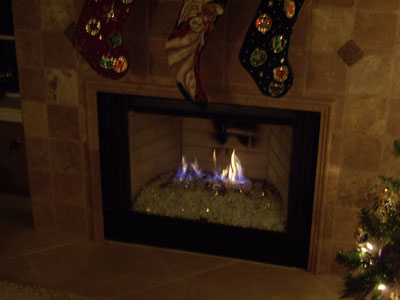
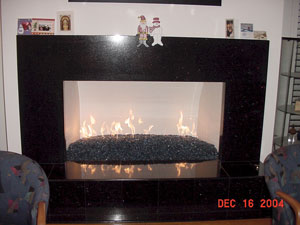
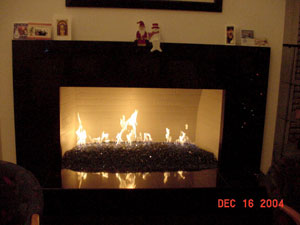
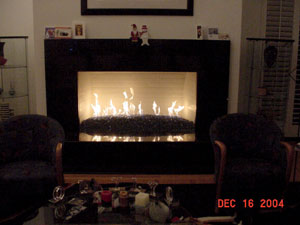
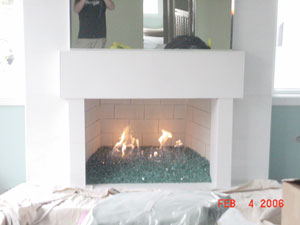
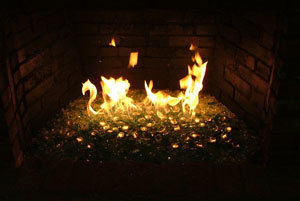
Marie Welsh got rid of her logs and filled her fireplace with some of our Bronze Rust Copper, Amber, CA Gold and 1/8" Bronze Reflective.
Marie also replaced her old burner system with an 18" x 18" steel burner pipes.
Here is what Marie had to say.
"I was in your store earlier this week and bought our fire glass and burner. We couldn't be happier. We spent only $400 total in supplies, paint and your products .Then, of course, there was some elbow grease! It looks great.
Thanks to everyone there.
Cheers! Marie"

_____________________________________________________________________
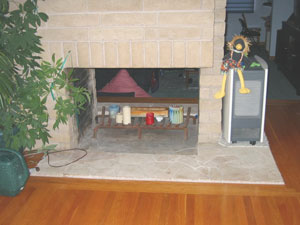
Click "HERE" or on the picture below to see how this started and finished, very simple and very nice
 _____________________________________________________________________
________________________________________________________________________
To see how this fireplace was transformed CLICK HERE or on the pictures below!

TO

Creativity and IMAGINATION is how.

________________________________________________________________________
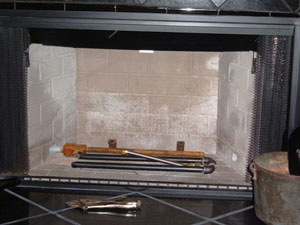
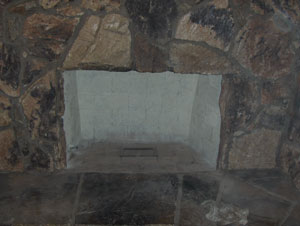
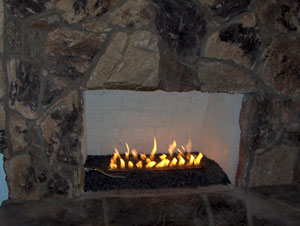
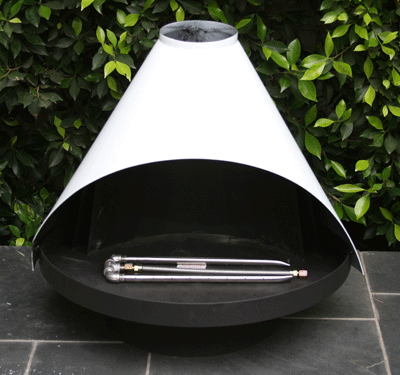
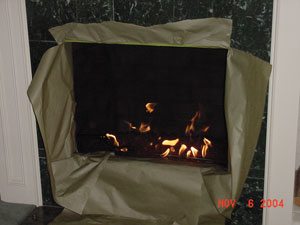
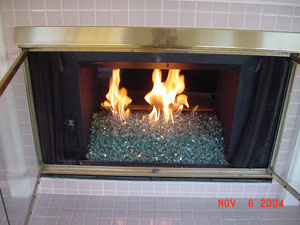
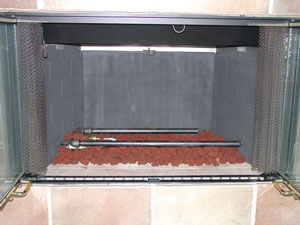
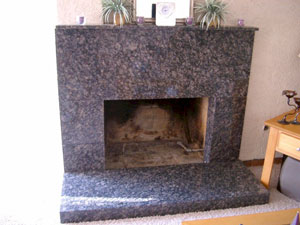
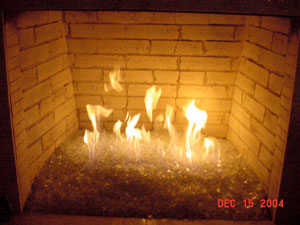
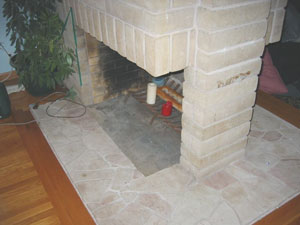
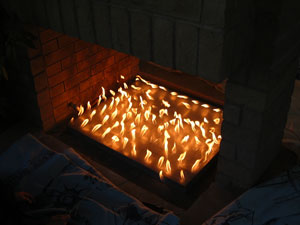
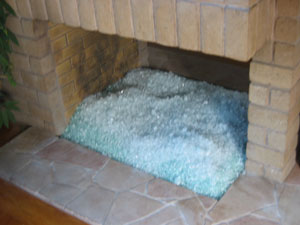
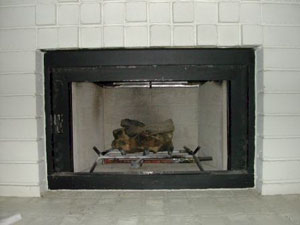
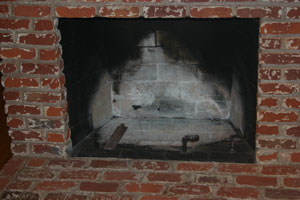
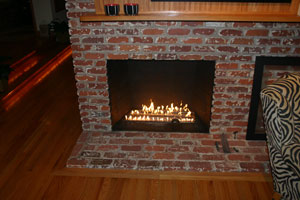
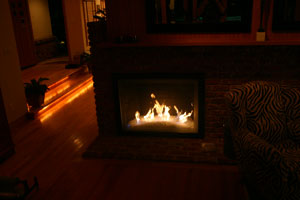
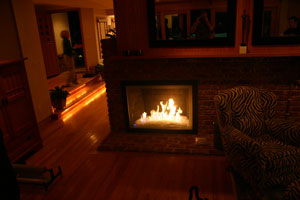
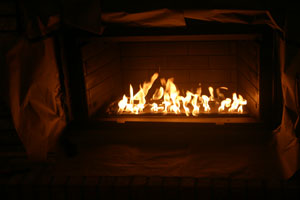
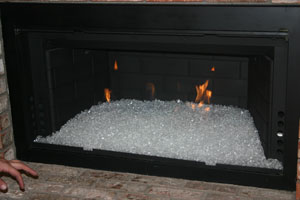
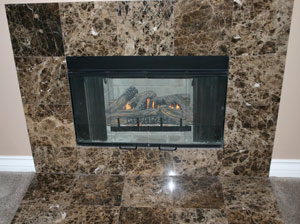
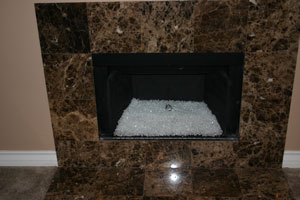
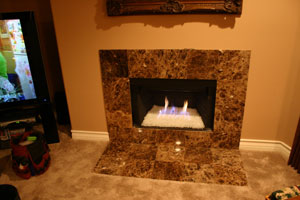
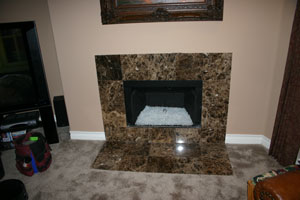
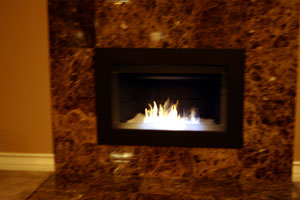
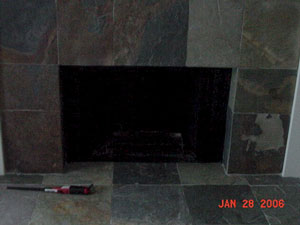
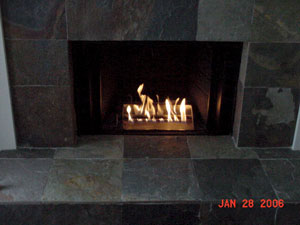
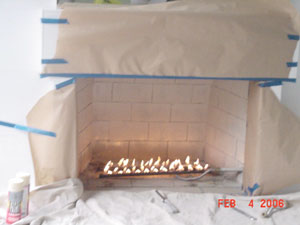
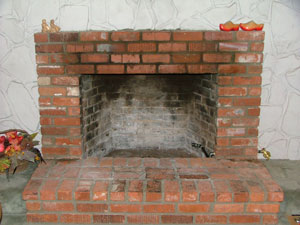
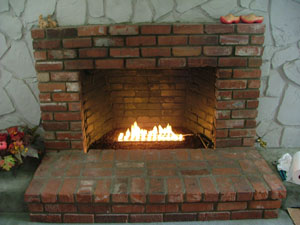
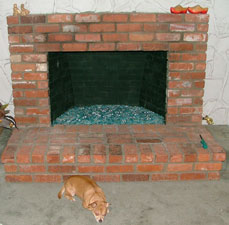
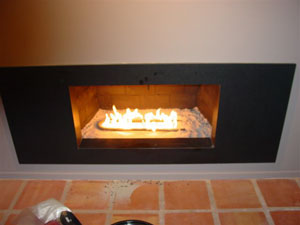
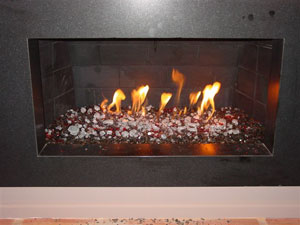
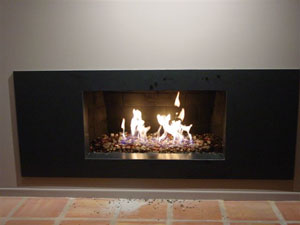
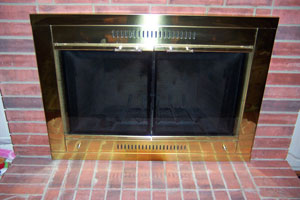
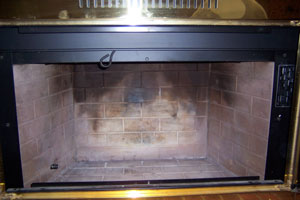
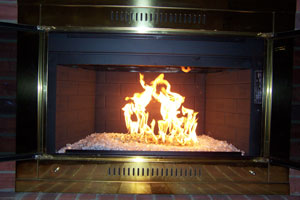
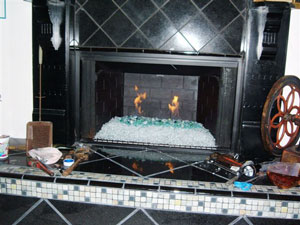
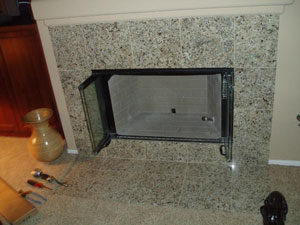
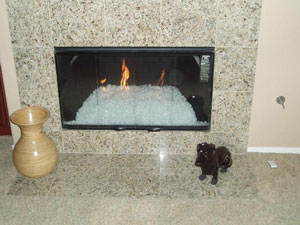
This first picture is a fireplace which is ready for an install
and this is how easy it really is!
The installation is our 2" method which saves you 1/3 the cost of the glass! Don't be fooled by the antics of some installers.
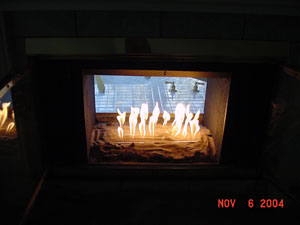
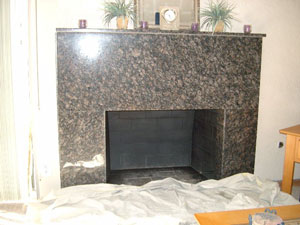
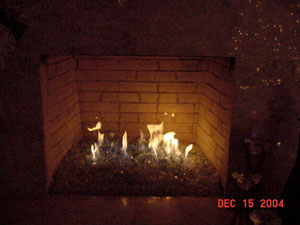
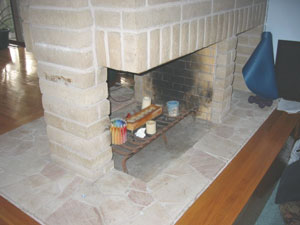
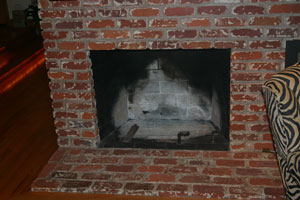
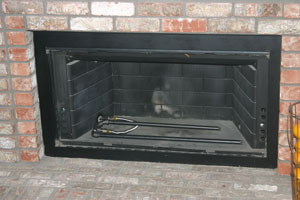
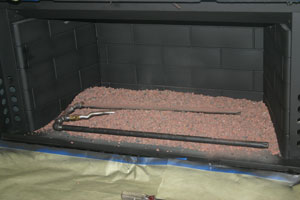
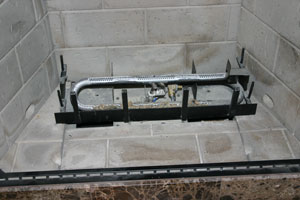
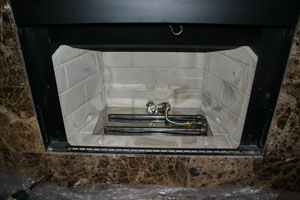
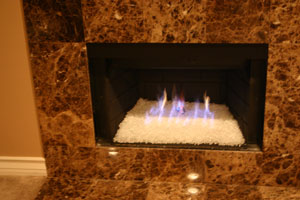
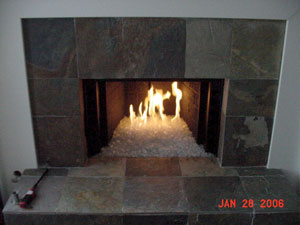
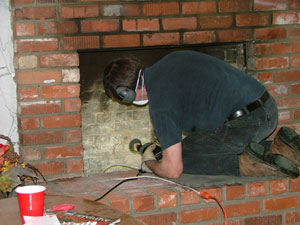
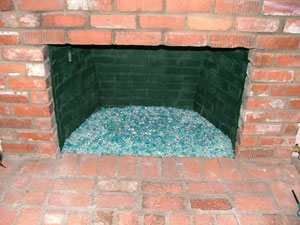
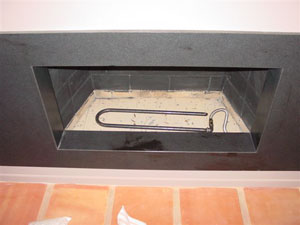
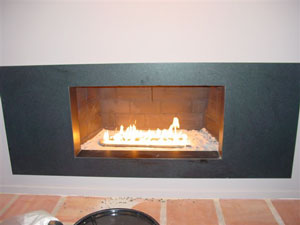
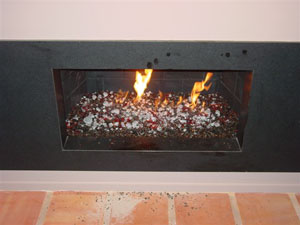
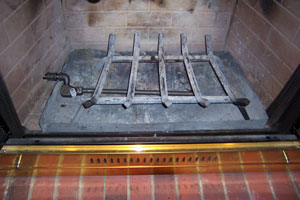
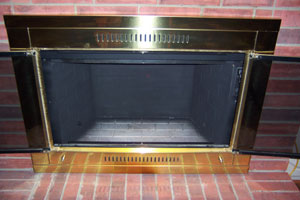
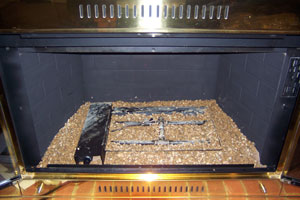
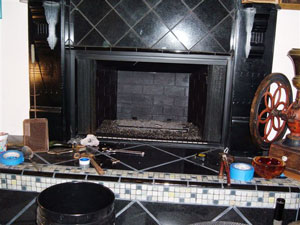
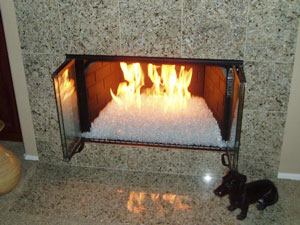
After the fireplace has been cleaned and is now ready for paint. We have installed the burner which is as easy as hooking up a garden hose.
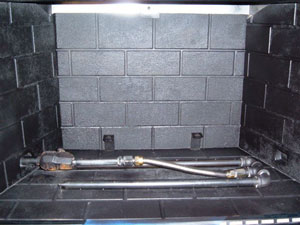
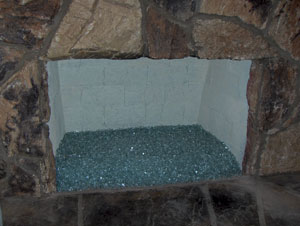
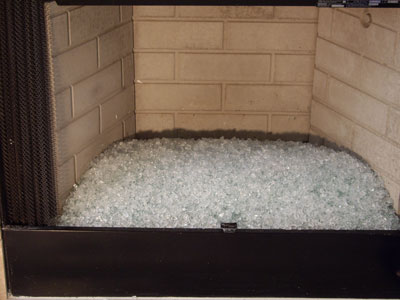
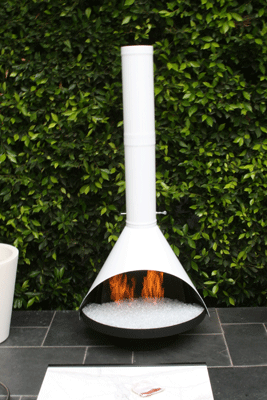
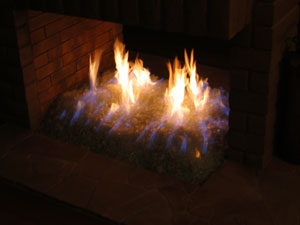
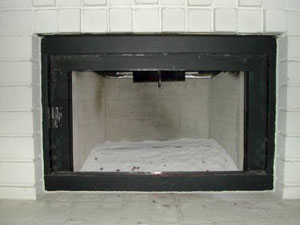
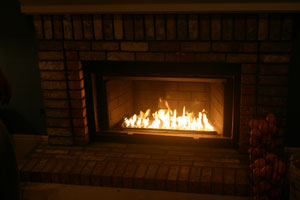
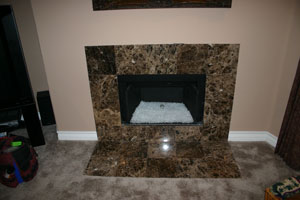
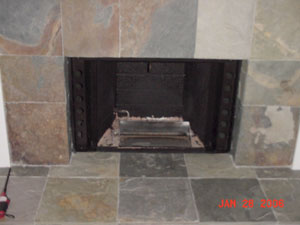
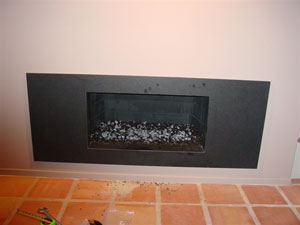
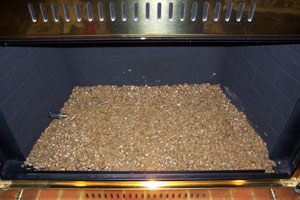
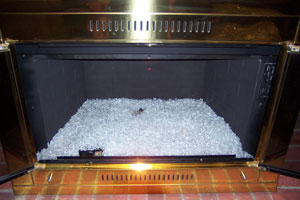
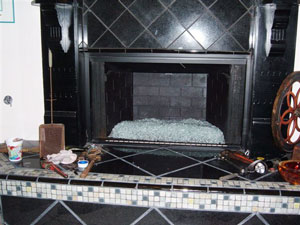
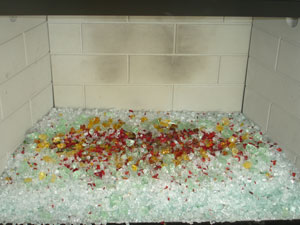
This is a little hard to see but we have 2" of crushed lava rock under the burner which is actually your new base.
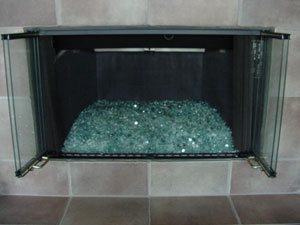
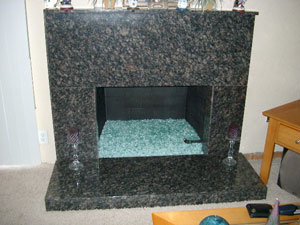
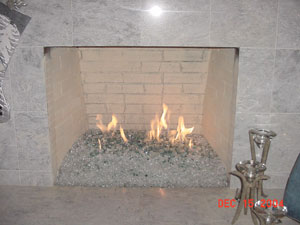
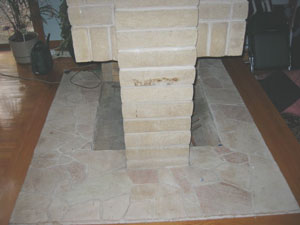
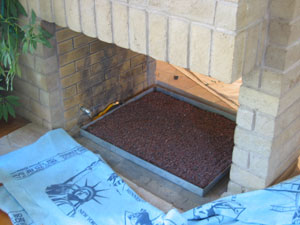
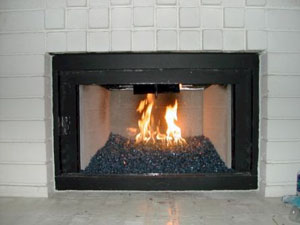
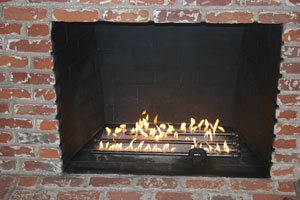
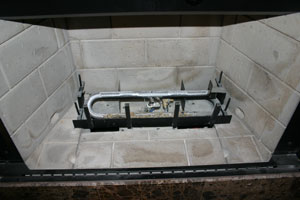
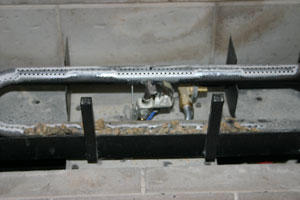
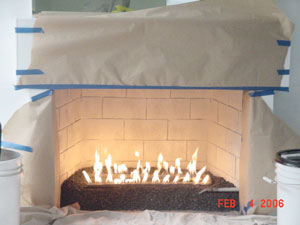
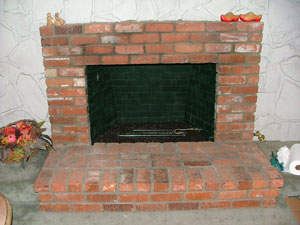
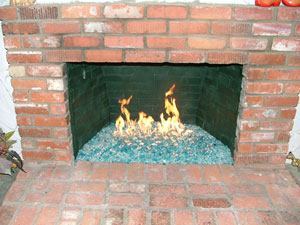
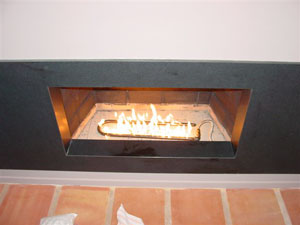
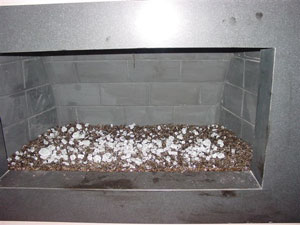
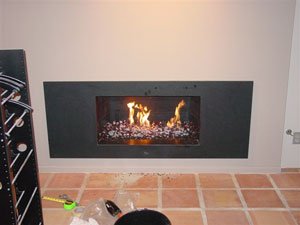
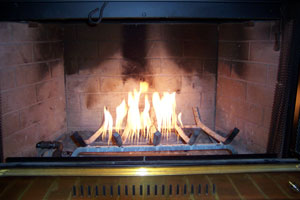
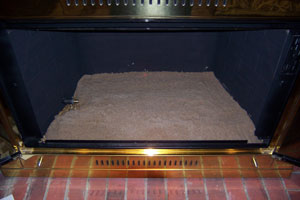
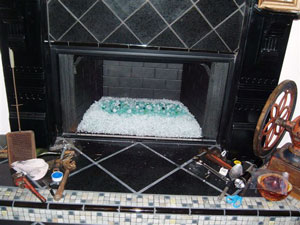
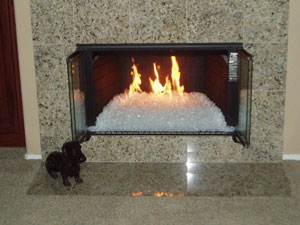
We now have pulled the burner to the top surface and covered the lava rock with sand to expose the burner. We then adjusted the flame pattern by turning the burners to obtain our flame direction.
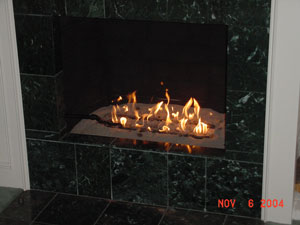
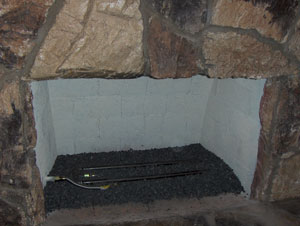
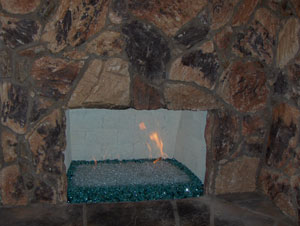
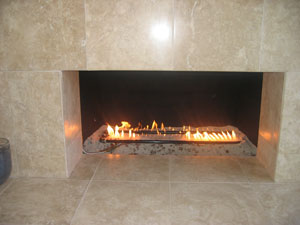
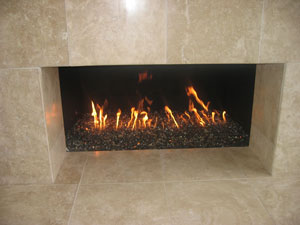
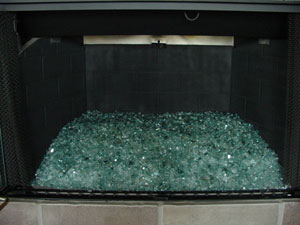
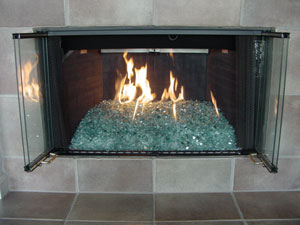
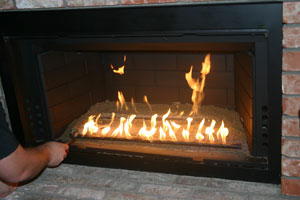
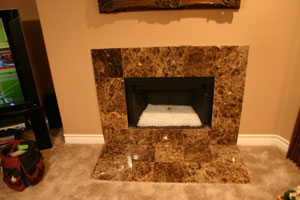
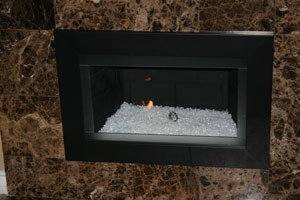
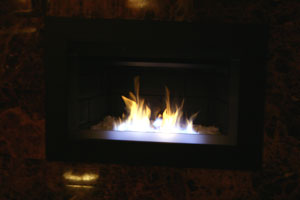
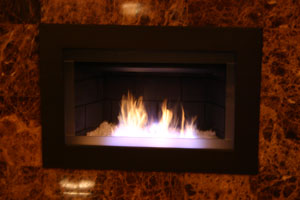
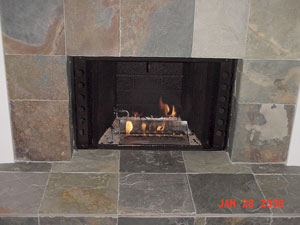
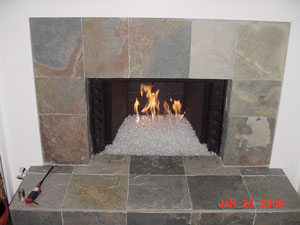
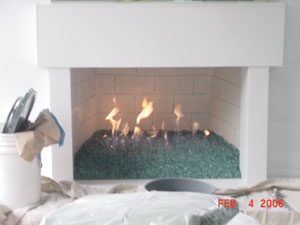
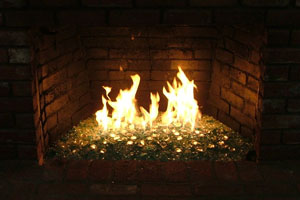
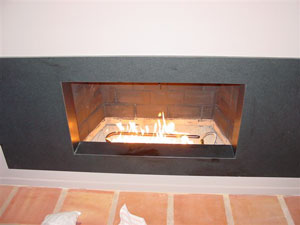
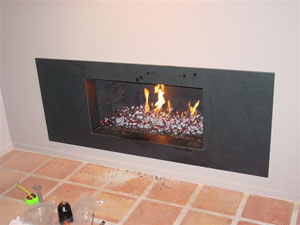
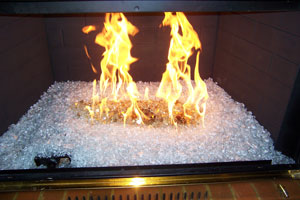
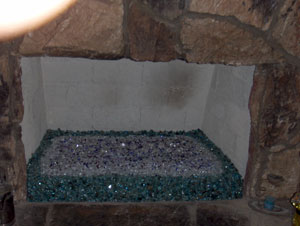
Here is the finished product with Blue Green Reflective and who would know that there is a 2" base of filler underneath?
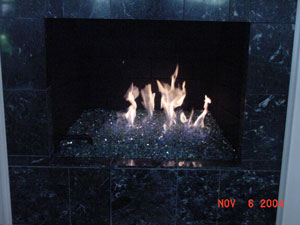
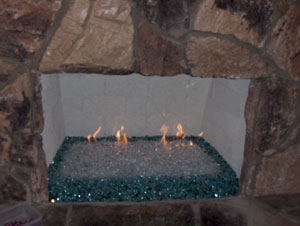
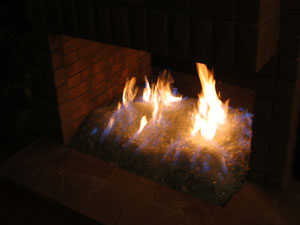
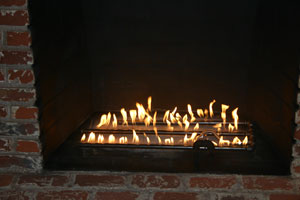
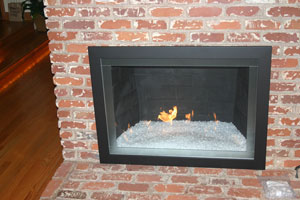
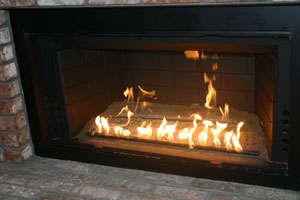
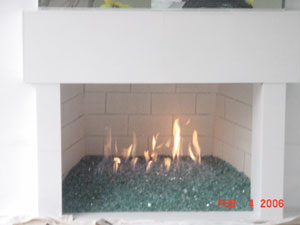
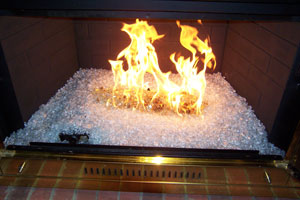
Here is another installation with Blue Green Reflective
______________________________________________________________________
Click HERE or on the picture to see how it was transformed to this!

From THIS! (BELOW) again YUK!

______________________________________________________________________
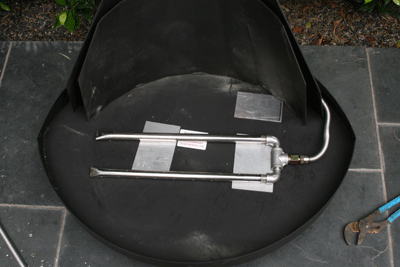
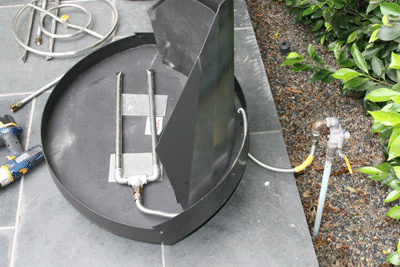
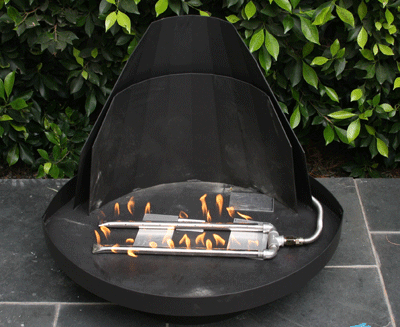
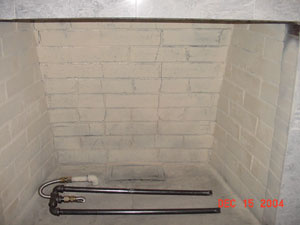
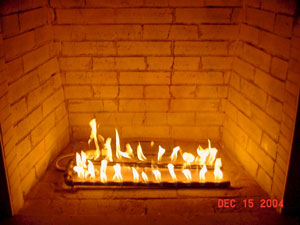
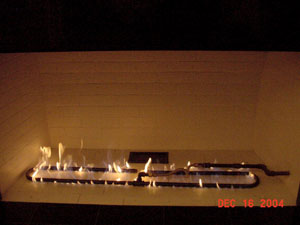
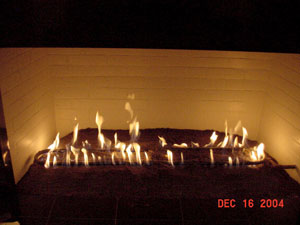
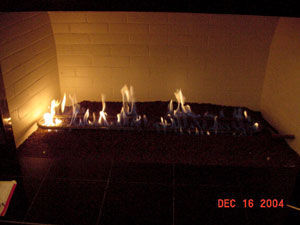
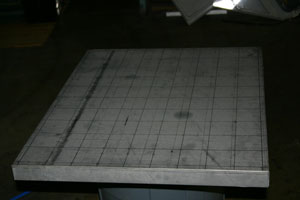
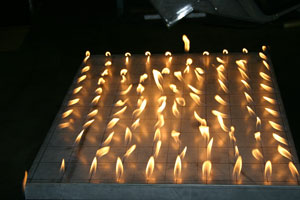
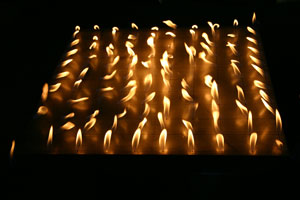
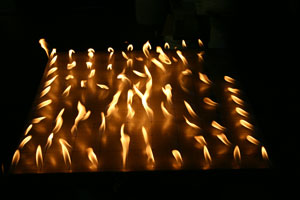
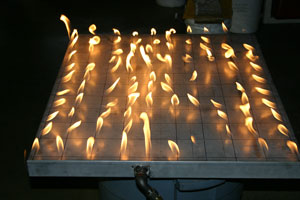
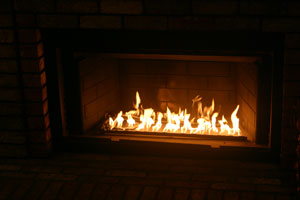
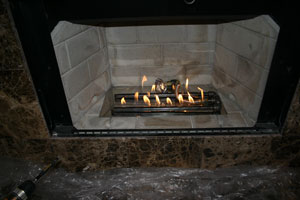
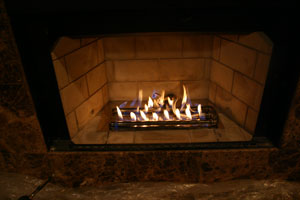
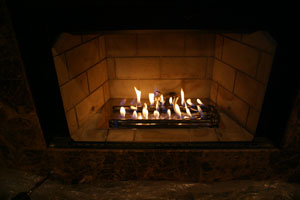
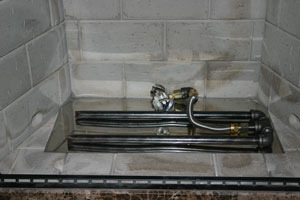
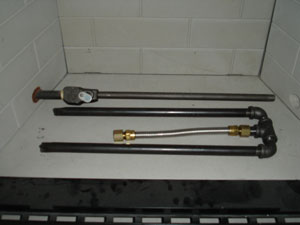
Here is another tip on How to correctly install a natural gas burner.
A picture is worth a thousand words, here are three thousand words!


This has an 18" x 18" burner with a lava rock and sand base. This method is will save you 1/3 the cost over atypical installation.
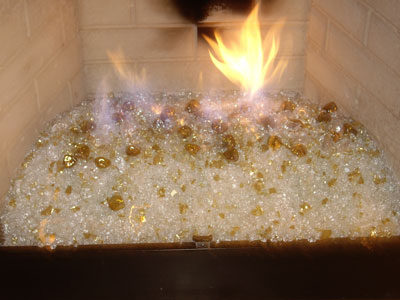
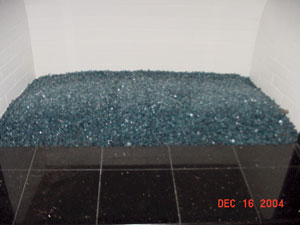
Can you see the crushed lava rock and sand? Here is another customer self install using Bronze Reflective with Gold on top.

Step one, yuck!
step two, paint and lava rock
step three, glass

step four, done!
Clear base with Evergreen Reflective on top.
again step one
clean and paint
and the final step, pour and light.
Clear base with Blue Green on top.
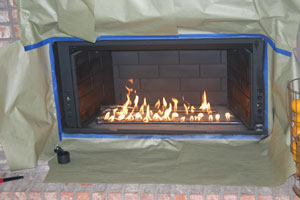
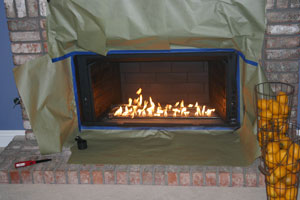
2” Installation Guide
First we would like to thank you for choosing Aquatic Glassel fireplace glass and now for the good stuff. Clean your fireplace and wire brush if needed to remove any soot build up. Wipe the surfaces clean with a dry cloth to remove any dust. If you are painting mask off the areas you don’t want any paint on. Spray your paint and remove the masking
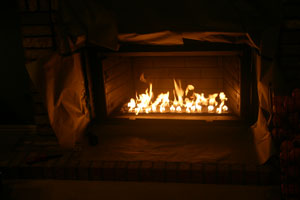
Now you want to hook up your burner and place it in the center of the fireplace. Turn the gas on and light it to check that you have the flame pattern in the center and going up and not lapping on the back wall. This will cause soot and look like do-do. Now you have found the general location for the burner. Pour in about 2” (you can use as much as you want) of crushed lava rock and maintain about 3” to 4” from the front of the fireplace. Keep the front clear of lava rock and sand, as we don’t want it to show through. Pull the burner to the top and light it again to insure the pattern has not changed. Now cover the burner and lava rock with sand, brush the burner of any sand and light it again. Checking for the flame pattern again. Looks good? Now your ready to pour the glass on the lava rock and sand base. Starting from the front to back to keep the lava rock from mixing in the glass. Now you’re done unless you are topping off with another color. We recommend you do this slowly as it looks better if you take your time. We also have found that if you do this at nighttime it makes more sense as you can see the actual effects of the fire and the toppings.
In the event you want to remove the topping at a later time, use a shop vacuum to remove the top layer. We put tape on the end to make the hole smaller as not to suck up the complete fireplace of glass. Save this glass you just removed for use later in time. Now you can re-decorate with a few pounds of another color to change the entire look of your fireplace.
We at Moderustic and Producers of Aquatic Glassel and the inventors of Fireplace Glass, are proud to offer the consumer almost 400 products and we know we have spawned a few undesirable competitors in the market place but we continue on our quest for betterment and greater success through you the customer. We have been criticized for offering the crushed lava rock and or filler method by all of these other companies. But we understand the wants and needs of the customer, you. Spend less and get more. Some of these companies are telling the consumer to not use filler, why? They only want to fill their pockets with your money and we want you to save money. We know we have devastated these companies with our filler saving methods but it is with the best intentions for the consumer in mind. We have refused to sell to these individuals and companies because of their business practices. So please understand their intentions when they want you to purchase more glass. We take pride in our new product and take Patent Infringement very seriously! There are several companies who have copied our product and or process and they will be in for a surprise when our patent number becomes available to the public and they will find their business in ruin. If you are a previous or new customer and would like to add your comments on these companies or your experience, we will post a testimonial page for these to be read by the public. If you would like to post just your comments, they are welcome as well. Again, we work for the consumer and not the competition.
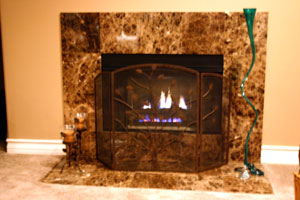
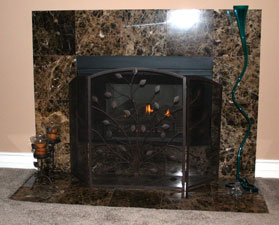
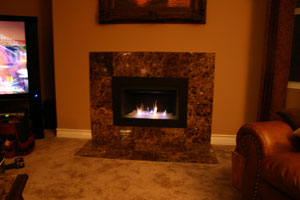
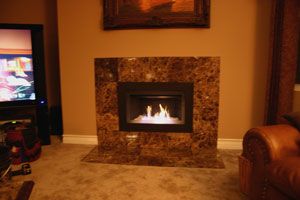
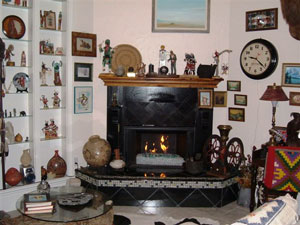
The fireplace below is in Pasadena, California. Ursula did a nice job, (2004!) but just recently she had us update it withe Sterling Silver walls.

The next 5 pictures are from Ursula in Pasadena. She just recently had us update her fireplace with a Sterling Silver interior. Nice touch!


Here are some pictures of 1/4" Ford Blue with Reflective on top.
This is also a self installation so follow the pictures down to see how it turned out.
above
this is how it looked when we arrived
below
installed burner and test the draft of the flame
below
pour lava rock and pull burner to the top

Ford Blue with Ford Blue Reflective
The pictures below are of John Hanson in Northern California and he did a pan burner we provided and installed it himself.
A Clear base with 3/4" Clear on top
Here is how it all started
The bottom of the pan goes in
The top goes on and you light it
Now the glass

and now the magic

This is how the pan started
There you have it, simple as that. Great job John Hanson!
_____________________________________________________________________
CLICK HERE or on the PICTURES below to see how this became what it is today!


_____________________________________________________________________
The pictures below are of ford blue and fore blue reflective from beginning to end.
Sand over lave has been installed over the burners.
Where is the lava rock and sand? Don't let anyone tell you different as this proves to be very cost effective if you choose to do it this way.

The pictures below we will be showing how to do a 3" install (all glass), a surround painted black and a triple burner with Ice and Starfire.
Above and below are a typical of what most fireplaces look like (yuk)1
Above and below with a triple burner, some cleaning and a little bit of paint.
Above and below we installed an aluminum surround painted black. Only Starfire is installed for now.

It's hard to see but we did install Ice on top of the Starfire. If you noticed we had to pile a small mound in the front to cover the massive pipe connection. Did you even notice it in the first few pictures?
With the surround it make the room. We are proud of our inventions and ideas because our customers are always pleased.
The pictures below are of a 2" install with Starfire and black paint and this install took only 30 minutes.
Be sure to clean the fireplace before painting.
install the burner and test the flame pattern.
test the flame on high and low to insure the flame goes straight up and does not hit the walls.
after masking and painting we turned the flame on low to heat the paint to dry it quicker.
Turn the light down low to see the flame pattern as you will have the light down low with your evening fire. The pipe burners can be adjusted to the desired effect.
Above the lava rock goes in and then we test the flame pattern once again.


Above the sand goes over the lava rock and we once again test the flame pattern.
Pour the glass on and your done.

We have been told by dozens of customers that you will need an installation by a tech. As you can see how easy this actually is, they just want your money more than you do. Again this was a 30 minute install.
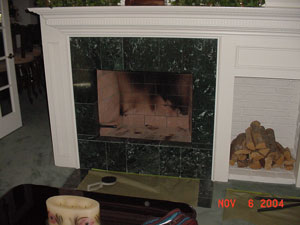
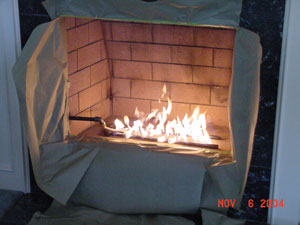
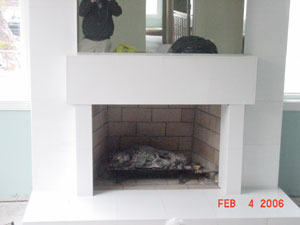
This is a new home with logs and a screen, average at best. Has anyone ever come over to your house and said" Nice Logs"? No and we are going to show you how to create a masterpiece!

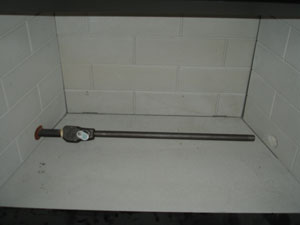
The pictures below are of a typical direct vent burner.
This is a picture of the automatic starter and thermo-coupler
After you have closed off the bottom of the fireplace and attached the adapter, your ready for glass!
Here we are testing the burn pattern of the double burners. Our burners have 2 rows of holes in each pipe to give you 4 rows of flames.
After pouring the glass make sure the automatic starter is just above the glass so it can work properly. You can hide it with glass all around the element and it helps if it is in a hole.
Here we installed an aluminum surround that has been painted black.

We have several more pictures of this fireplace with Ice and a few colors of toppers installed and we will have these pictures up in a few days.
We will also be posting several direct vent fireplaces to show you how easy it really is.
The 6 pictures below show a self install with all glass using the original burner which didn't have a bad flame pattern. 1/8" Clear was used as a base and then Starfire was added to the surface saving money and it did look great. It's a simple as that.
The 6 pictures are of Green, Green Reflective, a 2" install with lava rock filler and is a self install
This next self install is a 10 picture install with :
Azurlite, Clear, Blue Green, Blue Green Reflective, Ice Clear, Ice Blue. Very nice fireplace.

 // -->
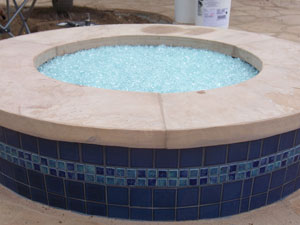
The pictures below are of a self install fire pit with crushed lava rock and a clear base
1/2" to 3/4" lava rock is use just to the bottom of the ring.
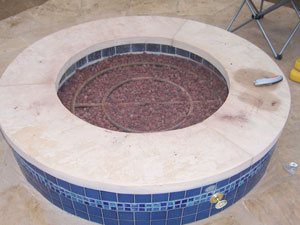
If you want a higher center then pour a little more filler on top of the ring.
Now we will pour the crushed lava rock (1/4" to 3/8") over the filler as this will stop the glass from falling through the lava rock.
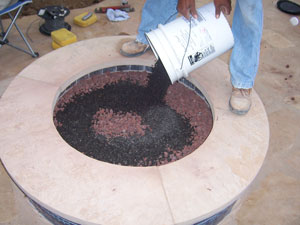
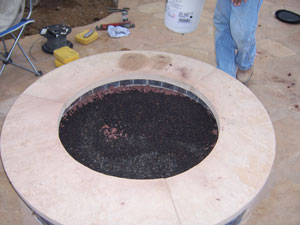
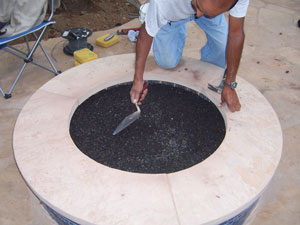
Finish shaping and pour the glass
This is a 36" fire pit which requires 56 lbs for a 1" cover and 80 lbs for a 1 1/2" cover.
We used the 1" method, 56 lbs which as you can see works just fine and no you can't see though the glass.
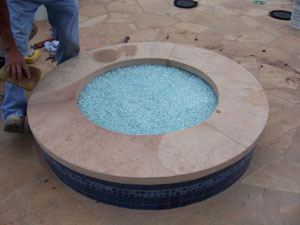
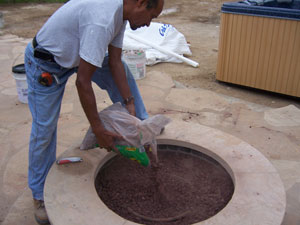
The second step will be to add color and Toppers which we should post in a few days and night time pictures with the fire on
Here we are showing you how to properly install a fire pit with glass whether you are using a 1”, 1½” or even the 2” method. The less glass over the crushed lava rock the more likely someone can disturb the top layer and then the lava rock could show through. We recommend starting with less and then you can always add more if you need to. As you can see we had our customer do the 1” method and it looks just fine. Now he is going to add toppers for accents and color. Don’t be fooled by someone trying to get you to purchase more than you actually need. Give us a call and we can help guide you in the right direction.
The pictures below are of a self install with:
1/4" and 1/2" Bronze, 1/4" and 1/2" Starfire
Red Topper
Red Topping and about 1 lb of Scarlet Red Topper.
The fireplace below is a propane burner, self installation with the 2" method, Starfire and Gold on top
Above we have the old burner with a smaller flame pattern which we will change to a double burner in our tray propane pan burner
A little bit of cleaning with a wire brush and 1200 degree paint
We filled the bottom with pea gravel and the covered it with sand
Then we installed the propane burner and filler it with pea gravel to the top of the burners
You can see the pilot light and thermo-coupler exposed
So there it is. A clean burning propane burner, 2" method, no soot, no smells, no carbon monoxide and it puts out a tremendous amount of heat. We sell the 2" method because it works and if anyone tries to tell you different, they need your money more than you do. We are the only company building propane burners for glass that don't soot or smell!
This is a self install with a Clear base, Lagoon Topper, Pale Emerald Green Topper and Ice
above the burner goes in
below the lava goes on the burner. Then magically the lava disappears! We use the 2" method to save money not gouge the customer as we here this everyday how customers are taken by BS!
The fireplace below is in San Diego, California and the colors used were:
Cobalt Blue Topper
Steel Blue Topper
Cranberry Pink Topping
Purple Topper
Lilac Topper
Deep Royal Topping
Clear Base
Solex and Solex Reflective
Azurlite and Azurlite Reflective
Blue Green and Blue Green Reflective
and a little bit of Ice Ice Ice on top
wow!
The end pictures show that the burner was too close the wall which was an easy fix by moving the burner forward.
This is where is went a little bit wrong, oops. We just had them move the burner forward and now its fine and the back wall was repainted.

The fireplace below has:
A Clear base with Pale Lime Green Topper, Red Toppings, Yellow Amber Toppers and Toppings, Copper Ruby Red Topper, and a hint of Starfire to lighten the color up.


This is how easy it is to install. This is all glass and if you need to build it up a little or a lot then use a filler to save money
The fireplace below is s typical simple install. Paint, glass, fire and your done. This is all Starfire over an 18 18 burner and 1 can of paint, black. This is how simple it really is!

The fireplace below is in Hope Ranch, Santa Barbara, California. First we installed the double "H" burner.
Then we pour 2" of crushed lava rock as a base over the burners.
Now we pour the Black Magic (you'll soon see why).
The we add one match and poof, BLUE FLAMES!
The we start to add 8" fireballs
A total of 32 8" fireballs in natural color were added
The customer had a green theme and so we topped it off with our Green coating.


As the evening went on the ambient heat drew the flames higher trough the fireballs and the blue was just pure magic. The End!
The fireplace below is in Palm Desert California and was a self install with a crushed lava base, Clear over the lava, Starfire on top of the Clear and topped with Amber Diamonds and a splash of our Gold . It looked great until they found the burner was too close to the back which burned the back wall. I don't know if this was repaired as we did send paint and instructions on how to prevent this in the future. The fireplace looked great except for the "skid mark" on the back wall.
Above it still looked good here!
About our Diamonds, they are made of crystal and when you see them in the fireplace you actually see the fire reflection reflecting the flame backward as if the Diamonds were melting from the inside.
The fireplace below is in Santa Monica California. The fireplace is a Malm Fireplace which can be found at:
or
We used an 18" double stainless steel burner and a bed of Starfire topped with a few pounds of our Ice Ice Ice.
This is a very simple self installation as you will see.

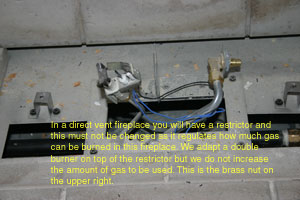
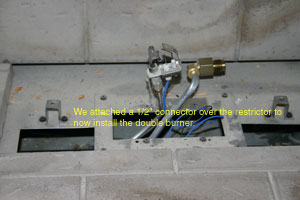
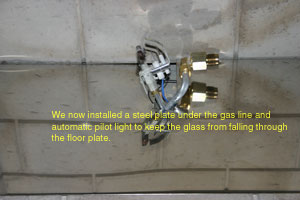
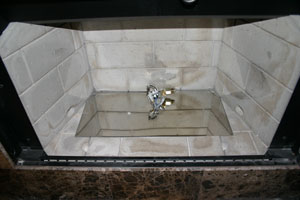
The fireplace below is in Venice Beach California. This is a direct vent installation and we will now show you how easy it really is. For all of the installers out there who say it can't be done, well here you go. Pay attention now!


The glass that was installed was Starfire.
The house is and was under construction so please excuse the debris around the fireplace. The pictures explain what we did. We didn't change the amount of fuel (btu's) being burned just the way it looks. Flip the switch, the ignitor lights, allowing the gas to come up through the burner and the pilot light lights the gas rising from the burner below. As for the doomsayers that tell you this can't be done, Oh Well! This will be our little secret. If you have any questions on your conversion please send us pictures and we will help you convert your direct vent fireplace as well.
Most fireplace manufactures will tell you this will void your warranty. But you need to actually read the warranty to understand what they will or won't cover. The person telling you this at the factory, ask them what the warranty actually implies. We have read many of these warranties and they won't cover the fireplace anyway. These warranties were written by attorneys to keep the liability from the manufacture and lay the blame on the consumer at any expense, no really read one.
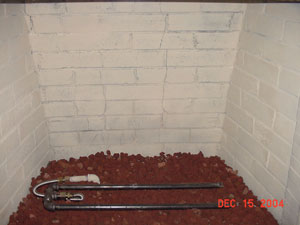
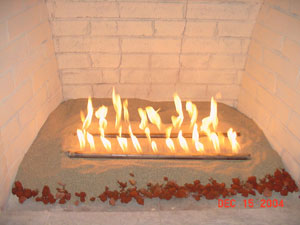
Here is another tip on How to correctly install a natural gas burner.
A picture is worth a thousand words, here are three thousand words!