PMC Certified
crafterjudi@yahoo.com e mail any comments or questions to Judi
________________________________________________________________________
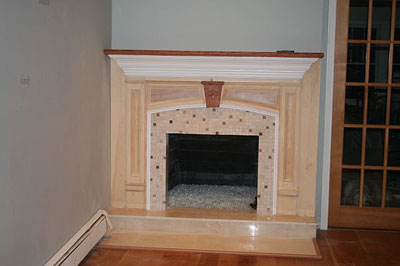
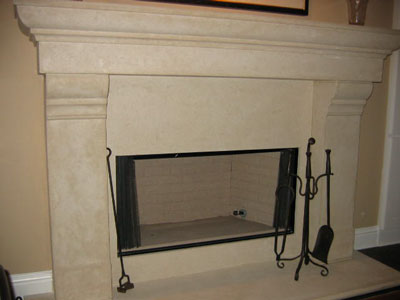
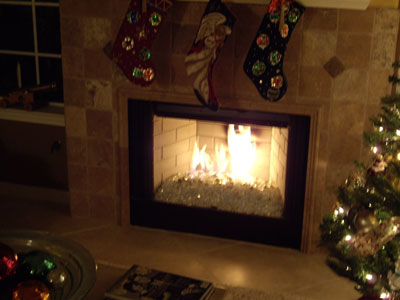
To see how this fireplace was transformed CLICK HERE or on the pictures below!

TO

Creativity and IMAGINATION is how.

________________________________________________________________________
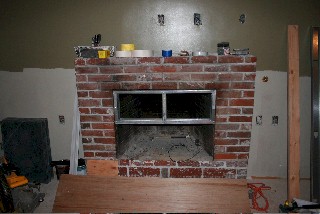
______________________________________________________________________
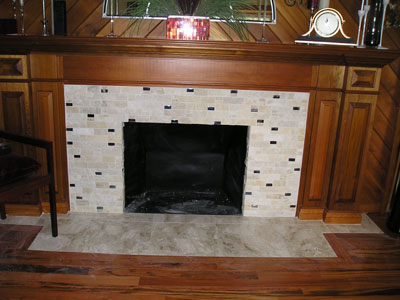
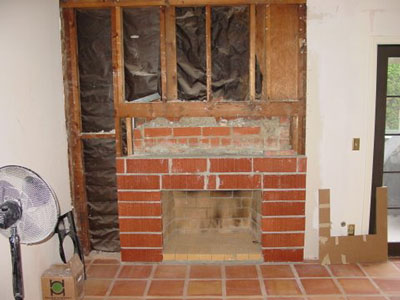
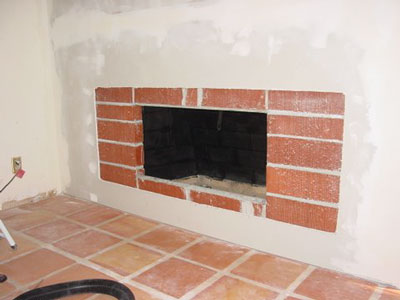
Click HERE or on the picture to see how it was transformed to this!

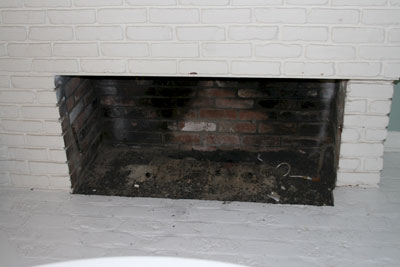
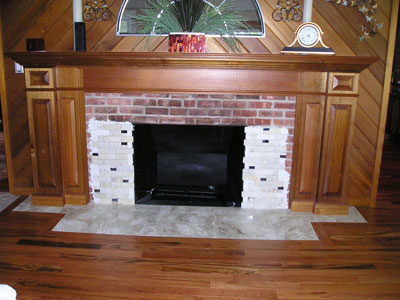
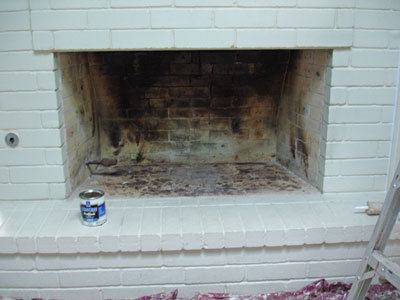
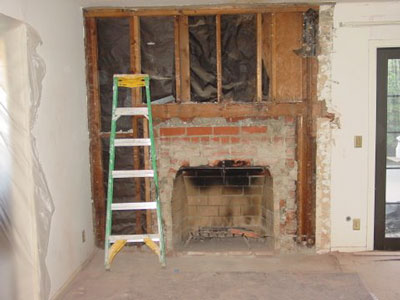
From THIS! (BELOW) again YUK!

______________________________________________________________________
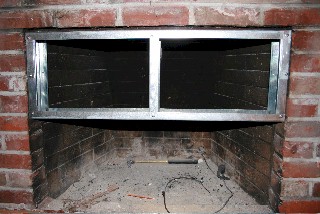
_____________________________________________________________________
Click "HERE" or on the picture below to see how this started and finished, very simple and very nice
 _____________________________________________________________________
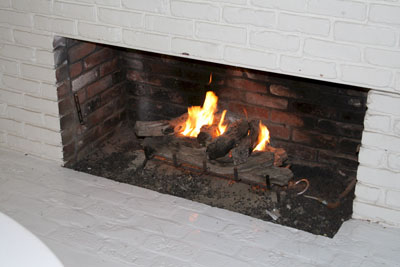
_____________________________________________________________________________
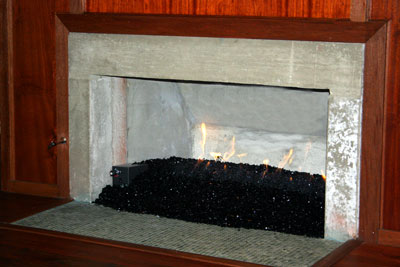
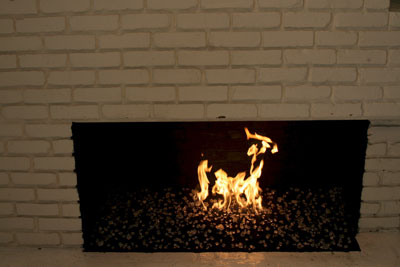
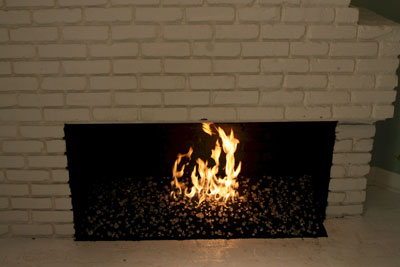
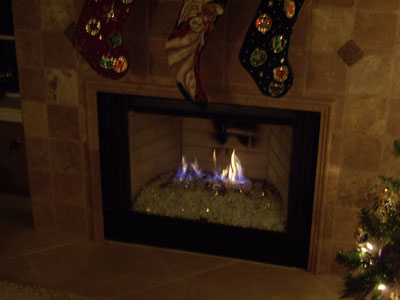
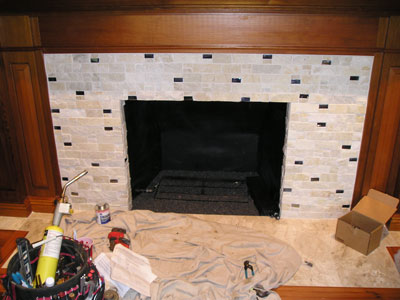
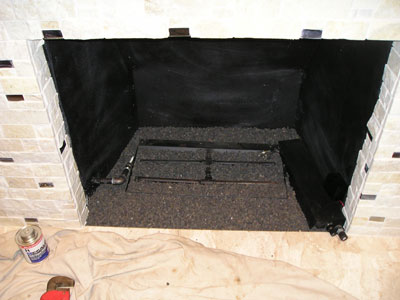
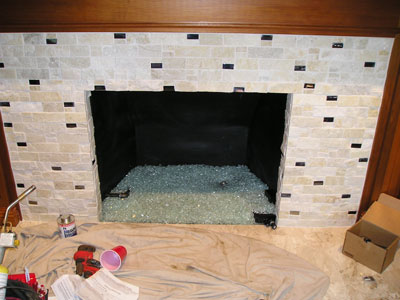
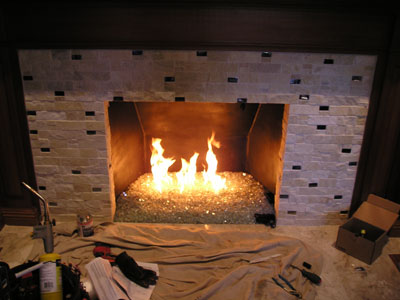
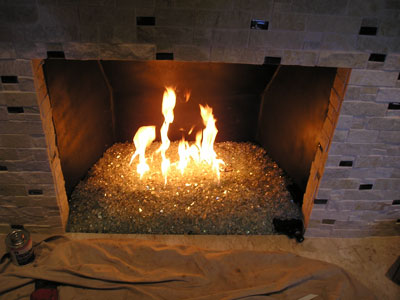
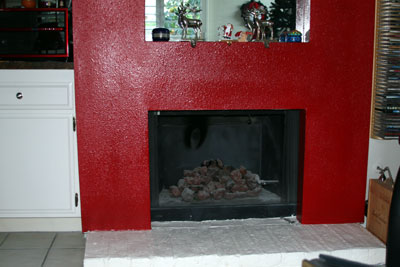
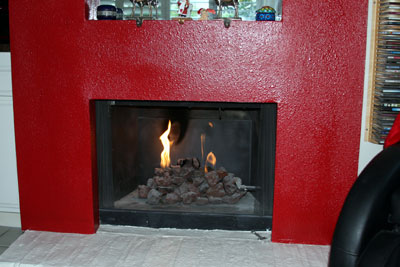
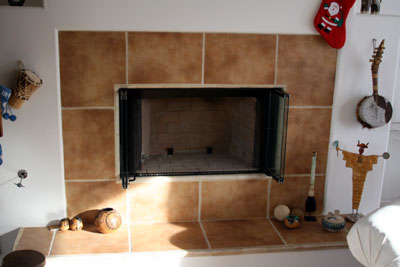
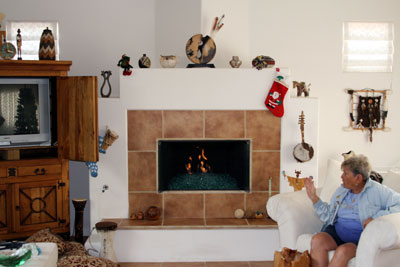
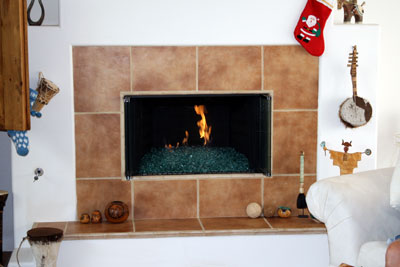
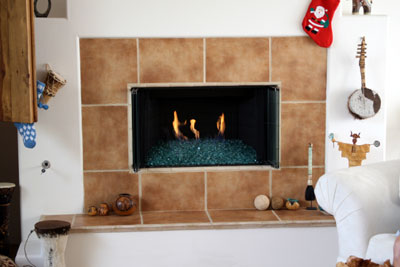
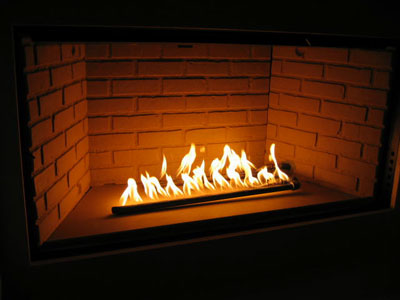
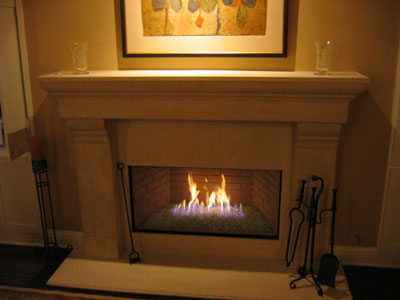
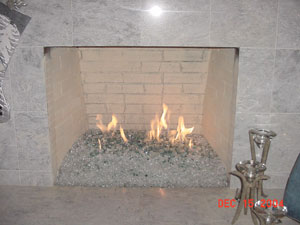
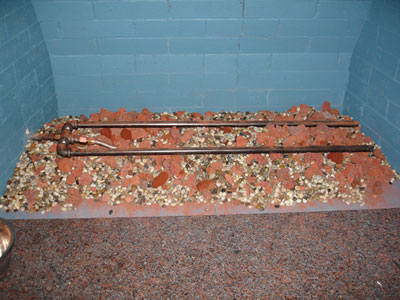
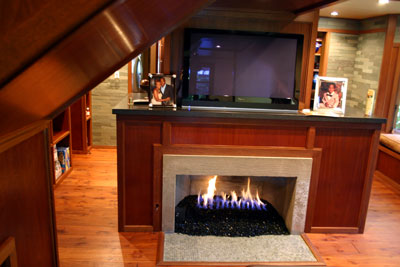
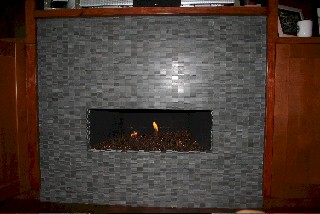
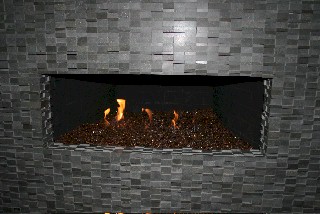
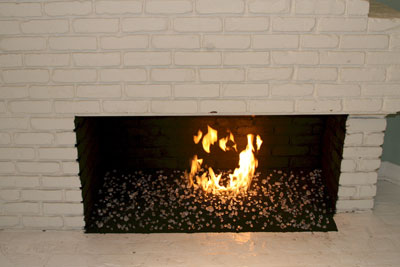
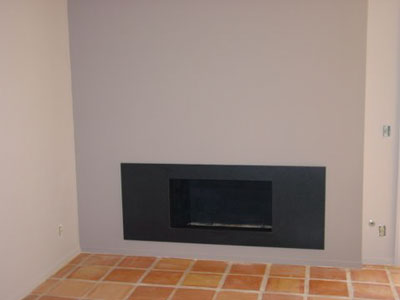
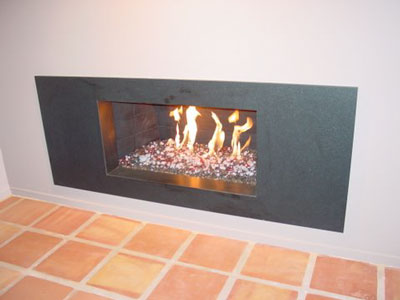
The picture below is of the completed Fireplace Surround, Direct Vent Conversion, FireGlass installation and the FireBalls Looks great!
Click "HERE" or on the picture below to see how this was made and installed.

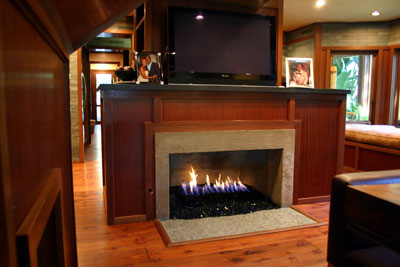
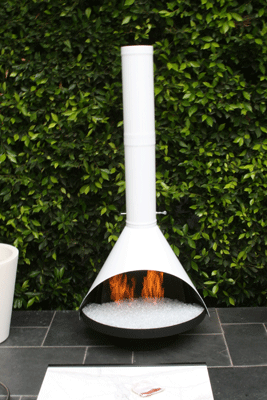
A picture is worth a thousand words, here are three thousand words!
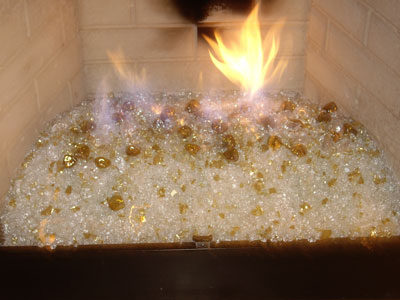
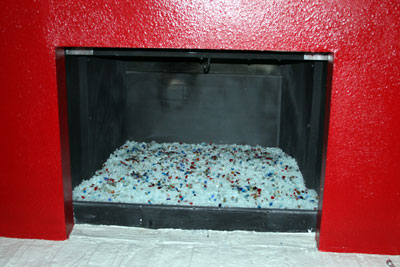
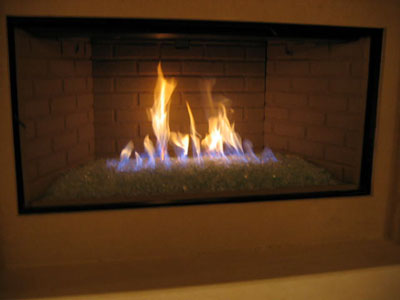
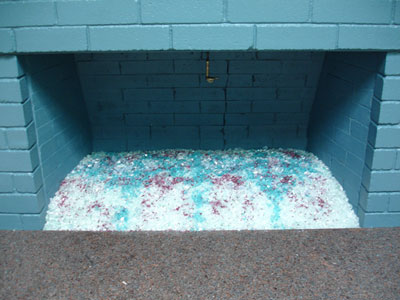
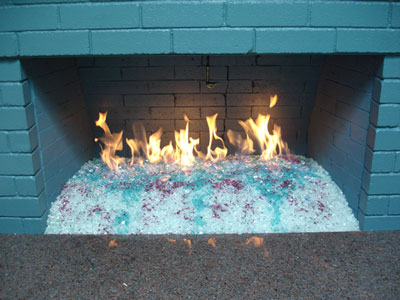
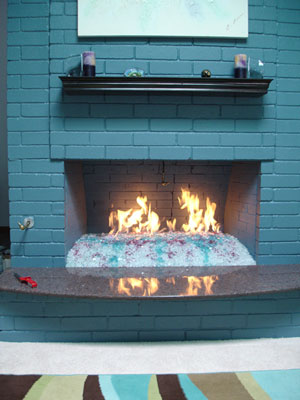
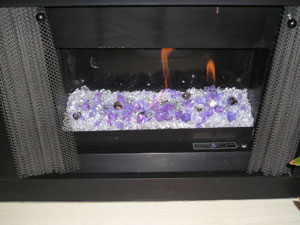
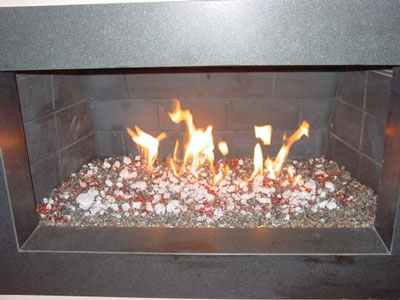
The fireplace below has a Clear base with Emerald Green Topper. As you can see with this self install how easy it actually is.
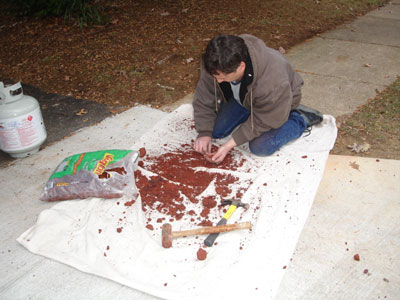
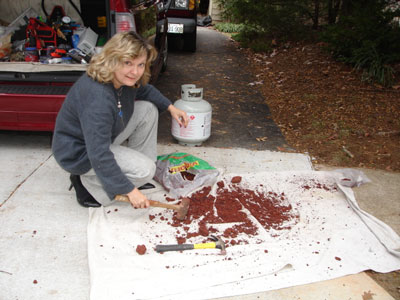
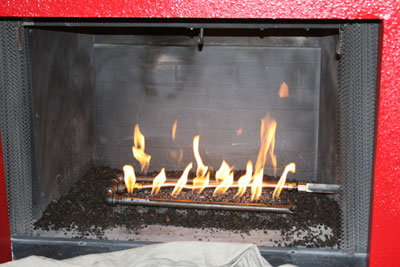
The fireplace below is a propane pan burner with a lava rock fill. You don't want to crush your own lava rock because of the time. You can use larger lava around the edges of the pan but you will want to use crushed lava in the pan up to the surface of the burners. The glass use in this fireplace was a Ford Blue base with Ford Blue Reflective on top. Topped with Clear Pyrite and Amber accents. The install went very well except for the rock crushing episode.
.
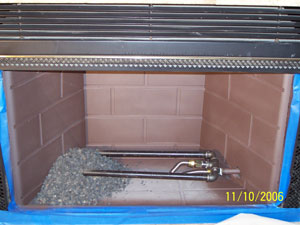
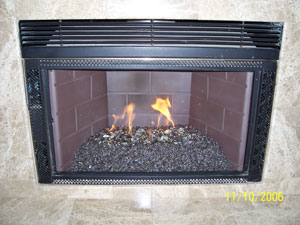
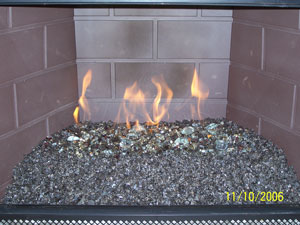
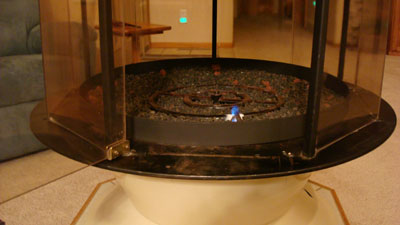
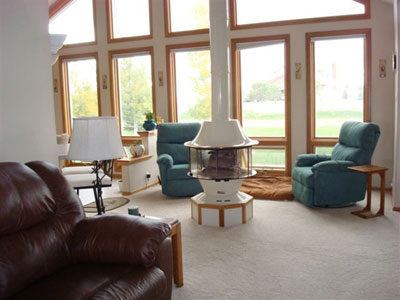
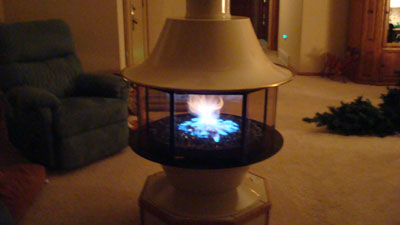
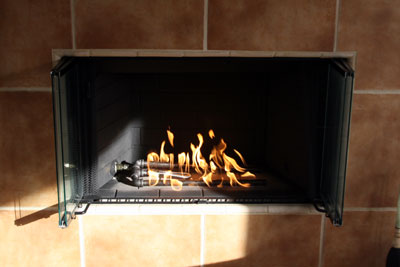
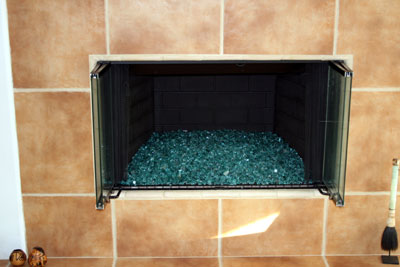
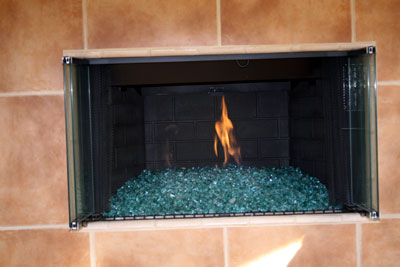
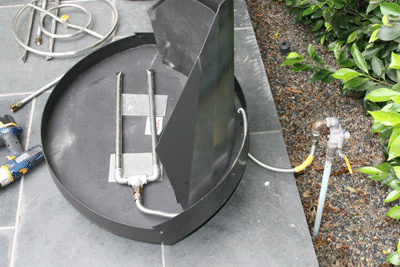
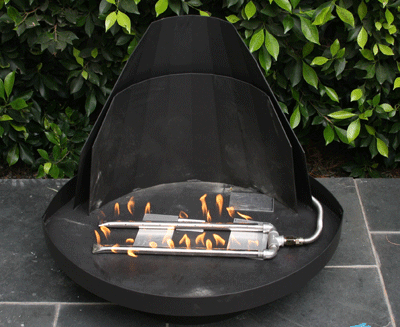
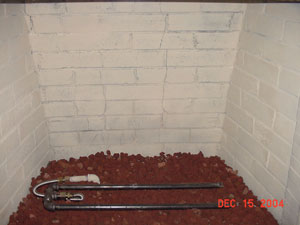
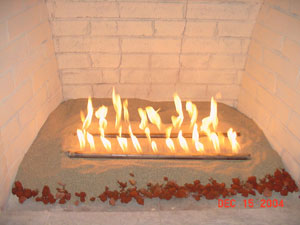
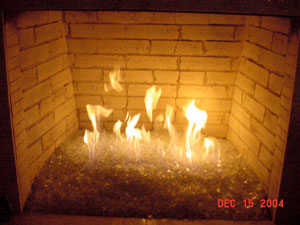
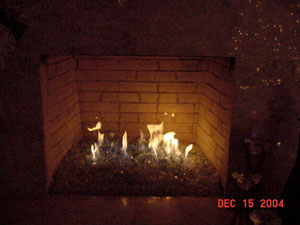
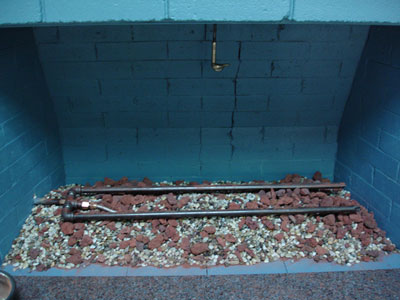
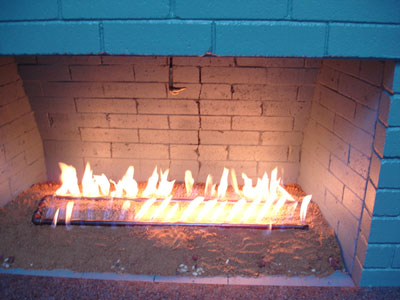
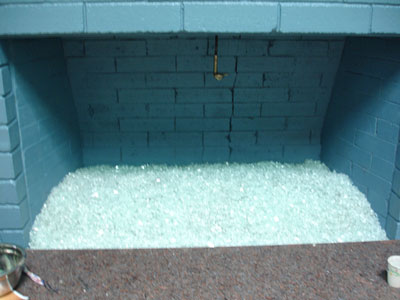
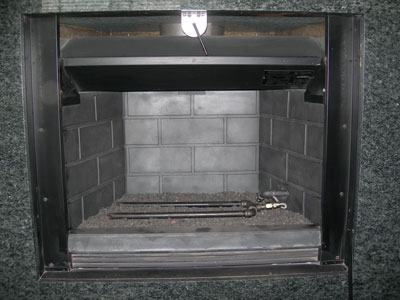
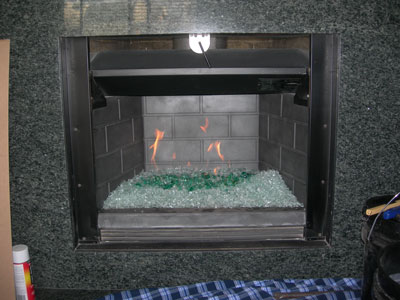
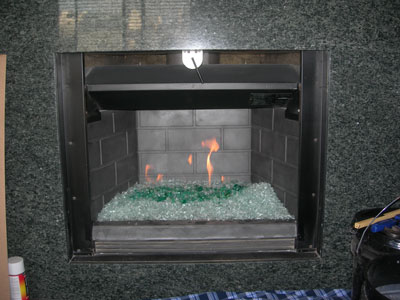
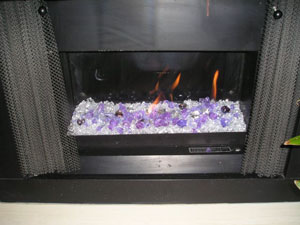
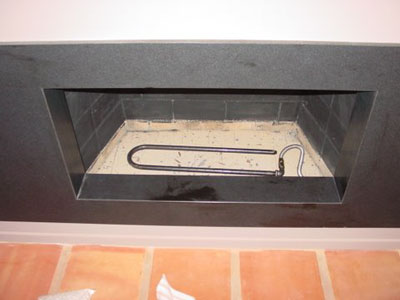
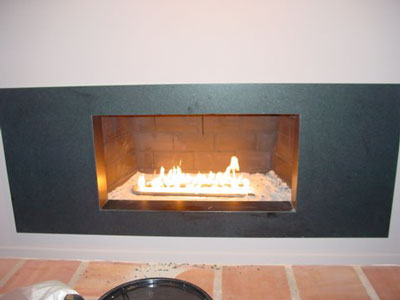
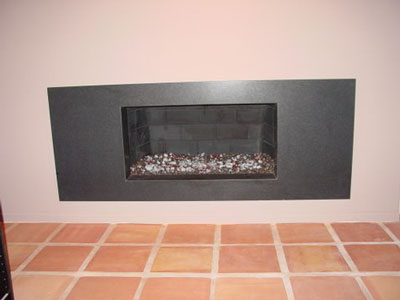
The fireplace below is a direct vent self installation with a Starfire base and Hyacinth Topper. There are a few fireplace companies who say this can't be done, really! So I guess this didn't really didn't happen, did it?

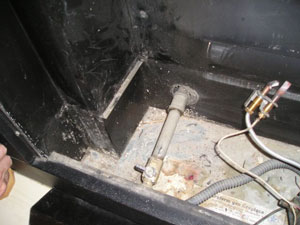
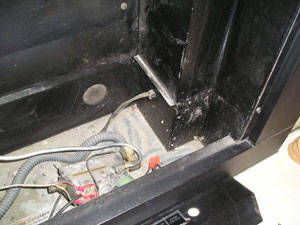
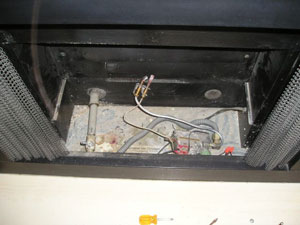
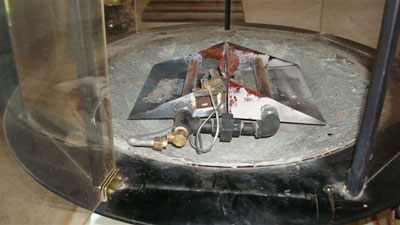
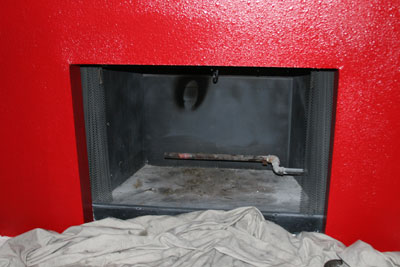
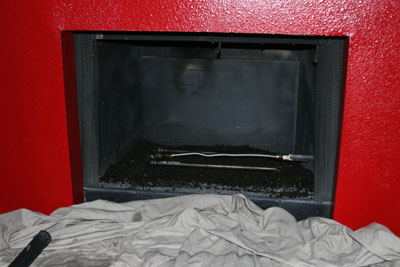
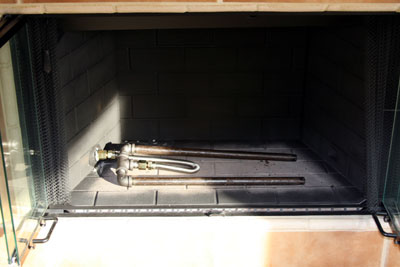
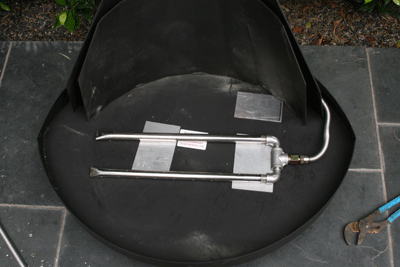
Above you see all the components that make a direct vent work
and below you see the finished product. This was completed by Teresa Leets, an attorney in Los Angeles. So much for those fireplace guys.
The fireplace below was done for
Nick Cannon (
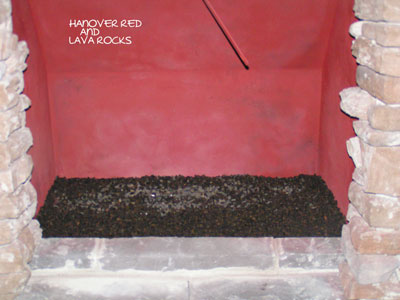
http://www.NickCannon.com/ ) (now married to Marih Carey) in Hollywood Hills California. We installed a remote control inside of the fireplace on the left side as you will see. The remote control was an IPI (Intermittent Pilot Ignition) so the pilot light only goes on when you turn the fireplace on with the remote control. We use a lava base filler and Topper it with 1/8" Black for a very fine layered look. The fireplace was coated with a high heat concrete mix to make it look wider and lower. A very contemporary look and it looks great.
The remote is on the lower left side with crushed lava all around
We have turned it on to a low flame
Now we add the 1/8" Black
and now you have one very simple but unique fireplace. You almost can't see the remote because of the glass color. The remote was to go inside the left cabinet but the plumber forgot to show up, oh well. But it's done and everyone is happy.
The fireplace below was installed by the customer (Kim Clark) with a remote control, propane burner manufactured by us and Topped with Starfire. The fireplace was transformed form an ordinary to work of art, nice job!
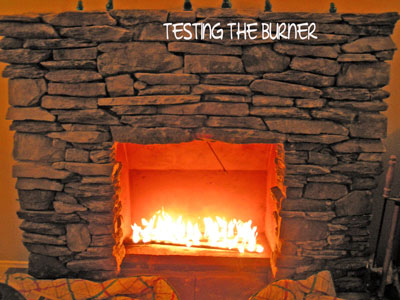
The picture below has the burner being tested
This is the remote control on the lower right with the pilot light assembly
We now have fire!
The fireplace below was modified to look like the HGTV fireplace did a while back for Pie Town Productions. We use Bronze Rust Copper base glass in the fireplace.
Ugly above and
Not ugly below, simple!
The fireplace below is in Beverly Hills California.
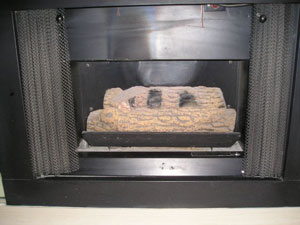
We use a Black base glass with Clear Ice Ice Ice on top. The customer wanted to use their original burner to keep the flames localized in the center area. This fireplace goes from "Log Ugly" to very nice and contemporary in about an hour. If you really take a look at your fireplace place in the beginning it almost looks like an incinerator for long ago.
Not very nice? Nice Logs? I don't think so!
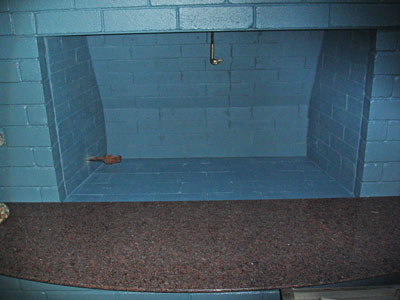
Now it's painted and ready for the glass.
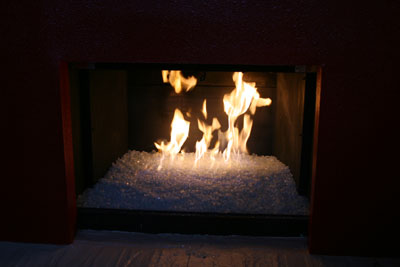
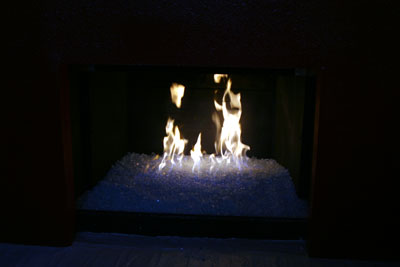
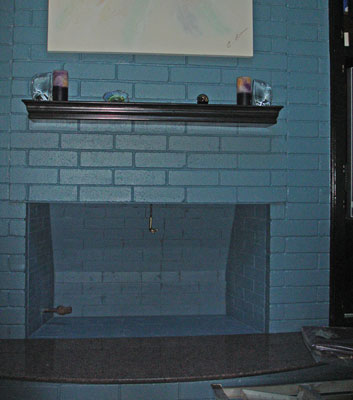
A Black base glass and 5 lbs of our Ice Ice Ice.
You can't see the Ice on still pictures but what it is doing like looking into a spoon, it reflects backwards and appears to be melting. Ask for a sample and you will be amazed.
The fireplace below has a Starfire base with Citrine, Dark Red Orange, and Orange Topper with a touch of our Ice Ice Ice. This was a complete remodel in natural gas and a remote control was added with a pilot light


The fireplace below is in Palm Desert California and was a self install with a crushed lava base, Clear over the lava, Starfire on top of the Clear and Topped with Amber Diamonds and a splash of our Gold . It looked great until they found the burner was too close to the back which burned the back wall. I don't know if this was repaired as we did send paint and instructions on how to prevent this in the future. The fireplace looked great except for the "skid mark" on the back wall.
Above it still looked good here!
About our Diamonds, they are made of crystal and when you see them in the fireplace you actually see the fire reflection reflecting the flame backward as if the Diamonds were melting from the inside.
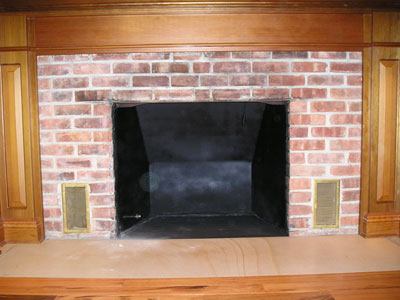
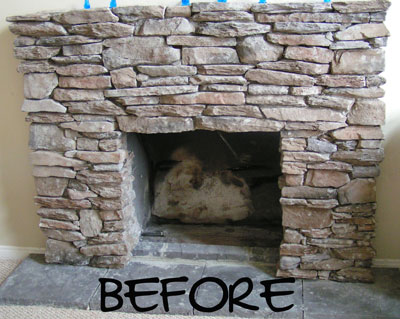
The fireplace below is a before and after and a "how to" make it low and lean. A more contemporary look. This is a self install by Rich Kamins and one very nice job!. He used a Bronze and Bronze Reflective base glass. Topped with a bit of Starfire. Ice Ice Ice and about 2 pounds of Copper Ruby Red Topper for a splash of color.
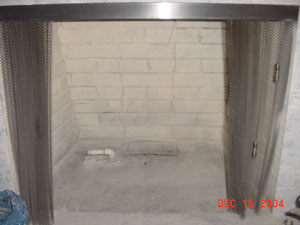
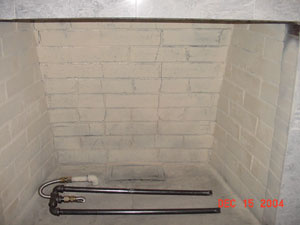
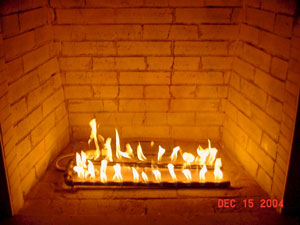
Typical nasty fireplace before Moderustic!
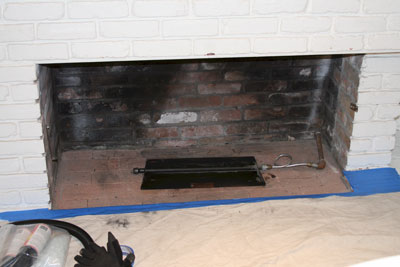
A few bricks and some drywall
Some sand under the burner for filler to raise the base glass.
And here you have one nice finished fireplace.
The fireplace below is a self install with a 2" base of crushed lava
painted with metallic warm brown paint
18 18 double burner
Bronze base glass
Bronze Reflective
Gold
Ice Ice Ice
Diamonds
Dark Red Orange Topper
The fireplace below is a propane fireplace. A bed of crushed lava was installed and a Clear base glass was used to cover it all up.
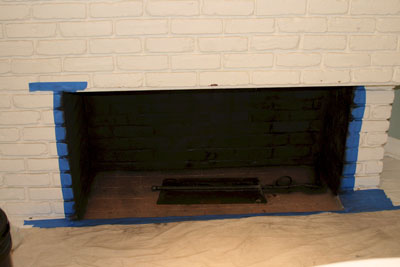
Step 1, paint it!
Step 2, cover the old brick!
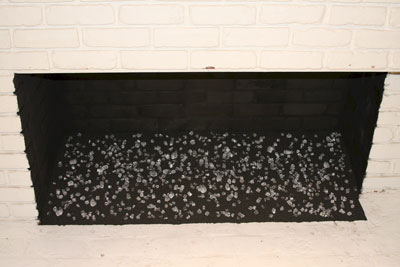
Finish the face and floor, very nice!
Install the propane pan burner
Fill in and all around the pan with crushed lava rock.
On the left side you can see the gas connection which will soon be covered as well. On the right side the control cover will be covered as well. This propane pan burner was fitted with a remote control, radio frequency.
Now that your finished your ready for FIRE! Have your spouse lite it in the event they didn't follow the instructions! (just kidding again)!
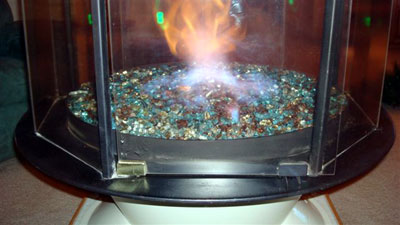
The fireplace below is a Malm Carousel Fireplace (
www.MalmFireplaces.com ). We replaced the attempted dual burner which it was originally installed with with a simple 12" steel ring.
This fireplace has a safety pilot light kit which was still left intact for local code reasons but we did get rid of the non functioning pan burners.
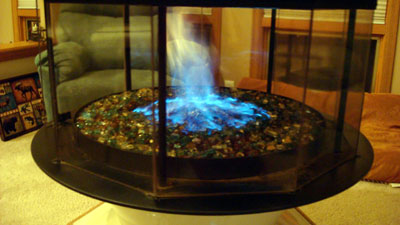
Below we poured the crushed lava base up to and just covering the ring burner.
Then we poured the Bronze Rust Copper over the ring and crushed lava rock.
With the doors closed just enough as you can see now they can control the hurricane/ tornado effect!
Azurlite Reflective and Gold were added to the Bronze Rust Copper
The fireplace below was installed in Palm Springs, California. The base glass is Starfire and then we Topped it with 1 lb of Pirates Topper.
This is a typical fireplace but this one has lava rock stacked up inside, yuck!
Below you can see the flame hitting the back wall creating a soot mark, not very nice looking. The customer didn't want the fireplace painted, why?
There's that soot mark! If you do paint make sure the work is not spotty! That looks nasty as well.
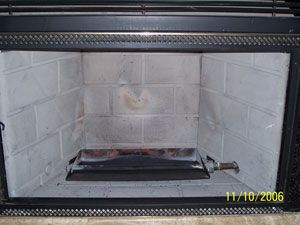
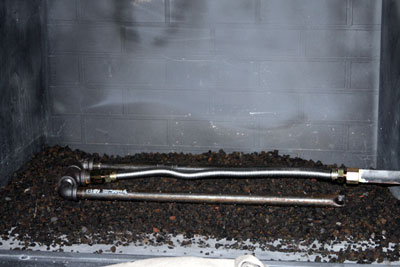
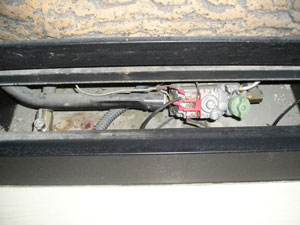
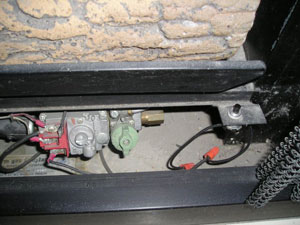
Above you see the typical hard piped burner installed which is fine for logs or lava. But this does not really work well for glass.
Below you see the double burner installed with an 18" flex line.
Test the burner and pour the glass, now it looks nice except for the soot mark!
Now we added 1 lb of our Topper, Pirates!
The fireplace below is in Palm Springs, California and is a self install
Clean and paint the walls in the color of your choice, we offer 25 colors!
Screw on the flex line adapter
Attach the flex line and burner with the flex line under the burner.
Test the burner to insure the flames are not hitting the back wall.
Pour on the glass, with or with out filler (sand or crushed lava rock)
and your done!
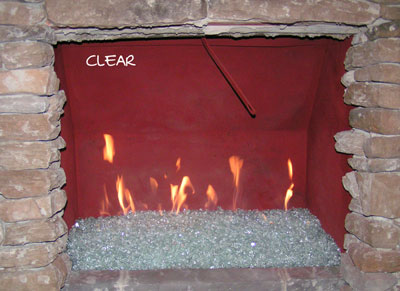
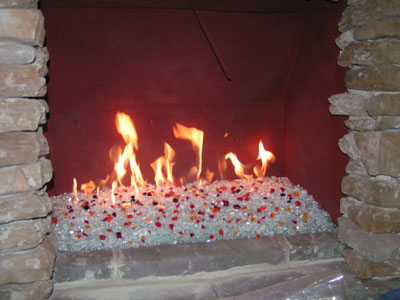
The fireplace below is a self install with a Hanover Red back ground, The glass that was used is a Clear base with Starfire on top. The Red and Orange Toppers were applied. Jon and Liz Kleinman even labeled their pictures for us.
Then the Starfire and Toppers were added.
The fireplace below is a self install with out any filler. They used a Clear base glass with a 17 lb layer of Starfire base glass to cover the Clear base glass.
The fireplace below is in Santa Monica California. The fireplace is a Malm Fireplace which can be found at:
or
We used an 18" double stainless steel burner and a bed of Starfire topped with a few pounds of our Ice Ice Ice.
This is a very simple self installation as you will see.

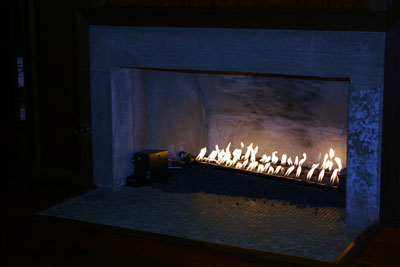
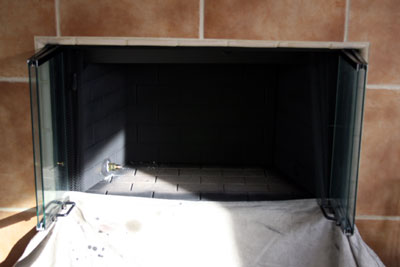
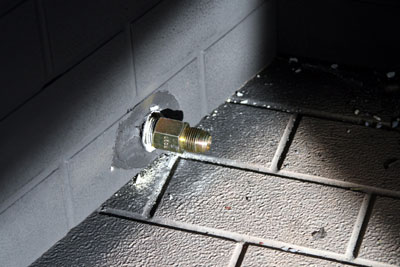
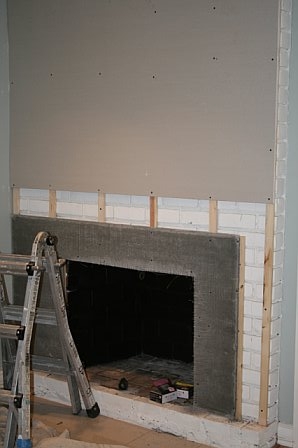
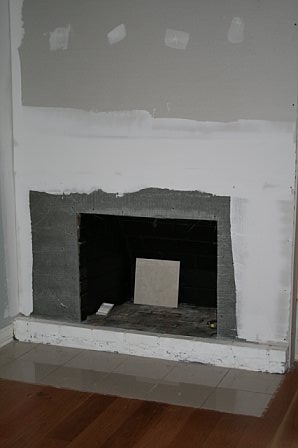
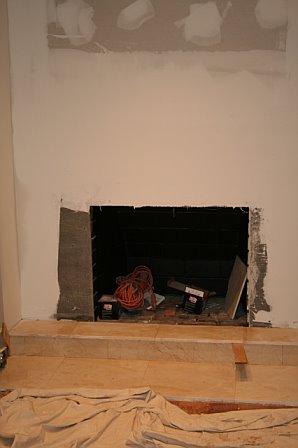
The fireplace below is in Venice Beach California. This is a direct vent installation and we will now show you how easy it really is. For all of the installers out there who say it can't be done, well here you go. Pay attention now!


The glass that was installed was Starfire.
The house is and was under construction so please excuse the debris around the fireplace. The pictures explain what we did. We didn't change the amount of fuel (btu's) being burned just the way it looks. Flip the switch, the ignitor lights, allowing the gas to come up through the burner and the pilot light lights the gas rising from the burner below. As for the doomsayers that tell you this can't be done, Oh Well! This will be our little secret. If you have any questions on your conversion please send us pictures and we will help you convert your direct vent fireplace as well.
Most fireplace manufactures will tell you this will void your warranty. But you need to actually read the warranty to understand what they will or won't cover. The person telling you this at the factory, ask them what the warranty actually implies. We have read many of these warranties and they won't cover the fireplace anyway. These warranties were written by attorneys to keep the liability from the manufacture and lay the blame on the consumer at any expense, no really read one.
The fireplace below is from Cory here locally in
Rancho Cucamonga California. This transformation was a complete surface make over along with out Sterling Silver interior. The glass that was used was Bronze base glass. This is truly a DIY project and we like to help you create your ideas to reality.
Here we begin with the old interior brick panels removed.
Below you can see the new stone being applied.
Below the Sterling Silver panels and Bronze base glass with a few pounds of Gold base glass was installed.
Now you can see the reflection on the walls in the Sterling Silver panels. No, these are not just mirrors in the fireplace. If you do try this, let us know how it worked out for you. Be sure to send us pictures of your project and we will be sure to post it on our "How Not To Do It Page"! No, Really!
Again we are proud to constantly give you new and exciting products for your fireplace and fire pit projects.

The fireplace below is a self install in Palm Springs at Tim Rockwood's. About 2" of crushed lava was used and a 2" layer of Solex base glass was installed over a double 18" burner. Watch how simple this really is. From ugly to one really nice fireplace.

Above and below is what it looked like when the project was started.


Below you can see the grate (noting great here) and the remote control. Too much stuff in the fireplace if you ask me.


Above, if you use a remote control, let's find a better way of hiding it? You think?
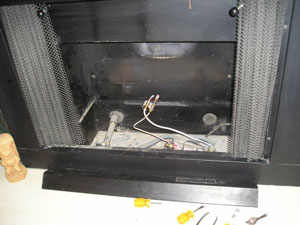
Below all of the STUFF is removed, much better!


Above and below it is now painted and the double 18" burner is installed.
Very clean look! Uncluttered!


Above the lava was poured up to the gas stub on the left side just enough to cover the burner. Be sure to leave 3 to 4" in the front for the glass. You don't want the lava all the way up front.

Now pour the glass and you have a heat producing fireplace as you were supposed to have in the beginning and it looks pretty good too!


These pictures of the fireplace were taken in the daytime if you were thinking why they were so light.

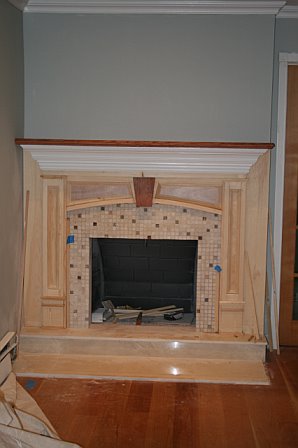
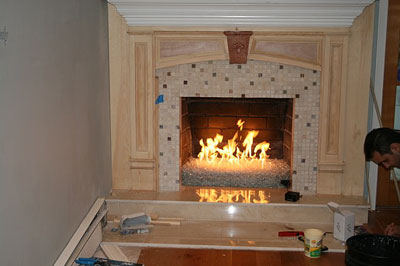
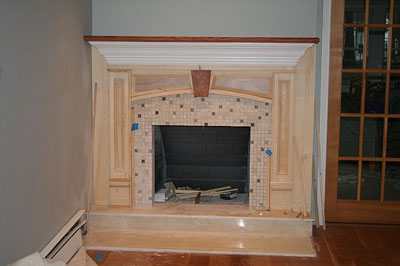
Do it yourself fireplace remodel made easy, or at least it seems that way.
First, the tile that was installed is not rated for fire. This tile would of popped off as soon as the fire was turned on. So do a little research before you begin. We can help in many ways, just call and ask.

It may have of seemed to be a good idea at the time, but it wasn't!

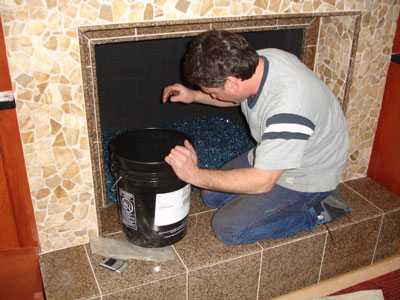
When redesigning a fireplace we suggest card board mache'. A card board board mock up so you can see a basic preview of your project.


Below you can see the bottom, top and mantle in card board.


Now the rip and tear process begins!

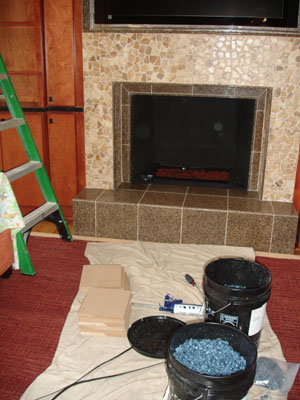
Below we installed the extra electrical for the components and the TV. The components will be installed on the right side out of view with a black glass door. This will be installed later.

Below the framing begins.


Below we now added the Durock at the fireplace opening. This is key to the whole project. Math is very important when doing these layouts!


Below you can see the slate is being added.


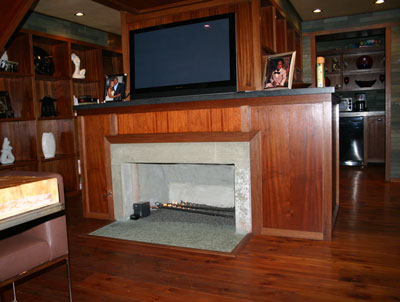
Above and below the fireplace is 90% finished. The mantle needs to be installed and the door on the right to conceal the components needs to be installed as well. The inside of the fireplace will have 3 pieces of black galaxy granite installed. We will post these pictures of the fireplace when it is completely finished as well.

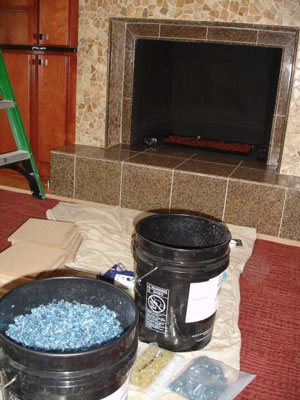
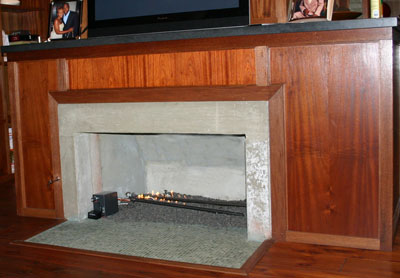
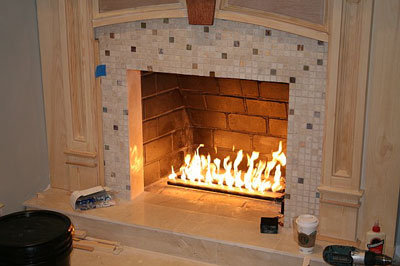
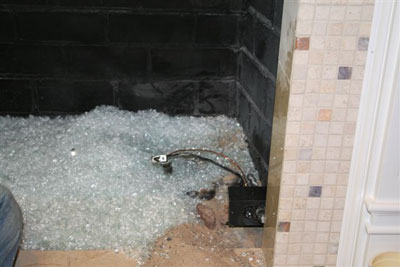
Now for the glass installation. We started with a satin black paint on the back walls, until we install the granite. Then we bulked up the base with 2" of white sand as this will save you a bunch of money! We used sand because we were pouring Starfire base glass in the fireplace. If we were to use a darker color of glass we would of used our crushed lava rock as a filler. When using sand, always make sure the burner is on top of the sand.

Test the burner/ location making sure the flames don't hit the walls.


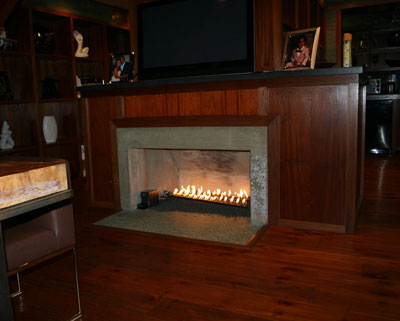
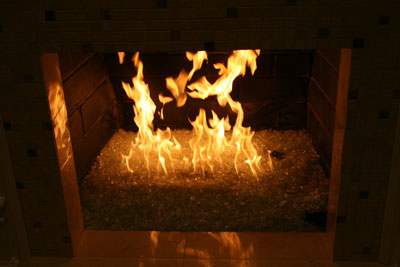
Then pour the glass!


We added a few pink diamonds and then later added Ice Ice Ice and Clear Diamonds. These products because of the way they are made appear to be melting on the inside.


The sealer that was used was a stone enhancer, not just a regular cheap sealer. When using rock you always want to see the beauty of the stone you are using.


As you can see the mantle is still missing. We have a few more details to still do and as soon as we have time to post the pictures, they will be here.
We encourage imagination to all of our customers and we support you and your projects. Regardless how simple or how creative. This is one of the elements that spawned our success and continues to do so.
The fireplace below is from Steve Calderon and he used a Starfire base glass with Gold and Bronze Rust Copper on top.
This is from beginning to end.

Above is the before believe it or not. As you can see Steve did a terrific job. This was a wood burning fireplace before. he installed a gas line and control valve on the right side.


Below you can see the old burner which we replaced with the new double 18" burner.


Mask it, vacuum it after wire brushing the walls clean.


A bit of Thermolux 1200 degree high heat paint.

Fireplace Glass used:
Pour in a Starfire base with a splash of Gold and Bronze Rust Copper on top.


.

Then you have one nice fireplace, great job!

Here is another tip on How to correctly install a natural gas burner.
A picture is worth a thousand words, here are three thousand words!
The next fireplace installation was by Vito
Sanfilippo. He installed a
propane pan and topped it with:
and added
Here we go:
YUK, no paint...
Paint makes a world of difference.
Pan and glass installed
Small fire
and if Vito wants a big fire, Vito gets a big fire!
and his wife said, no I want a small fire, guess who won?

_____________________________________________________________________
CLICK HERE or on the PICTURES below to see how this became what it is today!


_____________________________________________________________________